Propagation
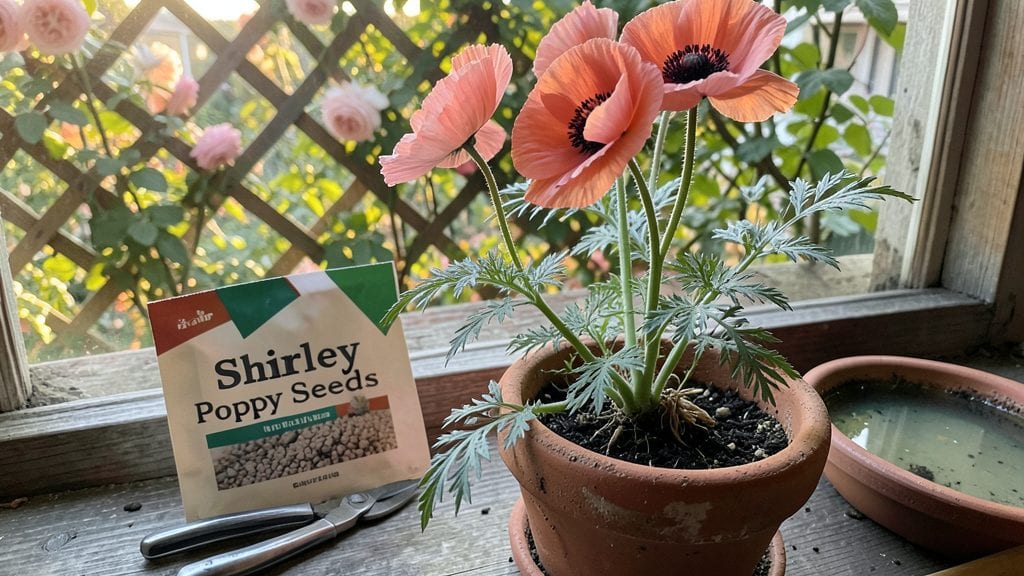
Growing Shirley poppies from seeds feels like unlocking a secret garden—those delicate, papery blooms emerge only after a little patience and the right trick. 🌱 The key isn't just planting; it's tricking the seeds into thinking winter's passed by mimicking cold soil conditions.
I've gotten blooms in just three months using this method, and the secret is simpler than you'd think.
All you need is a plastic bag, some damp paper towels, and a freezer. No fancy equipment, no greenhouses—just a way to break the seeds' dormancy before they hit the ground. The process takes about 6-8 weeks, and once they're ready, they pop up faster than weeds in spring.
These poppies thrive in poor soil, need full sun, and reward you with vibrant, nodding blooms that last all summer.
Here's the best part: they self-seed like crazy, so you'll have poppies popping up for years without replanting. The only catch? They're annuals, so plan to enjoy their show every season.
Pair them with lavender or salvia for a cottage-garden dream, or let them naturalize in a sunny meadow spot where they'll spread effortlessly.
Fair warning: they can get leggy if crowded, so space them 12-18 inches apart. But once they're established, they're basically maintenance-free—just cut back spent blooms to encourage more flowers. The payoff? A garden that looks like a storybook illustration, all from a handful of tiny seeds you cold-stratified yourself.
📚 In This Guide
- What you need
- Instructions
- Tips and common mistakes
- Wrapping up and next steps
What you need
- ● Shirley poppy seeds: 1 packet (100–500 seeds, depending on your garden size). Look for Papaver rhoeas or Papaver nudicaule varieties labeled "Shirley" for double blooms!
- ● Well-draining potting mix: 1–2 gallons of seed-starting mix (sterile, peat-based or coconut coir blend). Avoid garden soil—it’s too dense for tiny seeds!
- ● Small seed trays or pots: 2–4 shallow containers (3–4 inches deep) with drainage holes. Cell packs or biodegradable pots work great!
- ● Plastic wrap or humidity dome: To keep seeds moist during germination.
- ● Spray bottle: For gentle watering (no forceful streams—these seeds are delicate!).
- ● Refrigerator (or cold frame): For the cold stratification step (more on this later!).
- ○ Fine-mesh sieve or sifter: Optional but helpful for evenly distributing seeds.
- ● Grow lights or sunny windowsill: A bright spot (6+ hours of light/day) or a 12-inch LED grow light for seedlings.
- ● Plant labels & marker: To track varieties (especially if mixing seeds!).
- ● Transplanting tweezers: For delicate seedling moves later on.
- ○ Mulch or straw: Optional, for outdoor planting to retain moisture.
- ● 🌡️ Seed freshness matters: Use seeds from the current or previous year—older seeds may not germinate well.
- ● ✨ Sterilize tools: Wipe trays and tools with rubbing alcohol to prevent mold.
- ● 🔥 Test your soil: If repurposing pots, bake them at 200°F for 30 minutes to kill fungi.
How to grow Shirley poppies using cold stratification
Skip the waiting game—this method forces blooms in just 3 months.
🌱 Step 1: Collect and Prepare the Seeds
Shirley poppy seeds need a cold period to break dormancy, so gather them in late summer or buy fresh seeds. Spread the seeds on a paper towel and place them in a sealed plastic bag with a damp paper towel. This mimics winter moisture while keeping them from drying out.
Store the bag in your refrigerator’s crisper drawer for 4-6 weeks. Check weekly—they’re ready when they look slightly wrinkled but still firm. Don’t skip this step; unstratified seeds may take years to germinate or never sprout at all.
☀️ Step 2: Plant Stratified Seeds in Spring
Fill small pots with well-draining potting mix and plant the seeds ¼ inch deep. Space them 1 inch apart since poppies grow best when not crowded. Water gently until the soil is moist but not soggy—overwatering can rot the tiny seeds before they sprout.
Place the pots in a sunny windowsill or under grow lights for 12-14 hours of light daily. You’ll see sprouts in 10-14 days, but be patient if germination takes longer. Keep the soil consistently moist—let it dry slightly between waterings to prevent fungal issues.
🌿 Step 3: Harden Off and Transplant Seedlings
Once seedlings have 2-3 sets of true leaves (about 4-6 weeks after planting), it’s time to harden them off. Move the pots outside for 1-2 hours daily, gradually increasing exposure over 10 days until they can stay out full-time.
Transplant to the garden after the last frost when soil temperatures reach 55°F. Space seedlings 12-18 inches apart in full sun. Poppies thrive in poor soil, but they’ll bloom more prolifically if you amend the bed with compost before planting.
⏰ Step 4: Maintain for Stunning Blooms
Water poppies deeply once a week—they’re drought-tolerant once established but need consistent moisture during germination and early growth. Deadhead spent blooms to encourage more flowers, but leave some seed pods for natural reseeding if you want poppies to return year after year.
By 3 months after transplanting, you’ll see those iconic papery blooms opening in shades of pink, white, and red. The secret? Cold stratification tricks the seeds into thinking winter’s passed, so they focus on growing instead of waiting.
Tips & tricks for perfect Shirley poppy blooms
These little tricks will help you skip the years-long wait and get those dreamy poppies blooming in just 3 months.
The Cold Stratification Secret: The 4-6 weeks in the refrigerator isn't just about time—it's about mimicking winter conditions. Place a small dish of water in the fridge with your seed bag to maintain humidity. I learned this the hard way after my first batch dried out during the cold treatment. The wrinkled-but-firm appearance is your cue they're ready—don't rush it!
Lighting Strategy: Those 12-14 hours of daily light are non-negotiable for strong seedlings. If your windowsill isn't sunny enough, supplement with a basic grow light. I use a simple LED bulb on a timer—it's cheaper than fancy setups and works perfectly. Just keep it 6 inches above the seedlings to prevent leggy growth.
Soil Savvy: Well-draining potting mix is key, but don't overlook the container. Use pots with drainage holes—poppy roots hate soggy feet. I repurpose yogurt cups with holes punched in the bottom for my first planting. And here's a pro move: mix in a handful of perlite to improve drainage even more.
Transplant Timing: Wait for that 55°F soil temperature—it's your green light for outdoor planting. I check with a simple soil thermometer from the garden center. The 10-day hardening process is crucial—start with just 1-2 hours of outdoor time and gradually increase. Think of it like sunbathing after winter!
Pro Tips for Shirley Poppies Seeds
- These little tricks will help you skip the years-long wait and get those dreamy poppies blooming in just 3 months.
- The Cold Stratification Secret: The 4-6 weeks in the refrigerator isn't just about time—it's about mimicking winter conditions.
- Lighting Strategy: Those 12-14 hours of daily light are non-negotiable for strong seedlings.
Frequently asked questions
Got questions about growing Shirley poppies from seeds? You’re not alone! Here are answers to the most common queries to help you succeed with your cold stratification hack.
How long does cold stratification take for Shirley poppy seeds?
Cold stratification for Papaver rhoeas seeds typically takes 4–8 weeks in the fridge. Place them in a damp paper towel or moist sand inside a sealed bag. Patience pays off—this mimics winter conditions and breaks dormancy for faster germination (usually within 3 months after stratification).
Do I need to refrigerate the seeds, or can I plant them outside in winter?
You can plant seeds outside in fall/winter (they’ll self-stratify), but refrigeration gives you more control over timing. If planting outdoors, sow seeds in well-draining soil and lightly cover with ¼ inch of soil. They’ll germinate in spring—just like nature intended!
What if my Shirley poppy seeds don’t germinate after stratification?
Don’t panic! Try these fixes:
- Check moisture: Seeds need consistent dampness (not soggy) during stratification.
- Test viability: Soak seeds in warm water for 24 hours—if they sink, they’re likely viable.
- Try light exposure: Some poppies need light to germinate; plant shallowly (⅛ inch deep).
Can I grow Shirley poppies in containers or only in garden beds?
Shirley poppies thrive in containers (5+ inches deep) with fast-draining soil. Use pots with drainage holes and place them in full sun. Just avoid overcrowding—space seeds 6–12 inches apart to prevent competition. Bonus: Containers make them perfect for patios or balconies!
How soon will I see flowers after planting stratified seeds?
With cold stratification, expect blooms in 8–12 weeks from planting (not from stratification start). Early spring plantings often yield the first flowers by late spring/early summer. For continuous blooms, sow successive batches every 2–3 weeks.
Wrapping up and next steps
Growing Shirley poppies from seeds is a rewarding journey that combines patience with stunning results! With the right cold stratification technique, you’ll unlock vibrant blooms in just 3 months.
Whether you’re a seasoned gardener or a beginner, these delicate flowers bring joy and color—so grab those seeds and get planting! 🌸
Ready to transform your garden? Start your seeds this week and watch them thrive. Share your progress with fellow gardeners or tag us—we’d love to see your blooming success! 📸