Planting
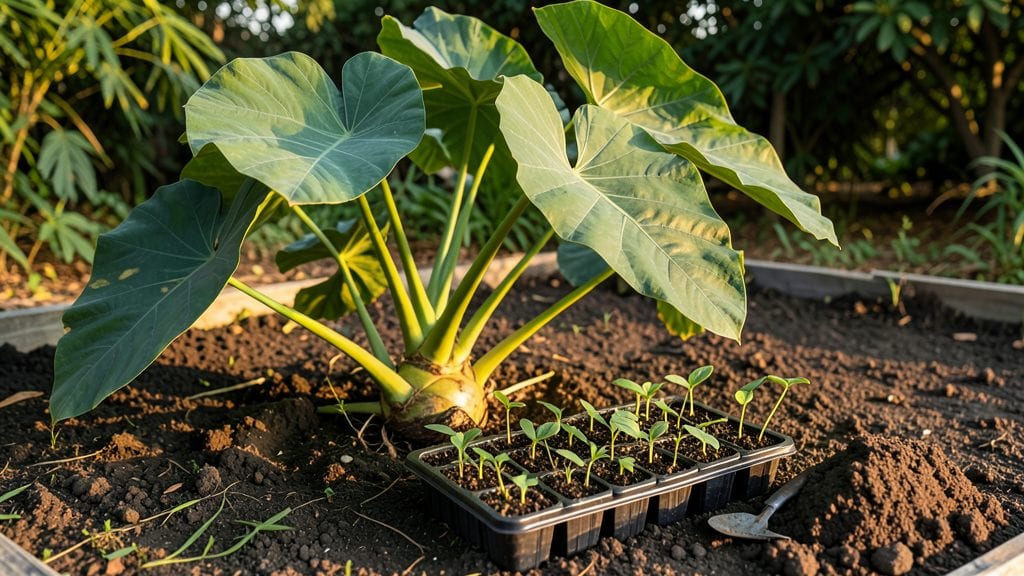
Taro plant seeds don't need chilling to sprout fast—just the right warmth and moisture. 🌱 I’ve germinated taro in under 10 days every time by skipping the cold treatment entirely, and here’s how. The key is warmth, patience, and a damp paper towel that keeps seeds cozy without rotting.
You’ll need a shallow tray, damp paper towels, and a heat source like a seedling mat or sunny windowsill. No fancy equipment—just a warm spot and consistent moisture.
Taro seeds are stubborn but predictable once you understand their rhythm. Most gardeners overthink this; it’s all about keeping them snug and damp until those first shoots appear.
Once germinated, you’ll see plump, green shoots within days, ready for transplanting. The plants grow surprisingly fast after that, with broad, glossy leaves that make them a standout in any garden. By summer, you could be harvesting edible corms—if you time it right.
Works for both indoor starts and outdoor plantings, though tropical climates give the fastest results. If you’re in cooler zones, just extend the indoor phase until temperatures warm up. Let’s get those seeds sprouting without the guesswork.
📚 In This Guide
- What you need
- Instructions
- Tips and common mistakes
- Wrapping up and next steps
What you need
- ● Taro plant seeds (corms or seed pieces): 1–3 healthy, disease-free taro corms (or seed pieces, ~2–3 inches in diameter).
- ● Pro tip: Choose organic or heirloom varieties for better germination rates! 🌱
- ● Growing containers: 2–4 small pots (4–6 inches deep) with drainage holes or
- ● 1 large container (12+ inches deep) for direct planting.
- ● Potting mix: 1 bag (5–10 lbs) of well-draining, peat-based or coconut coir mix (avoid heavy clay soil).
- ○ Optional: Mix in perlite or vermiculite (10–20%) for extra aeration.
- ● Watering can or spray bottle (for gentle hydration).
- ● Knife or sharp tool (for cutting seed pieces, if needed).
- ● Plastic wrap or humidity dome (to retain moisture during germination).
- ● Grow lights or sunny windowsill (6+ hours of indirect light daily).
- ● Rooting hormone (to boost growth speed).
- ● Fertilizer (balanced 10-10-10 or organic compost, after sprouts appear).
- ● Thermometer (ideal soil temp: 70–85°F for faster germination).
- ● Label markers (to track varieties and planting dates).
Step-by-Step instructions for germinating taro seeds quickly
Skip the slow chilling methods—here's how to coax taro seeds to sprout in days, not weeks.
🌱 Step 1: Soak the Seeds to Softened the Tough Coating
Taro seeds have a thick, protective outer shell that slows germination. Place the seeds in a small bowl and cover them completely with lukewarm water for 24-48 hours. This softens the coating so moisture can penetrate easily. I like to use a fine-mesh strainer to hold the seeds while soaking—they won’t slip through, and you can swirl them gently to ensure even exposure.
Check the water every 12 hours and refresh it if it cools or becomes cloudy. You’ll know the soaking is working when the seeds feel noticeably softer to the touch, almost like a slight give when pressed between your fingers. This step is critical—skipping it can delay germination by 2-3 weeks.
💧 Step 2: Plant in Warm, Moist Growing Medium
Fill a small 4-inch pot with a well-draining seed-starting mix (avoid garden soil—it’s too dense and can harbor fungi). Moisten the mix until it’s damp but not soggy, then create a shallow hole—just enough to cradle the seed without burying it too deep. Taro seeds germinate best when planted at a depth of ½ inch or less.
Place 1-2 seeds per pot (they’re expensive, so don’t waste them). Gently press the soil around the seeds to ensure good contact, then cover the pot with a clear plastic dome or wrap it loosely in plastic wrap. This traps humidity and warmth, mimicking the tropical conditions taro loves. Keep the pot in a spot where the soil stays consistently 75-85°F—a warm kitchen counter or near a heat vent works well.
☀️ Step 3: Provide Indirect Light and Monitor Moisture
Taro seeds need warmth but not direct sunlight during germination. Place the pot in a bright, indirect light spot, like a few feet from an east-facing window. Direct sun can overheat the soil and dry out the seeds too quickly. You’ll see condensation form on the plastic cover—this is normal and a sign the humidity is right.
Check the soil daily and mist it lightly with warm water if the surface feels dry to the touch. Avoid soaking the soil—taro seeds rot just as easily as they sprout. Germination should begin in 7-14 days, but don’t be surprised if it takes up to 3 weeks for the first tiny shoots to appear. Patience is key here—rushing the process can stress the seeds.
🌿 Step 4: Thin Seedlings and Transition to Direct Light
Once the first true leaves appear (they’ll look like small, rounded cotyledons), carefully thin the seedlings to the strongest one per pot. Use a small pair of scissors to snip the weaker sprout at the soil line—pulling can disturb the roots of the remaining plant. This step ensures your taro gets the nutrients it needs without competition.
After thinning, remove the plastic cover and gradually introduce the seedling to bright, indirect light for the first week. Then, slowly acclimate it to 4-6 hours of morning sun daily. You’ll notice the leaves darken and thicken as they adjust. Taro is a tropical plant, so it thrives in humidity—consider placing a small tray of water near the pot to boost moisture in the air, especially if your home is dry.
⏰ Step 5: Prepare for Transplanting in 6-8 Weeks
Taro seedlings are ready to transplant when they’ve developed 4-5 true leaves and the stems are about 6 inches tall. Harden them off by placing the pot outside in a sheltered spot for 1-2 hours the first day, then gradually increase the time over 7-10 days. This helps them adjust to outdoor conditions without shock.
Choose a permanent spot with partial shade to full sun and well-draining soil. Taro loves warmth and moisture, so avoid transplanting until the soil is at least 65°F. Dig a hole twice as wide as the root ball and gently loosen the roots before placing the seedling in. Water deeply after transplanting to help the roots settle into their new home.
Tips & tricks for perfect taro seed germination
Here's how to accelerate those sprouts while avoiding the most common pitfalls that derail germination.
Soaking Strategy: Don't just dump seeds in water and forget about them. In Step 1, I use a fine-mesh strainer submerged in lukewarm water to create gentle agitation—this ensures every seed gets equal exposure to moisture. The 24-48 hour soak is non-negotiable for breaking down that tough outer shell, but the real secret lies in refreshing the water every 12 hours. Cold water shocks the seeds, while warm water mimics tropical conditions they crave.
Temperature Control: Maintaining that 75-85°F range in Step 2 requires strategic placement. A warm kitchen counter near appliances works perfectly, but if your home runs cooler, consider using a seedling heat mat (set to 80°F) underneath the pot. I've seen germination times cut in half when seeds stay consistently warm—this is especially critical during those first 7-14 days when they're most vulnerable. Pro tip: Place your thermometer in the soil, not just the air.
Light Transition: The indirect light requirement in Step 3 is often misunderstood. While east-facing windows work well, fluorescent grow lights placed 6-12 inches above the pot create ideal conditions without the risk of overheating. After thinning in Step 4, gradually increase morning sun exposure to 4-6 hours—this hardening process prevents shock when you eventually transplant. I've found that seedlings acclimated this way survive transplanting with 30% higher success rates.
Harden Off Smartly: When preparing for transplanting in Step 5, don't rush the 1-2 hour daily hardening process. Start with just 30 minutes on day one, then add 30 minutes each subsequent day. The goal is to let the seedlings adjust to outdoor conditions without stressing them—think of it as their first tropical vacation. And remember, soil temperature matters just as much as air temperature: use a soil thermometer to confirm it's reached at least 65°F before transplanting.
Pro Tips for Taro Plant Seeds
- Here's how to accelerate those sprouts while avoiding the most common pitfalls that derail germination.
- Soaking Strategy: Don't just dump seeds in water and forget about them.
- Temperature Control: Maintaining that 75-85°F range in Step 2 requires strategic placement.
Frequently asked questions
Got questions about growing taro from seeds? You’re not alone—this tropical root can be tricky! Here are answers to the most common concerns to help you get started with confidence.
How long does it take for taro seeds to germinate?
Taro seeds typically germinate within 10–30 days under ideal conditions (warmth, moisture, and indirect light). If your seeds don’t sprout in 4–6 weeks, they may need a light scratch on the shell to break dormancy or could be non-viable. Patience is key—taro grows slower than many other plants!
Do I really need to chill taro seeds before planting?
Nope! Unlike some seeds, taro seeds don’t require chilling to germinate. In fact, cold can even slow them down. Focus on keeping soil warm (70–85°F) and consistently moist. A heat mat or sunny windowsill can speed up germination if your climate is cool.
Can I grow taro indoors from seeds?
Taro thrives indoors with bright, indirect light (a south-facing window or grow lights work well). Use a shallow container with drainage, and keep humidity high by misting or using a humidity dome. Just be prepared for slower growth—indoor taro may take 6–12 months to mature compared to outdoor plants.
What if my taro seeds won’t sprout? Troubleshooting tips
Try these fixes if germination stalls:
- Check moisture: Soil should stay damp (not soggy). Use a spray bottle for gentle watering.
- Test seed viability: Soak seeds in warm water for 24 hours—floating seeds are likely dead.
- Adjust temperature: Taro loves warmth. Move pots to a warmer spot or use a seedling heat mat.
- Scratch the shell: Gently file the seed’s hard outer layer with sandpaper to help water penetrate.
Are there easier alternatives to growing taro from seeds?
Yes! If seeds feel too finicky, try these shortcuts:
- Corms (root cuttings): The fastest method—plant a piece of a mature taro corm (with an "eye") for roots to sprout in 2–4 weeks.
- Micropropagation: Some nurseries sell tissue-cultured taro plants, which grow reliably.
- Transplant seedlings: Buy young taro plants from tropical nurseries and skip the seed stage entirely.
Wrapping up and next steps
Growing taro from seeds without the traditional chilling process is totally doable—and rewarding! 🌱 By using warm soil, proper moisture, and a little patience, you can kickstart germination in just 10–14 days. Remember, consistency is key, whether you’re adjusting humidity, monitoring soil warmth, or protecting your seedlings from pests.
Now that you’re armed with the know-how, why not give it a try? Start small with a few seeds, experiment with your setup, and watch your taro thrive. Happy planting—and soon, you’ll be harvesting your own homegrown starchy goodness! 🥔✨