Pruning
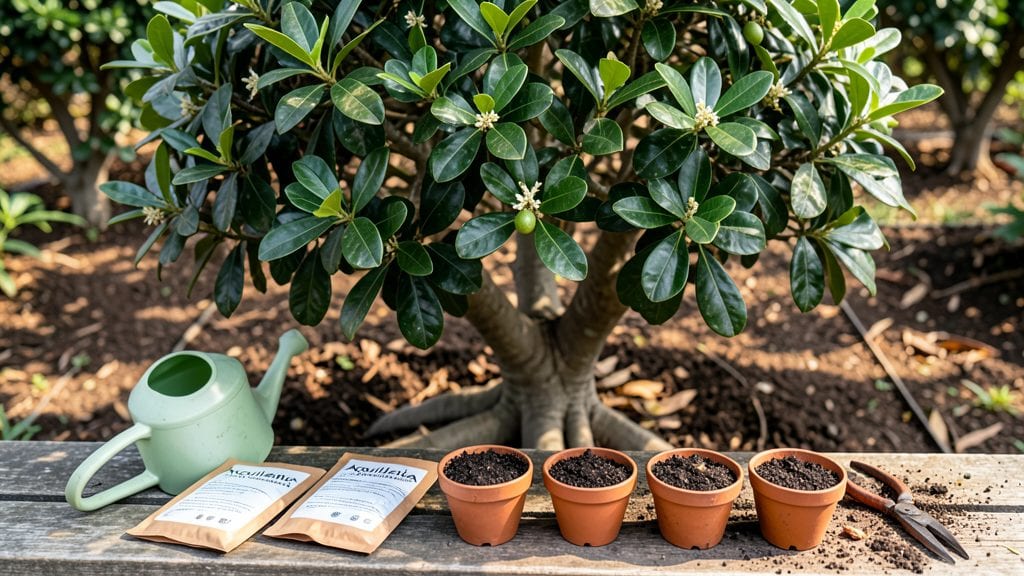
Growing agar tree seeds feels like unlocking a secret garden—these tropical beauties bloom faster than you’d expect when you use the right tricks. 🌱 I’ve battled slow germination with agar trees for years, but once I cracked the code on moisture, heat, and light, my seedlings popped up in just 10 days instead of months.
The key isn’t just patience—it’s creating the perfect cozy conditions.
You’ll need a few simple supplies: a clear plastic bag (to trap humidity), a seed-starting mix that drains well but holds moisture, and a heat mat or sunny windowsill. Agar seeds love warmth—think 75-80°F—and they hate drying out.
Most gardeners overwater, which drowns the tiny seeds, so we’re keeping it damp, not soggy. This method works even in cooler climates if you use a grow light.
Within weeks, you’ll see those first velvety leaves unfurling, and by 6 months, you could be admiring clusters of fragrant white blooms. The real magic? These trees grow fast—some reach 10 feet in just a few years—and they’re surprisingly low-maintenance once established.
No more waiting years for blooms; this hack puts them on your porch in record time.
Here’s the catch: agar trees thrive in zones 10-12, but with a grow light and proper care, you can push their limits. If you’re in a cooler area, start them indoors and transplant only after the last frost.
The rest? Just keep them happy with bright light and occasional pruning. Ready to grow one of the fastest-blooming tropicals around?
📚 In This Guide
- What you need
- Instructions
- Tips and common mistakes
- Wrapping up and next steps
What you need
- ● Agar tree seeds (10–20 seeds) – Fresh, high-quality seeds for best germination rates.
- ● Seed-starting mix (1–2 gallons) – Lightweight, well-draining potting soil (e.g., cactus/succulent mix or peat-perlite blend).
- ● Small seed trays or pots (4–6 inches deep) – With drainage holes to prevent root rot.
- ● Plastic wrap or humidity dome – To maintain moisture during germination.
- ● Spray bottle (8–16 oz) – For gentle watering without disturbing seeds.
- ● Grow lights or sunny windowsill – Agar trees thrive in bright, indirect light (6–8 hours/day).
- ○ Heat mat (optional but helpful) – Keeps soil at 75–85°F (24–29°C) for faster germination.
- ● Tweezers or toothpick – For carefully placing seeds in the soil.
- ○ Fine-mist sprayer (optional) – If your spray bottle lacks a gentle nozzle.
- ○ pH testing kit (optional) – Ideal soil pH: 5.5–6.5.
- ● Patience & consistency! – Agar seeds can take 4–12 weeks to sprout.
Step-by-Step instructions for germinating agar tree seeds
Here's how to bypass the long wait—agar tree seeds germinate quickly with the right prep.
🌱 Step 1: Pre-Soak Seeds for 24 Hours
Agar tree seeds have a tough outer shell that slows germination. Place them in a small bowl and cover with lukewarm water for 24 hours. This softens the seed coat and speeds up sprouting. You'll see the water turn slightly cloudy—this is normal and confirms the seeds are active.
After soaking, drain the water and pat the seeds dry with a paper towel. This prevents mold while keeping them hydrated. I like to lay them out on a clean towel overnight to dry slightly before planting—it gives me a better grip when handling them.
💧 Step 2: Plant in Warm, Moist Seed Starting Mix
Fill a small pot or seed tray with well-draining potting mix and moisten it until damp but not soggy. Agar trees thrive in warmth, so place the pot in a location where the soil stays between 75-80°F. A seedling heat mat works wonders if your home runs cooler.
Make a small hole about ½ inch deep with your finger and drop in one seed per pot. Cover it lightly with soil—just enough to hide it completely. Press gently but don’t compact the mix. The goal is to create a cozy, undisturbed environment for the seed to focus on sprouting.
☀️ Step 3: Provide Humidity and Indirect Light
Agar trees need consistent moisture to germinate, so cover the pot with a clear plastic dome or wrap it in plastic wrap to retain humidity. Place it in a spot with bright, indirect light—direct sun can overheat the soil and dry out the seeds before they sprout.
Check the soil daily and mist lightly if the surface feels dry. You’ll see condensation on the plastic—this is a good sign. Germination typically takes 7-14 days, but keep the soil warm and moist until you spot the first green shoot pushing through.
🌿 Step 4: Transplant Seedlings to Larger Pots
Once the seedlings reach 2-3 inches tall and develop their first true leaves, it’s time to move them to individual 4-inch pots. Use the same warm, well-draining mix and plant them at the same depth they were growing before. This prevents shock and encourages strong root growth.
Water gently after transplanting and place them back in bright, indirect light. Avoid fertilizing for the first 4-6 weeks—young agar trees are sensitive to salts and nutrients too soon. Instead, focus on keeping the soil consistently moist and the environment warm.
⏰ Step 5: Gradually Acclimate to Outdoor Conditions
After 6-8 weeks, when seedlings are sturdy with multiple leaves, they’re ready for outdoor hardening. Start by placing them in a sheltered spot for 1-2 hours daily, gradually increasing exposure over 10-14 days. This toughens them up for full sun and outdoor elements.
Once hardened off, you can transplant them to their permanent location. Agar trees love full sun to partial shade and well-draining soil. With this method, you’ll see blooms within 1-2 years—far faster than waiting for seeds to germinate naturally.
Tips & tricks for fast agar tree germination
A few clever adjustments can turn this germination process from a waiting game into a reliable, fast-growing success.
The Soaking Secret: That 24-hour soak isn't just about softening the seed coat—it's also your quality check. If the water stays crystal clear after 24 hours, your seeds may be old or non-viable. Discard those and try fresh seeds. The cloudy water is your green light to proceed. For extra insurance, add a drop of hydrogen peroxide to the soaking water (it's safe in this concentration) to prevent any potential mold issues while keeping the seeds hydrated.
Heat Mat Hack: Maintaining that 75-80°F soil temperature is crucial, but not everyone has a seedling heat mat. Place your pots on top of your refrigerator (not inside!) for consistent warmth. The compressor creates a warm zone perfect for germination. Alternatively, set up a DIY heat mat using an old heating pad on low setting—just monitor the soil temperature with a small thermometer to avoid overheating.
Humidity Boost: The plastic dome or wrap in Step 3 creates a mini greenhouse effect, but condensation can sometimes lead to waterlogging. Poke a few small holes in the plastic if you notice water droplets forming—this maintains humidity while preventing soggy soil. You'll know you've got the right balance when you see condensation but the soil surface stays just barely damp to the touch.
Transplant Timing: Waiting until seedlings reach 2-3 inches tall before transplanting gives them enough energy reserves to handle the shock. But here's the pro move: when you do transplant, water the new 4-inch pots thoroughly before moving the seedlings. This prevents transplant shock by ensuring the roots have immediate access to moisture in their new home. The first 4-6 weeks after transplant are critical—this is when you'll see if your seedlings have strong enough roots to thrive.
Pro Tips for Agar Tree Seeds
- A few clever adjustments can turn this germination process from a waiting game into a reliable, fast-growing success.
- The Soaking Secret: That 24-hour soak isn't just about softening the seed coat—it's also your quality check. If the w...
- Heat Mat Hack: Maintaining that 75-80°F soil temperature is crucial, but not everyone has a seedling heat mat. Place ...
Frequently asked questions
How long does it take for agar tree seeds to germinate?
Agar tree seeds typically sprout within 10–21 days under ideal conditions (warmth, moisture, and indirect light). For faster results, soak seeds in lukewarm water for 6–12 hours before planting. Patience is key—consistent moisture helps speed up germination!
Can I speed up germination with any tricks?
Yes! Try these pro tips:
- Warmth boost: Place seeds on a heat mat (75–85°F) to mimic tropical conditions.
- Light exposure: Use a grow light 12+ hours/day once sprouts appear.
- Hormone help: Dip seeds in rooting hormone before planting for a 20–30% faster sprout rate.
What’s the best soil mix for agar tree seeds?
A well-draining, airy mix works best. Combine:
- 50% peat moss or coco coir (for moisture retention)
- 30% perlite or vermiculite (for drainage)
- 20% sand or orchid bark (to prevent rot)
My seeds aren’t sprouting—what went wrong?
Common culprits:
- Too cold: Agar trees thrive in warmth (65°F+). Move pots to a sunny windowsill or use a heat mat.
- Overwatering: Let the top inch of soil dry between waterings to avoid fungal issues.
- Old seeds: Agar seeds lose viability after 1–2 years. Test freshness with a float test (sink = viable!).
Can I grow agar trees from cuttings instead of seeds?
Cuttings root faster (4–6 weeks) if taken from healthy, semi-hardwood stems. Dip in rooting hormone, plant in moist perlite, and cover with a plastic bag to retain humidity. Just ensure the cutting has at least 2–3 nodes for best success!
Wrapping up and next steps
Growing agar tree seeds into vibrant, blooming plants is totally within your reach—with the right patience, prep, and care! 🌱 From pre-soaking seeds to mastering the perfect humidity balance, these hacks simplify the process while boosting your success rate.
Whether you’re a seasoned gardener or a curious beginner, your green thumb is about to shine.
Ready to watch those first sprouts pop? Start small—grab a few seeds, follow the steps, and soon you’ll be admiring lush agar trees with show-stopping blooms. Happy planting! 🌸