Pruning
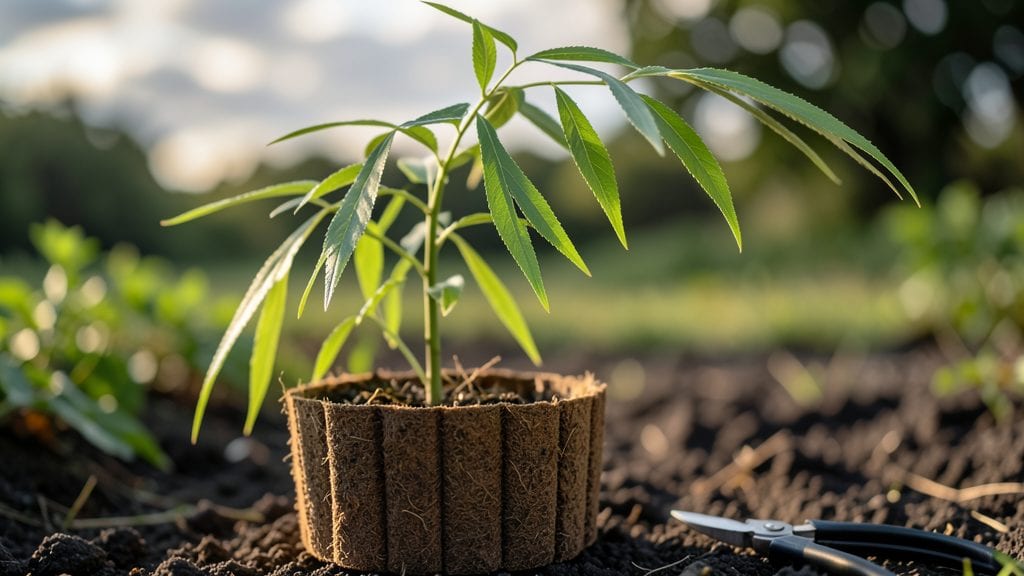
Growing a willow tree seedling from scratch starts with breaking dormancy through cold stratification—this 6-8 week chilling process mimics winter and triggers strong root growth before planting. I learned the hard way that skipping this step leads to weak seedlings that bolt or rot once in the ground.
The key is patience: place your seeds in damp peat moss, seal them in a plastic bag, and store them in your fridge's crisper drawer where temperatures hover around 34-41°F.
Once stratified, you’ll need moist, well-draining soil mixed with sand to prevent soggy roots—willow seedlings hate sitting in waterlogged dirt. A sunny spot with at least 6 hours of direct light daily is non-negotiable, though young saplings tolerate partial shade better than full sun once established.
The biggest mistake? Overwatering. Keep the soil damp but never soggy; willows can handle drought once rooted, but soggy soil at this stage is a death sentence.
By the time you transplant your hardened-off seedlings into the ground, you’ll see 3-6 inch stems with a network of fibrous roots ready to spread. The first year focuses on encouraging vertical growth—prune any low branches to direct energy upward, and mulch heavily to retain moisture.
Within two years, your willow will shoot up 8-10 feet tall, its flexible branches already starting to weave their signature patterns.
Willows grow fast but need space—plant them 10-15 feet from structures or other trees to avoid root competition. If you’re growing near water, they’ll thrive; if not, regular deep watering during dry spells keeps them happy.
The real magic happens in their second spring, when those first long, arching branches begin to form. That’s when you’ll know you’ve done it right.
📚 In This Guide
- What you need
- Instructions
- Tips and common mistakes
- Wrapping up and next steps
What you need
- ● Willow tree seeds: Fresh, high-quality seeds (10–20 seeds for experimentation). Pro tip: 💡 Collect seeds from mature willow trees in late summer/fall for best results!
- ● Cold stratification setup: Plastic storage bag or sealed container (1–2 quart size)
- ● Moistened peat moss or coco coir (2–3 cups)
- ○ Optional: Vermiculite (1 cup) for aeration
- ● Growing medium: Well-draining potting mix (50% peat/coco coir + 50% perlite/sand)
- ● Small pots or trays: 2–3 inch diameter pots (5–10 pots, depending on seed count)
- ● Spray bottle (for gentle moisture control)
- ● Plastic wrap or humidity dome (to retain moisture during stratification)
- ● Refrigerator or cold frame (34–40°F / 1–4°C for stratification)
- ● Grow lights or sunny windowsill (for post-stratification germination)
- ○ Thermometer (optional but helpful for monitoring cold temps)
- ● Seedling heat mat (to speed up germination after stratification)
- ● Fertilizer (balanced 10-10-10 or organic compost tea, diluted to half-strength)
- ● Humidity tray (for extra moisture retention)
- ● Garden journal (to track stratification progress and germination dates!)
Step-by-Step instructions for cold stratifying willow tree seedlings
Here's how to break dormancy and jumpstart root growth in willow seedlings.
Collect and Prepare Fresh Willow Seeds
Harvest willow seeds when the seed pods turn brown and begin to split open naturally—this usually happens in late summer or early fall. Gather the seeds immediately and spread them out on a paper towel to dry for 24 hours at room temperature. This prevents mold while keeping them viable.
Store the dried seeds in a paper envelope (not plastic) in a cool, dry place until you're ready to stratify. Willow seeds are lightweight, so handle them gently—they're delicate and can be easily scattered by wind. If you're working with seeds you've collected earlier, ensure they haven't been stored for more than 6 months, as viability drops significantly after that.
Moisten and Layer Seeds for Cold Stratification
Fill a quart-sized plastic bag with 2 inches of moistened peat moss—just damp enough that water drips out when squeezed but doesn’t pool. Sprinkle 4 willow seeds evenly over the peat moss, spacing them about 1 inch apart. This prevents overcrowding, which can lead to weak seedlings.
Seal the bag loosely with a twist tie, leaving a 1-inch gap at the top for airflow. Place the bag in a refrigerator (not the freezer) where temperatures stay between 35-45°F. Check the moisture level weekly—peat moss dries out slowly, but if it feels dry to the touch, lightly mist it with water. Stratification typically takes 4-8 weeks, depending on seed freshness.
Monitor Germination and Prepare for Planting
After 4 weeks, remove the bag from the refrigerator and place it in a bright, indirect light location—like a windowsill away from direct sun. Keep the peat moss moist but not soggy. Germination usually begins within 7-14 days after removing the seeds from cold stratification, though some seeds may take up to 30 days to sprout.
Once the first true leaves (not the initial seed leaves) appear, carefully transfer the seedlings to small pots filled with a mix of 50% potting soil and 50% perlite. Willow seedlings develop long, delicate roots, so avoid disturbing them during transplanting. Water gently to settle the soil around the roots, and place the pots in a shady spot for the first 2 weeks to reduce transplant shock.
Acclimate Seedlings Before Outdoor Planting
After the seedlings have established 3-4 true leaves and show signs of new growth, begin hardening them off. Move the pots to an outdoor shaded area for 2-3 hours the first day, gradually increasing exposure over 10-14 days. Willow seedlings are sensitive to sudden temperature changes, so avoid placing them in direct sunlight or cold winds during this period.
Plant the seedlings outdoors after the last frost date, when soil temperatures are consistently above 50°F. Dig a hole twice as wide as the root ball but only as deep as the pot. Space seedlings 6-8 feet apart to allow for their eventual size. Water deeply after planting to encourage root growth into the surrounding soil. Mulch with 2 inches of straw to retain moisture and suppress weeds.
Tips & tricks for perfect willow seedling cold stratification
Cold stratification can feel like a waiting game, but these small details make all the difference in getting strong, healthy willow seedlings.
Timing Tip for Step 1: The 24-hour drying period is crucial for preventing mold while maintaining seed viability. I've learned the hard way that skipping this step can lead to damp seeds that develop mold during storage. Spread them out in a single layer on a paper towel—this ensures even drying without overheating. If you're in a humid climate, consider placing the seeds in a warm, dry spot with good airflow to speed up the process slightly.
Temperature Control in Step 2: The 35-45°F range in your refrigerator is ideal, but not all fridges are created equal. Check your fridge's temperature settings—some models have a "crisper" drawer that stays colder than the main compartment. If your fridge runs cooler, you might need to place the bag closer to the back where it's slightly warmer. The goal is consistent cold without freezing, which can damage the seeds.
Moisture Management: When checking the peat moss weekly, I recommend using your fingers to gauge moisture rather than relying on visual cues. The peat should feel like a damp sponge—if it crumbles easily, it's too dry. If water beads up on the surface, it's too wet. Adjust by adding just enough water to restore that damp sponge texture. Overly wet peat can lead to mold, while dry peat can prevent proper germination.
Germination Observation: In Step 3, when you move the bag to bright, indirect light after 4 weeks, look for tiny white roots emerging from the seeds first. This is your first sign of success. Once the true leaves appear (not the initial seed leaves), resist the urge to rush the transplanting process. Willow seedlings are delicate—give them those 2 weeks in the shady spot to build strength before introducing them to outdoor conditions.
Pro Tips for Willow Tree Seedling
- Cold stratification can feel like a waiting game, but these small details make all the difference in getting strong, ...
- Timing Tip for Step 1: The 24-hour drying period is crucial for preventing mold while maintaining seed viability. I'v...
- Temperature Control in Step 2: The 35-45°F range in your refrigerator is ideal, but not all fridges are created equal...
Frequently asked questions
Got questions about growing willow tree seedlings?
You’re not alone! Here are answers to the most common concerns—from timing to troubleshooting—so you can nurture your seedlings like a pro.
How long does cold stratification take for willow tree seedlings?
Willow seeds typically need 4–8 weeks of cold stratification (34–41°F) to break dormancy. Place them in a sealed bag with moist peat moss, then refrigerate. Check for sprouting every 2 weeks—patience is key! If no growth appears after 8 weeks, try extending the process or soaking seeds in warm water for 24 hours first.
Can I skip cold stratification for faster germination?
While possible, skipping stratification may reduce germination rates (often dropping from 80%+ to 30–50%). For willows, the process mimics winter’s natural cycle, ensuring stronger root development. If you’re in a hurry, try soaking seeds in warm water for 48 hours before planting, but expect slower or uneven sprouting.
What’s the best soil mix for willow seedlings?
Willows thrive in moist, well-draining soil with a mix of:
- 60% peat moss or coconut coir (for moisture retention)
- 30% perlite or sand (for aeration)
- 10% compost (for nutrients)
Why aren’t my willow seeds sprouting after stratification?
Common culprits include:
- Dry seeds: Re-moisten the peat moss and reseal the bag.
- Old seeds: Willow seeds lose viability after 1–2 years—test freshness.
- Poor light: Place seeds near a bright window (not direct sun) during stratification.
- Fungal growth: If mold appears, discard seeds and sterilize your setup.
Can I plant willow seedlings directly outdoors after stratification?
Yes, but timing matters! Plant outdoors only after the last frost when soil temps reach 50°F+. Harden off seedlings by gradually exposing them to outdoor conditions (1–2 hours/day) for 7–10 days. Choose a sunny, wet location—willows love water but avoid standing pools. Mulch lightly to retain moisture.
Wrapping up and next steps
Growing a willow tree seedling from scratch is a rewarding journey, and with the right cold stratification timeline, you’ll set the stage for strong, reliable root growth. 🌱 Remember, patience and consistency are key—whether you’re a seasoned gardener or just starting out, your efforts will soon bloom into a thriving tree.
Ready to take the next step? Plant your stratified seedlings in well-draining soil and keep them in a sunny spot. Monitor their progress, and before you know it, you’ll be watching your willow tree flourish! 🌿