Pruning
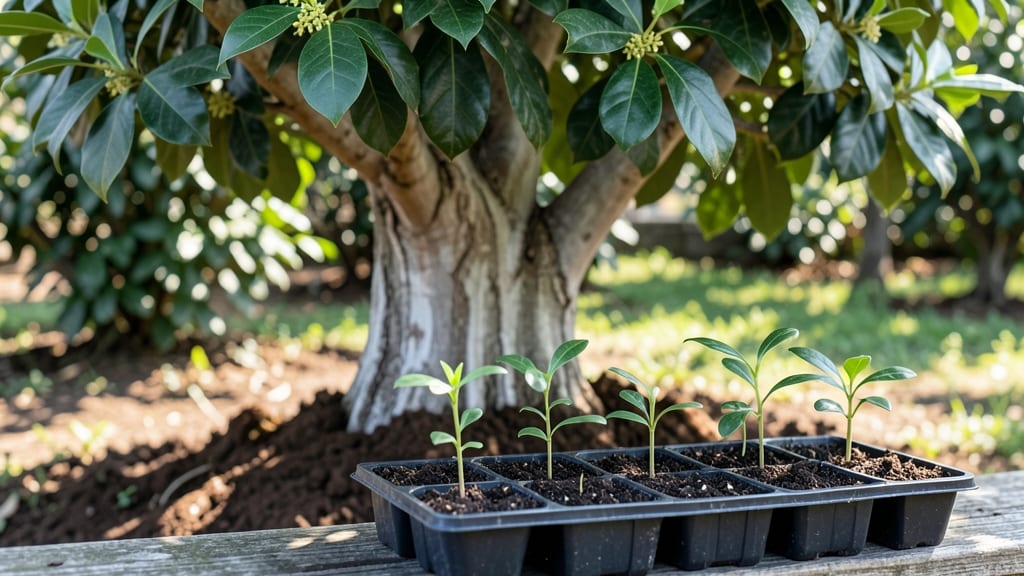
Growing camphor tree seeds requires patience and precision—these aromatic giants need a stratification timeline of 60 to 90 days before they’ll even crack open. 🌱 I’ve learned that skipping this step means weeks of waiting for seeds that may never sprout, no matter how perfect your conditions seem.
The key isn’t just time in the fridge; it’s mimicking the natural winter-spring cycle their seeds evolved to endure.
You’ll need just three things: fresh seeds (or those stored in a cool, dry place), a mix of damp peat moss and perlite, and a sealed plastic bag with tiny air holes. Place the mix in the bag, add the seeds, and refrigerate—no fancy equipment, just a steady 40°F temperature.
After two months, move them to a warm, bright spot (but not direct sun) and watch for those first pale green shoots in 4-8 weeks.
The payoff? A sturdy seedling with glossy leaves and a faint camphor scent when crushed—proof you’ve cracked the code. These trees grow slow but reward you with fragrant foliage and that signature resinous aroma.
Just be ready for a 5-year wait before it reaches mature height, because camphor trees aren’t in a hurry.
Here’s the secret weapon: don’t rush the stratification. If you’re in a warmer climate, extend the cold treatment to 120 days—it’s the difference between a thriving seedling and one that gives up halfway.
Once you’ve got that first sprout, the rest is just nurturing with consistent moisture and indirect light.
📚 In This Guide
- What you need
- Instructions
- Tips and common mistakes
- Wrapping up and next steps
What you need
- ● Camphor tree seeds: 10–20 fresh seeds (harvested within the last 6 months for best results).
- ● Stratification medium: Option 1: 2 cups of moist peat moss or coco coir (sterilized).
- ● Option 2: 1 part perlite + 1 part sand (for better drainage).
- ● Containers: 2–3 small plastic bags (resealable, 1-gallon size) or a shallow tray with a lid (for humidity control).
- ● Plastic wrap or breathable lid: To maintain moisture without drowning the seeds.
- ● Refrigerator: A standard fridge (34–40°F / 1–4°C) for cold stratification.
- ● Spray bottle: With water (to mist the medium gently).
- ● Label & marker: To track seed varieties and stratification dates.
- ○ Gloves: (Optional) To protect hands from seed oils or sharp husks.
- ○ Thermometer: (Optional) To monitor fridge temperature if your model varies.
- ○ Grow lights: (Optional) For post-stratification sprouting if natural light is limited.
- ○ Seedling trays: (Optional) 2–3 small pots (2–3 inches deep) with drainage holes for transplanting.
- ○ Fungicide: (Optional) A mild solution like hydrogen peroxide (3%) to prevent mold.
Step-by-step instructions for stratifying camphor tree seeds
Here's how to break dormancy and coax those stubborn seeds to sprout reliably.
🌱 Step 1: Collect and Prepare Fresh Seeds
Harvest camphor tree seeds when they're fully ripe and turn from green to brown, typically in late summer or fall. Remove any chaff or dried husks by gently rubbing them between your fingers or with a soft brush—this prevents mold during stratification. Store them in a paper envelope (not plastic) in a cool, dry place at 40-50°F until you're ready to start the process.
If you're working with older seeds, soak them in lukewarm water for 24 hours before stratification to soften the hard outer shell. This step isn't always necessary but can speed up germination for seeds that have dried out. Drain and let them air-dry slightly before proceeding.
⏰ Step 2: Perform Cold Stratification for 60-90 Days
Place the seeds in a plastic bag filled with slightly damp (not soggy) perlite or sand. Seal the bag loosely—you want airflow to prevent rot, but enough moisture retention to keep the medium damp. I like to use a zip-top bag with a few small holes poked in the top for this.
Store the bag in your refrigerator's crisp drawer (around 35-40°F) for 60-90 days. Check the seeds every 2 weeks—if the medium feels dry, mist it lightly with water. The goal is to keep it consistently moist but never waterlogged. You'll know stratification is working when the seeds begin to soften slightly and lose their hard outer coating.
☀️ Step 3: Sow Stratified Seeds in Warmth
After stratification, sow the seeds ½ inch deep in a well-draining potting mix (camphor trees hate soggy roots). Use a small container or seed tray with drainage holes, and keep the soil warm at 70-75°F—a seedling heat mat helps immensely. Place the tray in bright, indirect light (no direct sun yet).
Mist the soil gently after planting to settle the seeds, then cover the tray with a clear plastic dome or plastic wrap to retain humidity. Keep the soil evenly moist but not wet—you'll see condensation on the dome, which is normal. Germination can take 3-6 weeks, so patience is key. Watch for tiny green sprouts breaking through the soil surface—that's your signal to remove the dome immediately.
🌿 Step 4: Provide Ideal Growing Conditions for Seedlings
Once seedlings emerge, move them to a sunny spot with at least 6 hours of indirect light daily. Camphor trees grow slowly at first, so don't rush the process. Water gently at the base when the top inch of soil feels dry, avoiding the leaves to prevent fungal issues. You'll notice new leaves developing after 4-6 weeks—this is when you can start fertilizing lightly with a diluted houseplant fertilizer.
When seedlings reach 4-6 inches tall and have developed 3-4 sets of true leaves, they're ready for their first repotting into slightly larger containers. This prevents root binding and encourages stronger growth. Keep them indoors until they're at least 12 inches tall before considering outdoor planting in warm climates.
Tips & tricks for perfect camphor tree seed stratification
A few simple strategies can dramatically improve your success rate with these stubborn seeds.
Temperature Matters: The 40-50°F storage range for fresh seeds is critical—this mimics their natural winter dormancy period. If your fridge runs warmer, place the paper envelope in the coldest part, like the crisper drawer. For older seeds, that 24-hour lukewarm water soak at room temperature (around 75°F) helps soften the tough outer shell without over-softening the embryo inside.
Medium Selection Tip: I've found perlite works better than sand for moisture control during stratification. Perlite holds just enough moisture without becoming waterlogged, which prevents mold while maintaining the necessary humidity. If using sand, rinse it thoroughly first to remove any fine particles that could clog the seed pores.
Stratification Timeline: The 60-90 day range accounts for natural variations—some seeds may germinate after 60 days, while others need the full 90 days. Mark your calendar when you start and check every 2 weeks. If you notice the seeds beginning to soften or show slight cracks after 60 days, you can gently check for signs of life by carefully opening the bag and examining a few seeds.
Sowing Success: When planting those ½-inch deep stratified seeds, press them gently but firmly into the soil to ensure good soil-to-seed contact. The 70-75°F soil temperature requirement is non-negotiable—use a seedling heat mat if your home stays cooler. I've seen germination rates nearly double when maintaining this precise temperature range during the critical first 3-6 weeks.
Pro Tips for Camphor Tree Seeds
- A few simple strategies can dramatically improve your success rate with these stubborn seeds.
- Temperature Matters: The 40-50°F storage range for fresh seeds is critical—this mimics their natural winter dormancy ...
- Medium Selection Tip: I've found perlite works better than sand for moisture control during stratification. Perlite h...
Frequently asked questions
Got questions about camphor tree seeds and their germination journey? You’re not alone! Here are some of the most common queries—and their answers—to help you navigate the process like a pro.
How long does it take for camphor tree seeds to germinate after stratification?
After completing the 60-90 day cold stratification, camphor tree seeds typically germinate within 2-6 weeks. However, some seeds may take up to 3 months—patience is key! Monitor moisture levels and keep the soil warm (around 70°F) to encourage sprouting.
Can I skip stratification? What happens if I plant them right away?
Skipping stratification dramatically reduces germination success. Camphor seeds have a hard seed coat that requires cold treatment to soften. Planting them without stratification may result in 0-5% germination—not worth the risk! If you’re in a hurry, soak seeds in warm water for 24 hours before planting, but stratification is still the gold standard.
What’s the best temperature for germinating camphor seeds after stratification?
Once stratification is complete, maintain a consistent soil temperature of 68-75°F (20-24°C). Use a seedling heat mat if your home runs cooler. Avoid extremes—below 60°F (15°C) slows growth, while above 80°F (27°C) can cause rot. A sunny windowsill or grow light works great!
Why aren’t my camphor seeds sprouting? Troubleshooting tips.
If seeds aren’t germinating, check these common issues:
- Improper stratification: Ensure seeds spent full 60-90 days in the fridge (not freezer!).
- Dry soil: Keep moisture consistently damp (not soggy)—use a spray bottle.
- Old seeds: Camphor seeds lose viability after 1-2 years; test freshness first.
- Poor air circulation: Mold or rot can set in if seeds are too crowded.
If all else fails, try scarification (lightly sanding the seed coat) to mimic natural wear-and-tear.
Can I grow camphor trees from seeds indoors? What’s the process?
Start seeds in small pots with well-draining soil (cactus/succulent mix works). After germination, transplant seedlings into 5-inch pots when they have 2-3 true leaves. Camphor trees thrive indoors with bright, indirect light—just avoid drafts. Once established, they can handle outdoor conditions (if you’re in USDA zones 9-11).
Wrapping up and next steps
From understanding the ideal stratification timeline for camphor tree seeds to gathering the right materials, you’re now equipped to boost your germination success rate! 🌱 Remember, patience and consistency are key—whether you’re using a cold stratification method or a simple paper towel approach.
Now’s the perfect time to start your seeds and watch your camphor tree grow into a stunning addition to your garden or landscape.
Ready to take the next step? Gather your supplies, follow the steps, and keep an eye on those sprouts! Happy gardening! 🌿