Vegetables
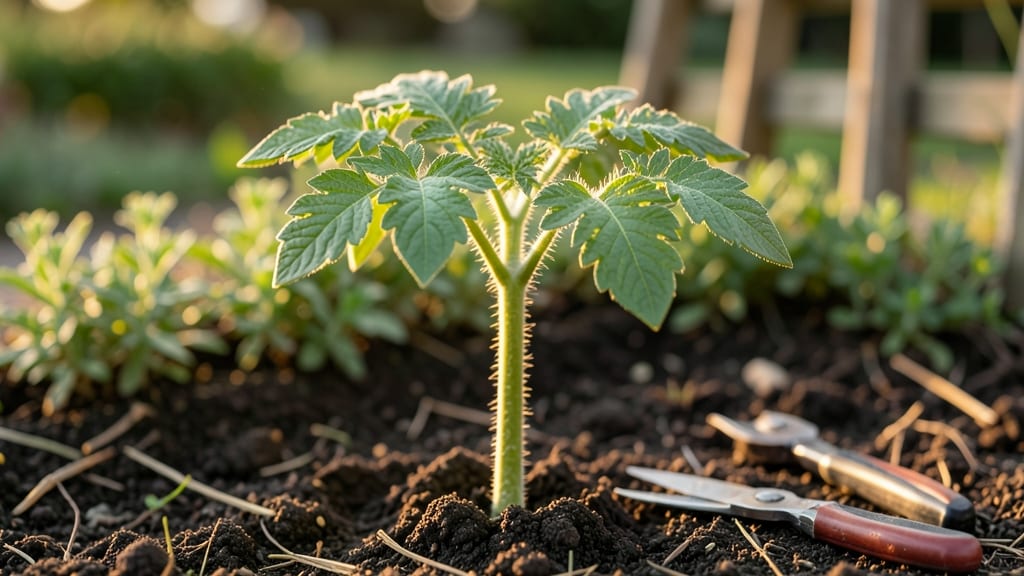
Seeing tomato seedlings grow from tiny specks to sturdy transplants is one of the most satisfying parts of gardening. 🌱 I’ve tracked every stage—from the first fragile cotyledons to the stocky, leafy plants ready for the garden—and these images show you exactly what healthy development looks like at each step.
The early stages are all about identifying strong stems and vibrant leaves. True leaves appear after the initial cotyledons, and by the time seedlings have 4-6 sets of leaves, they’re ready for transplanting.
Each stage has its own quirks, like when to thin crowded seedlings or spot early signs of disease.
By the time you’re pinching off suckers and hardening off plants, you’ll recognize the signs of a thriving seedling. These images help you compare your progress to the ideal, so you know exactly when to move them outside—usually when nighttime temperatures stay above 50°F.
Whether you’re growing heirlooms or hybrids, this visual guide works for any tomato variety. The key is catching potential issues early, like leggy stems or yellowing leaves, so your plants stay robust until harvest time.
📚 In This Guide
- What you need
- Instructions
- Tips and common mistakes
- Wrapping up and next steps
What you need
- ● Seeds: 5–10 high-quality tomato seeds (choose heirloom or hybrid varieties for vibrant growth stages).
- ● Seed-starting trays: 1–2 biodegradable or plastic trays (72–128 cell count, 2–3 inches deep).
- ● Seed-starting mix: 1–2 bags of sterile, well-draining potting mix (avoid garden soil—it’s too dense!).
- ● Containers or pots: 3–4 small pots (3–4 inches in diameter) for transplanting later.
- ● Grow lights or sunny windowsill: A full-spectrum LED grow light (12–16 hours/day) or a south-facing window.
- ● Misting bottle: 1 spray bottle (for gentle watering).
- ● Labels & markers: 5–10 plant labels + a permanent marker (to track varieties!).
- ● Macro lens or close-up camera: For crisp tomato seedling images (even a smartphone with a macro mode works!).
- ● Tripod or stable surface: To avoid blurry shots.
- ● Natural light source: A bright window or diffused sunlight (avoid harsh overhead lighting).
- ● White background or neutral cloth: For clean, professional-looking images.
- ○ Magnifying glass (optional): To highlight tiny details like cotyledons or root growth.
- ● Sterilize tools: Wash trays, pots, and tools with a 10% bleach solution to prevent mold.
- ● Moisture control: Use a humidity dome or plastic wrap (remove once sprouts appear!).
- ● Light consistency: Keep seedlings 2–3 inches from grow lights to avoid legginess.
- ● Document growth: Snap photos weekly to track progress—perfect for your tomato seedling image gallery!
Step-by-Step guide to documenting tomato seedling growth stages
Capture the transformation from tiny seed to sturdy transplant with these clear visual milestones.
🌱 Step 1: Photograph the Germination Stage
Start documenting the moment you see the first signs of life—typically 5-10 days after sowing. Place your camera at soil level to show the radicle (the tiny white root) breaking through the seed coat. This is the critical first step where you’ll see the seedling’s future strength.
Use natural light near a window to avoid shadows, and include a ruler or coin for scale. The cotyledons (the first true leaves) will appear next, but capturing the radicle shows the seed’s journey from dormancy to growth. I like to photograph this stage daily until the seedling reaches 1 inch tall—it’s fascinating how quickly they develop.
🌿 Step 2: Capture the Cotyledon and First True Leaf Stage
Once the seedling has two small, rounded cotyledons (the seed leaves), take a close-up shot from above. These leaves are different from the first true leaves, which will look more like the mature plant’s foliage. This stage usually occurs 7-14 days after germination.
Use a macro setting if your camera allows it to highlight the texture and color of the leaves. The cotyledons will eventually fall off as the plant matures, so document them before they disappear. I also snap a side view to show the stem thickness—a good indicator of a healthy seedling.
☀️ Step 3: Record the Seedling’s Response to Light
After the first true leaves appear, observe how the seedling reacts to your light source. If it’s stretching toward the light (a sign of etiolation), photograph it from multiple angles to show the leggy growth. This usually happens if the seedlings aren’t getting enough 14-16 hours of light daily.
Compare images taken under different light conditions—natural sunlight versus artificial grow lights—to show how light quality affects growth. I always include a timestamp in the filename to track progress over time. This stage is critical for identifying whether your seedlings are thriving or struggling.
✂️ Step 4: Document the Hardening-Off Process
During the 2-week hardening-off period before transplanting, take daily photos to show the seedling’s adaptation to outdoor conditions. Focus on the leaf color, stem strength, and any signs of stress like wilting or yellowing.
Include a side-by-side comparison of a seedling indoors versus one placed outside for increasing durations. This helps visualize how the plant toughens up before its final move to the garden. I also photograph the roots if you’re using clear containers—healthy roots should be white or pale yellow, not brown or mushy.
🪴 Step 5: Final Transplant-Ready Images
On the day of transplanting, capture the seedling’s final state before it goes into the ground. Look for 3-4 sets of true leaves, a thick stem, and no signs of disease. This is the ideal stage for transplanting, and the images will serve as a reference for future growing seasons.
Include a photo of the seedling in its final container or garden bed to show the transition. Label each image with the tomato variety, planting date, and location. Over time, you’ll build a visual library of how your seedlings progress, making it easier to spot issues early in future batches.
Tips & tricks for perfect tomato seedling documentation
These insider tricks will transform your seedling photos from basic snapshots to professional-grade growth documentation.
Lighting is Everything: The 14-16 hours of daily light mentioned in Step 3 isn't just about growth—it's your photography goldmine. Position seedlings near a south-facing window during daylight hours for consistent natural light. For artificial grow lights, place them 6-12 inches above seedlings to avoid shadows in your photos. I use a small LED ring light for close-ups of the radicle stage—it creates even illumination without heat stress.
Scale Matters More Than You Think: In Step 1, that 1-inch height marker isn't just for show—it's critical for comparing growth rates between batches. I keep a set of calibrated measuring tools (ruler, coin, and even a tomato seedling growth chart) ready for every shoot. For macro shots of cotyledons in Step 2, a dime works perfectly as a scale reference—its familiar size helps viewers gauge actual plant dimensions.
Document the Invisible: While Step 4 focuses on visible hardening-off signs, don't overlook the roots if using clear containers. Healthy roots should show white tips with some pale yellow—this indicates active growth. I photograph roots from multiple angles during the 2-week hardening period, noting any changes in density or color. These underground details often reveal problems before they appear above soil level.
Consistency Creates Value: The most valuable seedling documentation comes from consistent timing and labeling. I create a simple spreadsheet that tracks each photo with: date, growth stage, lighting conditions, and any notable observations. This turns your collection into a searchable resource for future reference. For example, comparing photos from different years helps identify which tomato varieties handle your climate best.
Pro Tips for Tomato Seedling Images
- These insider tricks will transform your seedling photos from basic snapshots to professional-grade growth documentat...
- Lighting is Everything: The 14-16 hours of daily light mentioned in Step 3 isn't just about growth—it's your photogra...
- Scale Matters More Than You Think: In Step 1, that 1-inch height marker isn't just for show—it's critical for compari...
Frequently asked questions
Got questions about tomato seedlings? You’re not alone!
Whether you're a first-time gardener or looking to refine your technique, these frequently asked questions will help you navigate the journey from seed to transplant-ready seedlings with confidence.
How long does it take for tomato seeds to germinate?
Tomato seeds typically germinate in 5–14 days, depending on temperature, moisture, and seed quality. Keep soil consistently warm (70–85°F) and moist—germination speeds up in ideal conditions! If nothing sprouts after 2 weeks, try replanting fresh seeds.
When should I transplant tomato seedlings outdoors?
Wait until nighttime temperatures stay above 50°F and seedlings have 3–4 true leaves (not just cotyledons). Harden them off for 7–10 days by gradually exposing them to outdoor conditions. Transplant after the last frost date in your zone for best results!
Why are my tomato seedlings leggy or weak?
Leggy seedlings usually mean they’re stretched for light. Move them closer to a bright window or grow light (12–16 hours/day). Bury them deeper when transplanting—up to the first true leaves—to encourage stronger roots. Avoid overcrowding too!
Can I save tomato seedling images for future reference?
Snap photos at each growth stage (seedling, true leaves, flowering) to track progress. Label them by date and variety. Pro tip: Use a white background for clear comparisons. Store images in a folder like “Tomato Growth Stages 2024” for easy access next season!
What if my tomato seeds don’t sprout at all?
Try these fixes:
- Check seed viability: Test a few seeds in damp paper towels—if none sprout in 7–10 days, they may be old.
- Adjust moisture: Overwatering can drown seeds; ensure soil is damp but not soggy.
- Warmth matters: Use a seedling heat mat if your home is too cool.
- Fresh seeds: Buy new seeds if germination rates are consistently low.
Wrapping up and next steps
Watching your tomato seedlings grow from tiny sprouts to sturdy transplants is one of the most rewarding parts of gardening! 🌱 Whether you’re a beginner or a seasoned green thumb, these tomato seedling images help you track progress and ensure success.
Now that you know what to look for at each stage, it’s time to roll up your sleeves and nurture those plants—soon, you’ll be harvesting juicy tomatoes!
Ready for the next step? Transplant your seedlings into the garden or larger containers once they’re strong enough (usually 4–6 weeks old). Happy growing! 🌿