Planting
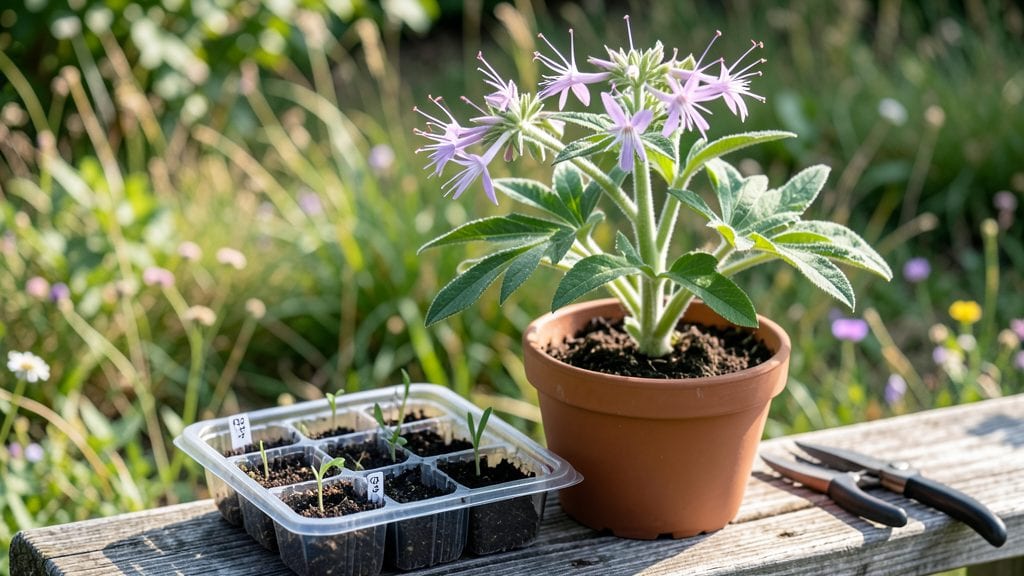
Sowing these cleome seeds after a quick cold treatment guarantees those jaw-dropping, spiky blooms in just six weeks—no greenhouse required. I learned the hard way that skipping this step means waiting months for germination, but once I cracked the cold prep routine, my cleomes went from flop to showstopper.
The secret lies in mimicking their natural winter dormancy period, which tricks them into breaking dormancy just as spring warms the soil.
You’ll need a simple setup: a plastic bag, some damp paper towels, and your patience. Plant the seeds ¼-inch deep in well-draining soil mix, space them 12 inches apart (they sprawl like wild vines), and keep the soil consistently moist but never soggy.
Cleomes thrive in full sun but tolerate partial shade—perfect for garden edges or containers. The first true leaves appear in 7-14 days, and by week 6, you’ll be pinching back leggy stems to encourage bushier growth.
What you end up with is a dramatic vertical display of pink, white, or purple blooms that hummingbirds can’t resist. The flowers last for weeks, and the seed pods add texture long after the petals fade.
Even my black thumb can’t kill these—just watch for slugs on young seedlings and thin crowded starts to avoid disease. By midsummer, your neighbors will be asking for cuttings.
Works in zones 3-10, whether you’re sowing directly in the garden after last frost or starting indoors 8-10 weeks before transplanting. The cold prep method even helps in hot climates where seeds might otherwise refuse to germinate. Here’s exactly how to do it without the guesswork.
📚 In This Guide
- What you need
- Instructions
- Tips and common mistakes
- Wrapping up and next steps
What you need
- ● Cleome seeds: 5–10 seeds (choose a variety like Cleome hassleriana for vibrant colors).
- ● Seed-starting mix: 1–2 cups of sterile, well-draining potting soil (avoid garden soil—it’s too dense!).
- ● Containers: Small pots (3–4 inches deep) or seed trays with drainage holes.
- ○ Optional but helpful: Biodegradable peat pots for easy transplanting.
- ● Spray bottle: For gentle watering (cleome seeds hate soggy soil!).
- ● Plastic wrap or humidity dome: To keep seeds cozy until germination.
- ● Refrigerator (for cold prep): A zip-top bag or small container to chill seeds for 2–4 weeks.
- ● Grow lights or sunny windowsill: Cleome seeds need bright light (6+ hours daily) to thrive.
- ○ Thermometer (optional): Ideal germination temp: 65–75°F (18–24°C).
- ● Fertilizer (light dose): A balanced, water-soluble fertilizer (5-5-5 or 10-10-10) for post-germination growth.
- ● 🌡️ Chill your seeds! Cold stratification mimics winter and boosts germination rates—skip this, and you might wait months for sprouts.
- ● ✨ No overcrowding: Plant seeds 1/4 inch deep and 1 inch apart to avoid damping-off disease.
- ● 💧 Water wisely: Keep soil moist but not soggy—cleome roots despise waterlogged conditions.
Step-by-Step instructions for sowing cleome seeds
Here’s how to coax those striking cleome blooms from tiny seeds—no fancy equipment needed.
Prepare the Seeds for Faster Germination
Cleome seeds need a cold treatment to break dormancy. Place them in a sealed plastic bag with a damp paper towel—just enough moisture to keep the towel damp but not dripping. I like to add a few ice cubes to the bag to keep temperatures steady. Store the bag in the refrigerator for 4-6 weeks, checking weekly to refresh the moisture if the towel dries out.
This cold prep mimics winter conditions in the wild, signaling the seed it’s safe to sprout. After 4 weeks, remove the bag and let the seeds sit at room temperature for 24 hours before sowing. You’ll know they’re ready when the paper towel feels slightly dry to the touch—this prevents mold during germination.
Choose Containers and Fill with Light Mix
Use 4-inch pots or a shallow tray with drainage holes—cleome seedlings don’t like soggy roots. Fill containers with sterile seed-starting mix (never garden soil) and press it down lightly so the surface is firm but not compacted. I tap the container gently on the table to settle the mix evenly—this prevents air pockets that could delay germination.
Moisten the soil until it feels like a wrung-out sponge: damp but not dripping. Sow seeds ¼ inch deep, spacing them 1 inch apart in each pot. Cleome seeds are large, so you can plant them individually without crowding. Gently press the soil around each seed to ensure good contact—this helps roots anchor quickly.
Provide Warmth and Humidity for Sprouting
Cover the containers with clear plastic wrap or a humidity dome to retain moisture and warmth. Place them in a spot with 70-75°F temperatures—an indoor windowsill near a heat source works well. Keep the soil consistently moist by misting lightly every 2-3 days, but avoid soaking it. You’ll see sprouts in 7-14 days, depending on how well the cold prep worked.
Once seedlings emerge, remove the plastic immediately to prevent damping-off—a fungal disease that causes stems to collapse. Place pots under grow lights or in a south-facing window for 12-14 hours of light daily. Leggy seedlings (thin stems with widely spaced leaves) mean your light is too weak—move the plants closer or add a second light source.
Thin Seedlings and Harden Off
When seedlings reach 2 inches tall, thin to the strongest plant per pot by snipping the others at the base with clean scissors. Cleome seedlings are tough, but overcrowding weakens them. After thinning, water deeply to help the remaining plant establish roots. Fertilize lightly with a balanced liquid fertilizer (10-10-10) diluted to half strength—cleome prefers lean soil and overfeeding can reduce blooms.
Two weeks before your last frost date, start hardening off seedlings by placing them outside in a sheltered spot for 1-2 hours the first day. Gradually increase exposure over 10-14 days, ending with full sun. Cleome thrives in full sun and well-draining soil, so choose a spot with at least 6 hours of direct light daily. Plant outdoors after all danger of frost has passed—these seeds hate cold soil.
Tips & tricks for sowing cleome seeds
These small details make all the difference when growing cleome from seed—trust me, I’ve learned these the hard way!
Cold Prep Precision: For the 4-6 week cold treatment in Step 1, consistency is key. Place your bag of seeds near the back of the fridge where temperatures stay most stable. If your fridge fluctuates, consider adding a thermometer to ensure it stays between 35-40°F. This mimics natural winter conditions perfectly, which is why cleome seeds respond so well to this method. After the 4 weeks, that 24-hour room temperature adjustment is crucial—it helps prevent shock when you finally plant them.
Soil Settling Technique: In Step 2, when you’re filling your 4-inch pots, don’t just dump the sterile seed-starting mix in. I tap the container gently on the table 3-4 times to eliminate air pockets—this creates better soil contact for those roots. Also, make sure your pots have drainage holes; cleome seedlings will rot if their roots stay soggy. The ¼-inch depth for planting is perfect because these large seeds need just enough coverage to stay in place without being buried too deeply.
Lighting Strategy: The 12-14 hours of light in Step 3 is non-negotiable for strong seedlings. If you don’t have grow lights, place your pots on a windowsill that gets direct sunlight for most of the day. South-facing windows work best, but watch for overheating—if the soil feels warm to the touch, move the pots back slightly. Leggy seedlings are your first warning sign that light is insufficient. When you notice this, immediately move the plants closer to the light source or add supplemental lighting.
Fertilizer Timing: In Step 4, when you fertilize after thinning, use that diluted 10-10-10 solution sparingly. Cleome prefers lean soil, and overfeeding can actually reduce those showy blooms we’re all after. I wait until the seedlings have developed their second set of true leaves before applying any fertilizer. Also, always water deeply after fertilizing to help distribute the nutrients evenly through the soil.
Pro Tips for Sowing Cleome Seeds
- These small details make all the difference when growing cleome from seed—trust me, I’ve learned these the hard way!
- Cold Prep Precision: For the 4-6 week cold treatment in Step 1, consistency is key. Place your bag of seeds near the ...
- Soil Settling Technique: In Step 2, when you’re filling your 4-inch pots, don’t just dump the sterile seed-starting m...
Frequently asked questions
Got questions about sowing cleome seeds? You’re not alone—these vibrant bloomers are easy but have a few quirks! Here are answers to the most common queries to help you grow stunning cleomes with confidence.
When is the best time to plant cleome seeds?
Cleome seeds thrive in warm soil—wait until nighttime temperatures stay above 55°F (13°C). In most regions, this means planting after the last frost, typically late spring or early summer. If you’re in a cooler climate, consider starting seeds indoors 4–6 weeks before the last frost, then transplant outdoors.
Why do cleome seeds need cold treatment?
Cleome seeds have a hard seed coat that requires stratification (cold treatment) to soften and germinate. Soaking seeds in water for 24 hours or nicking them with sandpaper mimics natural winter conditions, breaking dormancy. Without this step, germination rates drop dramatically—so don’t skip it!
How long do cleome seeds take to germinate?
With proper cold prep, cleome seeds usually sprout in 7–14 days. Keep soil consistently moist (not soggy) and warm (70–80°F or 21–27°C). If germination takes longer than 3 weeks, check moisture levels or test a few seeds in warm water—some may need extra encouragement!
Can I grow cleome from store-bought seeds or saved seeds?
Yes! Cleome seeds are non-hybrid, so you can save seeds from your plants for next year. Collect seed pods (they’ll turn brown and dry), crack them open, and store the seeds in a cool, dry place. Store-bought seeds work just as well—just follow the cold treatment steps for best results.
What if my cleome seedlings look leggy or weak?
Leggy seedlings often mean too little light or overcrowding. Move seedlings to a sunny window or under grow lights immediately. Thin them to 12–18 inches apart once true leaves appear. If they’re already planted outdoors, provide afternoon shade until they’re more established.
Wrapping up and next steps
Sowing cleome seeds is a rewarding journey that brings vibrant, butterfly-loving blooms to your garden in just six weeks—no fancy tricks required! With the right prep (like a quick cold treatment) and a little patience, you’ll enjoy stunning, drought-tolerant flowers that thrive with minimal fuss. 🌸
Ready to transform your space? Grab those seeds, follow the steps, and soon you’ll be basking in a sea of color. Next up: Mark your calendar for transplanting in 6 weeks and watch your garden come alive!