Lawn
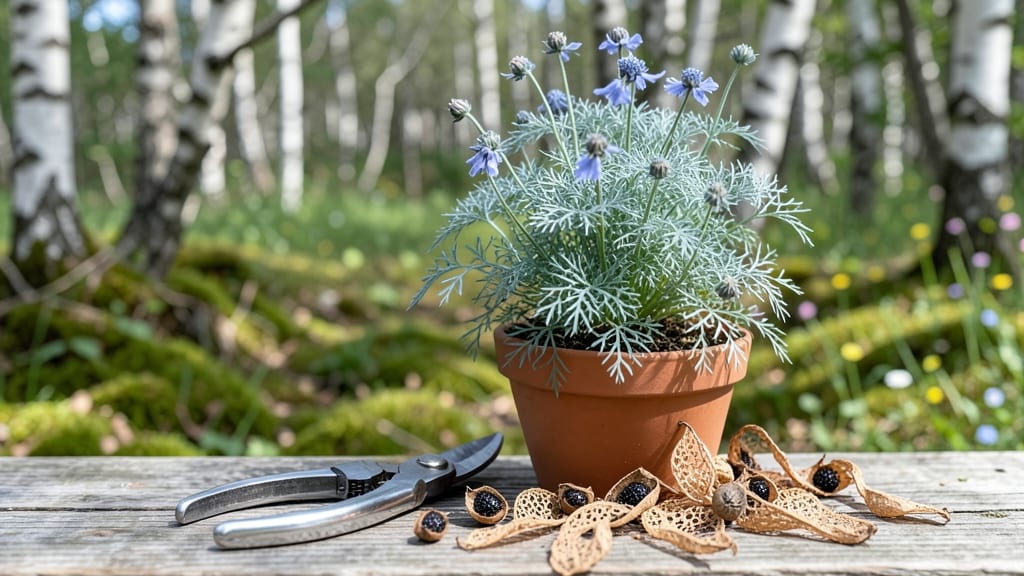
Cold stratification turns finicky nigella seed pods into reliable blooms every spring. ✨ I’ve struggled with erratic germination until I discovered the simple trick of mimicking winter’s chill—just place seeds in the fridge for a few weeks before planting.
The payoff? Those delicate blue lace flowers appear like clockwork, turning any corner of the garden into a dreamy, cottage-core scene.
The secret isn’t complicated: grab a paper towel, dampen it, wrap the seeds, and tuck them into a sealed bag in the fridge for 4-6 weeks. No fancy equipment—just patience and a little science.
Once stratified, sow them directly in well-draining soil where they’ll get full sun to partial shade, and watch for those signature feathery foliage in 6-8 weeks. Even beginners nail this method, and the results are worth the wait.
By summer, you’ll have clusters of aromatic seed pods that dry into decorative charms or spice up dishes with a nutty, slightly peppery kick. The pods themselves become conversation pieces—hang them for dried arrangements or crush them into homemade salt blends. It’s gardening that doubles as art and the pantry.
Works in zones 3-10, whether you’re tucking them into borders, containers, or wildflower meadows. The same trick revives old seed packets too—no need to buy new. Ready to grow nigella that actually thrives? Let’s get those seeds chilling.
📚 In This Guide
- What you need
- Instructions
- Tips and common mistakes
- Wrapping up and next steps
What you need
- ● Nigella seeds (seed pods): 1–2 packets (choose varieties like Nigella damascena for classic blooms or Nigella sativa for culinary use).
- ● Cold stratification setup: Plastic bag or airtight container (quart-sized or larger)
- ● Damp paper towels or sphagnum moss (enough to lightly moisten seeds)
- ○ Optional: Refrigerator with a crisper drawer (for consistent 35–45°F temps)
- ● Growing medium: Seed-starting mix (sterile, well-draining) or potting soil amended with perlite.
- ● Containers: 2–4 inch pots or seed trays (with drainage holes).
- ● Misting bottle or spray nozzle (for gentle watering).
- ● Grow lights or sunny windowsill (south-facing or 6+ hours of indirect light daily).
- ● Seedling heat mat (to speed up germination in cooler climates).
- ● Humidity dome or plastic wrap (to retain moisture during early growth).
- ● Fertilizer: Balanced liquid fertilizer (diluted to half-strength) for established seedlings.
- ● Plant labels and markers (to track varieties and planting dates).
- ● Outdoor hardening-off tray (for gradual acclimation before transplanting).
Step-by-step instructions for growing nigella seed pods from seed
Here’s how to coax those delicate, lacy nigella blooms—starting with a little winter magic.
🌱 Step 1: Collect and Prepare Seeds for Cold Stratification
Nigella seeds need a cold period to break dormancy, mimicking their natural winter cycle. Collect ripe seed pods from your garden or purchase fresh seeds—old seeds may not germinate reliably. Spread the seeds in a single layer on a paper towel inside a sealed plastic bag. Place the bag in the refrigerator’s crisper drawer for 6-8 weeks at 35-40°F. This cold treatment is critical: without it, germination rates plummet.
Check the seeds weekly. They’re ready when the outer seed coat softens slightly—you’ll notice a faint green tint emerging. If moisture builds up inside the bag, open it briefly to air out condensation. Real talk: Skipping this step means waiting months for erratic germination, if it happens at all.
💧 Step 2: Sow Stratified Seeds in Well-Draining Soil
Fill 4-inch pots with a mix of 50% potting soil and 50% perlite—this ensures excellent drainage, which nigella demands. Moisten the mix until damp but not soggy; nigella roots rot easily in waterlogged soil. Scatter the stratified seeds ¼ inch deep, spacing them 1 inch apart. I like to tap the seed packet gently to release one seed at a time—planting too many in one hole leads to weak, crowded seedlings.
Lightly cover the seeds and mist the surface with a spray bottle until the soil looks evenly damp. Place the pots in a seedling heat mat set to 65-70°F to speed germination. You’ll see tiny sprouts in 2-4 weeks—until then, keep the soil consistently moist but never waterlogged. The key here is patience; nigella isn’t in a hurry.
☀️ Step 3: Provide Bright Light and Gradual Hardening
Once seedlings emerge, move them to a south-facing window or under grow lights for 12-14 hours daily. Nigella seedlings grow slowly at first, so don’t rush them. You’ll notice first true leaves (not the initial cotyledons) in 3-4 weeks. At this stage, thin seedlings to 2 inches apart if crowded, using clean scissors to snip excess plants at soil level—this prevents transplant shock later.
After 4-6 weeks, when seedlings have 3-4 sets of leaves, begin hardening them off. Place pots outside in a sheltered spot for 1 hour the first day, gradually increasing exposure over 10 days. Watch for leggy growth—a sign of insufficient light. If stems stretch toward the window, adjust the light source within 6 inches of the plants to encourage sturdy growth.
🪴 Step 4: Transplant to the Garden for Full Bloom Potential
Transplant seedlings outdoors 2-3 weeks before your last frost date, when soil temperatures reach 50°F. Choose a site with full sun to partial shade and well-draining soil—nigella hates soggy roots. Dig holes twice as wide as the root ball but no deeper, then place seedlings in and firm soil around the base. Space plants 12-18 inches apart to allow air circulation and prevent fungal issues.
Water deeply at transplanting, then let the soil dry slightly between waterings. Nigella is drought-tolerant once established, but young plants benefit from 1 inch of water weekly. You’ll see first blooms in 8-10 weeks—those signature lacy flowers that hummingbirds adore. The seed pods that follow are the real prize, forming naturally as blooms fade.
✂️ Step 5: Harvest and Save Seed Pods for Next Year
Leave spent blooms on the plant until the seed pods turn brown and papery—usually 8-10 weeks after flowering. Gently twist pods to release seeds, then dry them in a paper bag for 2 weeks in a cool, dry place. Store seeds in an airtight container in the freezer for up to 3 years; this preserves viability for future plantings.
Deadhead faded blooms regularly to encourage more flowers, but don’t remove all pods if you want self-seeding. Nigella’s delicate charm lies in its ability to naturalize—let a few pods drop to scatter seeds for surprise blooms next season. Here’s the thing: once you grow nigella, you’ll never want to buy flowers again.
Tips & tricks for perfect nigella seed pod cultivation
Mastering nigella's finicky germination takes precision—but these insider tricks will turn your cold stratification from hit-or-miss to foolproof.
Cold Stratification Precision: The 6-8 week period at 35-40°F is non-negotiable for breaking nigella's dormancy. I've learned the hard way that skipping this step results in seeds that either refuse to sprout or take months to germinate. Place your sealed bag on the refrigerator's bottom shelf where temperatures stay most consistent—avoid door storage where temps fluctuate wildly. Pro tip: Use a small thermometer inside the bag to monitor temps, especially if your fridge runs hot or cold.
Soil Mix Science: That 50/50 potting soil-perlite blend isn't arbitrary—it creates the perfect balance of moisture retention and aeration nigella craves. I've found that adding a handful of coarse sand to the mix further improves drainage without compromising moisture. When filling your 4-inch pots, press the mix down gently but firmly to eliminate air pockets that could cause uneven germination. The goal is a texture that holds moisture like a wrung-out sponge.
Lighting Strategy: Nigella seedlings may grow slowly, but they're light-hungry. After the 12-14 hour daily requirement is met, consider supplementing with a full-spectrum LED grow light placed just 6 inches above the seedlings. I've seen dramatic improvements in seedling vigor when using this setup, especially in north-facing windows where natural light is weak. The key is maintaining consistent light exposure—nigella won't tolerate erratic light cycles that cause leggy growth.
Transplant Timing: Those 2-3 weeks before your last frost date are critical for establishing strong root systems. I recommend checking soil temperatures with a thermometer—nigella performs best when soil stays above 50°F consistently. If your spring is unpredictable, consider using row covers for the first week after transplanting to protect young plants from temperature swings. The 12-18 inch spacing might seem generous, but it prevents fungal issues and allows those signature lacy blooms to develop their full delicate structure.
Pro Tips for Nigella Seed Pod
- Mastering nigella's finicky germination takes precision—but these insider tricks will turn your cold stratification f...
- Cold Stratification Precision: The 6-8 week period at 35-40°F is non-negotiable for breaking nigella's dormancy. I've...
- Soil Mix Science: That 50/50 potting soil-perlite blend isn't arbitrary—it creates the perfect balance of moisture re...
Frequently asked questions
Got questions about growing nigella seed pods? You’re not alone—these delicate blooms can be tricky! Here’s a quick rundown of the most common concerns, from timing to troubleshooting, so you can cultivate stunning Love-in-a-Mist with confidence.
How long does it take for nigella seed pods to germinate?
With cold stratification, germination typically takes 2–4 weeks after sowing. If you skip stratification, expect delays of 4–8 weeks—or even no sprouts at all! Patience is key—keep soil moist (not soggy) and warm (60–70°F) for best results.
When is the best time to plant nigella seeds for fall blooms?
For fall flowers, sow seeds 8–10 weeks before your first frost (usually late summer). Nigella thrives in cool weather, so avoid planting in scorching heat. If you miss the window, try a second sowing in early spring for summer blooms!
What can I do if my nigella seed pods aren’t opening?
Pods may stay closed due to overcrowding, poor pollination, or dry conditions. Thin plants to 12–18 inches apart, hand-pollinate with a soft brush, and ensure consistent moisture. If pods still resist, they might need more sun—try moving to a sunnier spot next season.
Can I save nigella seed pods for next year?
Let pods dry on the plant, then harvest and store them in a cool, dark, dry place (like a paper bag). They’ll stay viable for 2–3 years. Just remember: Cold stratification is still needed for best germination rates.
Are there alternatives to nigella if I want similar-looking flowers?
If nigella proves finicky, try larkspur (tall spikes, similar elegance) or cornflowers (drought-tolerant and self-seeding). For a whimsical cottage-garden vibe, baby’s breath (gypsophila) is another delicate option—though it’s not edible like nigella!
Wrapping up and next steps
Growing nigella seed pods with cold stratification isn’t just rewarding—it’s a game-changer for vibrant, reliable blooms in your garden! 🌸 By mastering these tricks, you’ll unlock easy, low-maintenance beauty that thrives even in cooler climates.
Whether you’re a seasoned gardener or just starting, your patience will pay off with stunning, fragrant flowers that attract pollinators and add charm to any space.
Ready to level up your garden? Start by experimenting with a few seed pods this season, and soon you’ll be sharing tips with fellow plant lovers. Happy growing! 🌱