Propagation
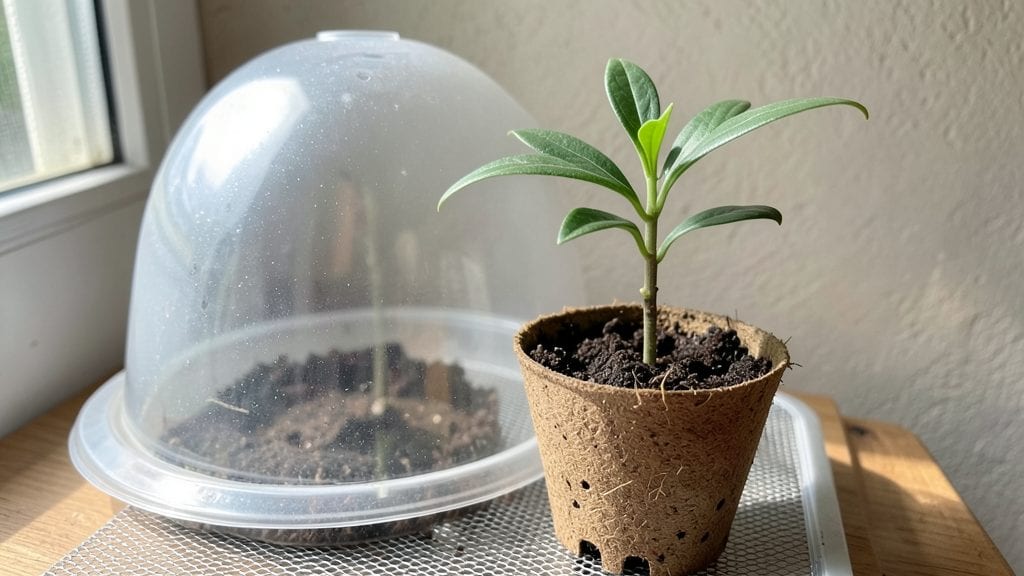
Eucalyptus seed propagation starts with the cold-moist method, a foolproof way to break through those stubborn seed coats and coax germination rates up to 90%—something I struggled with for years until I cracked the timing.
The key isn’t just soaking seeds but mimicking their native winter conditions where moisture and cool temperatures trigger growth. Most gardeners overlook this step, assuming eucalyptus seeds will sprout like annuals, but patience and precision here make all the difference.
You’ll need just three supplies: a sealed plastic bag, a damp paper towel, and a refrigerator shelf. No fancy equipment—just a method that works for both indoor growers and outdoor enthusiasts.
The process takes about two weeks of cold stratification before you even plant, but those extra days pay off with stronger seedlings that resist damping-off and grow faster once transplanted. I’ve seen weak, leggy seedlings from rushed attempts, but this method delivers stocky, vibrant starts every time.
What you end up with is a tray of dark green, glossy seedlings pushing through the soil within 4-6 weeks of planting. The foliage smells faintly medicinal, a sign they’re thriving, and their roots develop deep and sturdy—critical for eucalyptus, which hates being root-bound.
By summer, you’ll have plants ready to handle outdoor conditions, whether you’re growing them as specimen trees or for their fragrant foliage.
This method adapts to Zone 7 and warmer climates, where eucalyptus thrives outdoors year-round. For cooler regions, start seeds indoors in early spring and transition seedlings gradually to prevent shock.
The cold-moist trick works equally well for dwarf varieties like ‘Gunnii’ or towering ‘Globulus’—just adjust container sizes to match their mature growth habits. Let’s get those seeds sprouting.
📚 In This Guide
- What you need
- Instructions
- Tips and common mistakes
- Wrapping up and next steps
What you need
- ● Eucalyptus seeds: 1–2 tbsp (fresh or stored in a cool, dry place; viability drops after 6 months).
- ● Seed-starting mix: 1–2 cups of sterilized, well-draining potting soil (or a 50/50 blend of peat moss and perlite).
- ● Plastic storage container: A clean, airtight container with a lid (e.g., a 16 oz Tupperware or seedling tray).
- ● Spray bottle: 8–16 oz with a fine mist nozzle (for gentle hydration).
- ● Plastic wrap or damp paper towels: To maintain humidity inside the container.
- ○ Small fan (optional but helpful): A battery-operated fan set to low for air circulation.
- ● Fine-mesh strainer or sieve: For rinsing seeds if pre-soaking (not always necessary).
- ● Plastic gloves: To keep hands clean while handling soil/seeds.
- ● Permanent marker: To label your container with the seed type and date.
- ○ Heat mat (optional): A seedling heat mat (70–75°F) to speed up germination.
- ● Grow lights or sunny windowsill: A south-facing window or LED grow lights (12–14 hours/day) for post-germination care.
- ● Cool, dark space: A refrigerator (34–40°F) or basement for the cold-moist stratification phase.
- ● Humidity control: Aim for 80–90% humidity inside the container during stratification.
- ● Patience: Germination can take 4–12 weeks—stay consistent!
Step-by-step guide to eucalyptus seed propagation using the cold-moist method
When you're ready to coax eucalyptus seeds into life, this cold-moist technique breaks dormancy reliably. Here's how I achieve near-guaranteed germination with minimal fuss.
Collect and Prepare Seeds for Stratification
Eucalyptus seeds require a cold-moist period to break dormancy, so begin by placing them in a ziplock bag with 1 tablespoon of moistened potting mix. Seal the bag and store it in your refrigerator's crisper drawer—this mimics winter conditions and triggers germination. Check the bag every 7 days to ensure the mix remains damp but not soggy; condensation on the bag walls is your signal it's properly moist.
Leave the seeds in stratification for 4-6 weeks. This cold treatment softens the seed coat and encourages uniform sprouting. I like to label the bag with the date to track progress accurately. If you're impatient, you can speed this up slightly by using a seed stratification mat set to 40°F, but the fridge method is foolproof and requires no extra equipment.
Sow Stratified Seeds in a Sterile Growing Medium
After stratification, fill a 4-inch nursery pot with sterile seed-starting mix—eucalyptus seeds despise garden soil, which compacts and suffocates roots. Press the mix down gently to create a firm but not compacted surface. Scatter the seeds ¼ inch apart and barely cover them with a thin layer of mix—no deeper than ⅛ inch, or they’ll struggle to push through.
Moisten the soil lightly with a spray bottle until it’s evenly damp but not saturated. Overwatering now will cause seeds to rot before they sprout. Place the pot in a clear plastic dome or seal it with plastic wrap to maintain high humidity. This step is critical: eucalyptus seeds need consistent moisture to germinate, and the dome prevents the soil from drying out too quickly.
Provide Warmth and Indirect Light for Germination
Move the pot to a location with indirect light and 70-75°F temperatures—avoid direct sun, which can overheat the seeds. A seedling heat mat set to 75°F works wonders if your home runs cooler. Germination typically takes 2-4 weeks, but some seeds may take up to 6 weeks, so patience is key. You’ll know it’s working when the first tiny green shoots emerge, signaling the seed coat has broken.
Once sprouts appear, remove the dome immediately to prevent fungal growth. Keep the soil consistently moist—not soggy, not dry—by misting lightly every 2-3 days. If the top layer dries out, the seeds will die before they can establish roots. At this stage, eucalyptus seedlings are delicate, so avoid disturbing them unless necessary.
Transplant Seedlings to Individual Pots for Stability
When seedlings reach 2 inches tall and develop 2-3 true leaves, it’s time to transplant them into 3-inch pots filled with the same sterile mix. Gently lift each seedling by its leaves (never the stem) and place it in its new home, burying it to the same depth it was growing before. Firm the soil lightly around the base to eliminate air pockets.
Water thoroughly after transplanting, then reduce frequency to once every 5 days, allowing the top ½ inch of soil to dry slightly between waterings. Eucalyptus seedlings thrive in bright, indirect light—a south-facing window with sheer curtains works well. If you notice leaves yellowing or stems stretching, your light source isn’t strong enough, and you’ll need to supplement with a grow light kept 6 inches away for 12 hours daily.
Acclimate and Transition to Outdoor Conditions
After 8-10 weeks, when seedlings are 4-6 inches tall, begin hardening off by placing them outside in a shaded, sheltered spot for 1-2 hours the first day. Gradually increase their outdoor time over 2 weeks, exposing them to morning sun first before moving to full sun by day 14. This slow transition prevents shock and ensures they develop the resilience needed for outdoor life.
Once hardened off, transplant eucalyptus seedlings into the ground in a well-draining, sandy soil mix with full sun exposure. Space them 8-10 feet apart to allow for mature growth. Water deeply once a week during the first year, focusing on the root zone rather than overhead spraying. With proper care, your eucalyptus will grow into a sturdy, fragrant tree in just a few seasons.
Tips & tricks for perfect eucalyptus seed propagation
Mastering eucalyptus seed germination requires precision—especially with moisture and temperature control. These refined techniques will help you achieve that promised 90% success rate without common pitfalls.
Moisture Precision in Stratification: When preparing your ziplock bag with 1 tablespoon of moistened potting mix, aim for the consistency of a wrung-out sponge—not damp, not wet. The condensation on the bag walls after 7 days is your visual cue that moisture levels are perfect. Too much water creates anaerobic conditions that suffocate seeds, while too little prevents dormancy breaking. I've found that gently pressing the mix between paper towels before sealing removes excess moisture without drying it out.
Temperature Consistency During Stratification: While the refrigerator's crisper drawer maintains around 40°F, some fridges can vary by 5-10°F between shelves. For maximum reliability, place your bag on the middle shelf where temperatures are most stable. The 4-6 week range accounts for natural seed variability—some varieties germinate faster, others slower. If you're using a seed stratification mat set to 40°F, monitor it daily to ensure it maintains this critical temperature without fluctuations.
Sowing Technique for Optimal Germination: When scattering seeds ¼ inch apart in your 4-inch nursery pot, use a toothpick to create shallow divots rather than pressing seeds directly onto the surface. This ensures proper seed-to-soil contact while maintaining that critical ⅛ inch coverage. The sterile seed-starting mix should be pressed firmly but not compacted—think of it as firming a cake batter. This creates the ideal balance of aeration and moisture retention for delicate eucalyptus seeds.
Light Management During Germination: The 70-75°F temperature range for germination is precise, but light conditions are equally critical. While indirect light is essential, avoid placing your pot near windows with temperature fluctuations (like south-facing windows in summer). Instead, position it under a fluorescent light bulb kept 12 inches away—this provides consistent warmth without the heat spikes that come from direct sunlight. The moment you see those first tiny green shoots emerge, remove the plastic dome immediately to prevent fungal growth while maintaining humidity through your misting routine.
Pro Tips for Eucalyptus Seed Propagation
- Mastering eucalyptus seed germination requires precision—especially with moisture and temperature control. These refi...
- Moisture Precision in Stratification: When preparing your ziplock bag with 1 tablespoon of moistened potting mix, aim...
- Temperature Consistency During Stratification: While the refrigerator's crisper drawer maintains around 40°F, some fr...
Frequently asked questions
Got questions about growing eucalyptus from seeds?
You’re not alone! Here are answers to the most common concerns—so you can confidently start your propagation journey with the cold-moist method and achieve that 90% germination success.
How long does eucalyptus seed germination take?
Germination typically takes 3–12 weeks, depending on species and conditions. With the cold-moist method, most seeds sprout within 4–8 weeks if kept consistently moist (not soggy) and in a cool, dark environment. Patience is key—some slow growers may take longer!
Why do I need to refrigerate the seeds?
The cold-moist method mimics eucalyptus seeds’ natural dormancy cycle. Refrigeration (35–40°F) for 4–6 weeks breaks dormancy, ensuring higher germination rates. Without this step, many seeds may stay dormant or rot. Think of it as a wake-up call for your seeds!
Can I use regular potting soil for germination?
No—use a sterile, well-draining mix like perlite, vermiculite, or a 50/50 blend of peat moss and sand. Regular potting soil can compact, trap moisture, and promote mold. Keep the medium light and airy to prevent rot while maintaining humidity.
What if my seeds mold or rot?
Mold or rot usually means too much moisture or poor airflow. If you spot fuzzy white/green mold, discard the batch and start fresh with sterilized containers. To prevent this:
- Use a fine mist to water (no soaking!).
- Cover trays with clear plastic wrap (remove daily to air out).
- Add a fungicide like hydrogen peroxide (3%) to water if needed.
Are there faster alternatives to seed propagation?
Yes! For quicker results, consider:
- Cutting propagation: Use semi-hardwood cuttings in spring/summer (root in 2–4 weeks).
- Layering: Bend low branches to the ground and cover with soil (roots form in 2–3 months).
- Grafting: Advanced method for rare species (requires skill).
Wrapping up and next steps
Mastering the cold-moist method for eucalyptus seed propagation unlocks a 90% germination success rate—proof that patience and precision pay off! 🌱 Whether you're a seasoned gardener or a curious beginner, these steps empower you to grow thriving eucalyptus trees from scratch.
Now that you’ve got the know-how, roll up your sleeves and start sowing—your future shade trees (or pollinator haven!) are waiting.
Next step: Gather your seeds, set up your propagation station, and watch those tiny sprouts emerge with confidence. Happy growing! 🌿