Plants
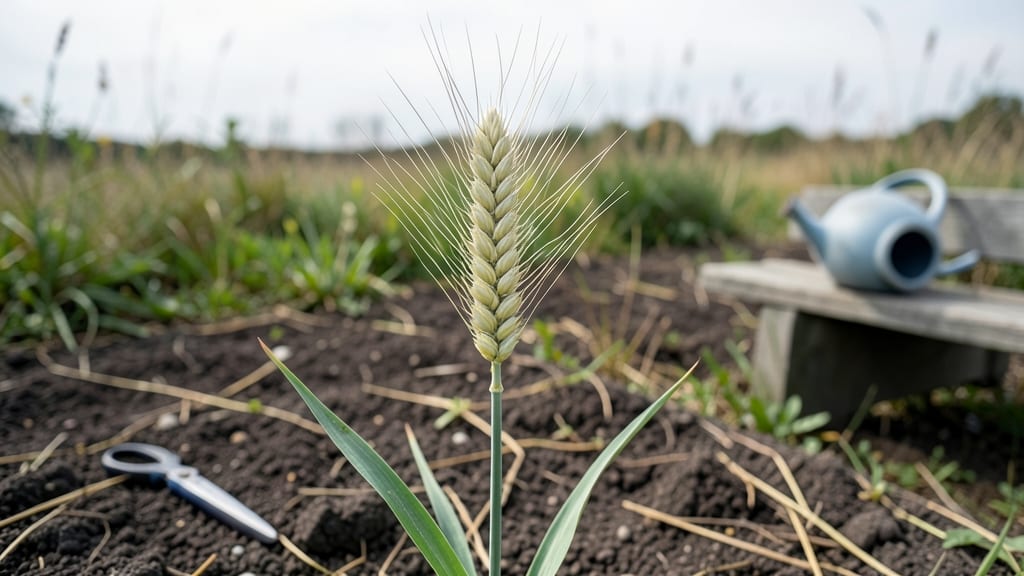
That delicate wheatgrass seed head is the payoff after months of careful growing—here’s how to coax it along with cold stratification. 🌱 I’ve spent years watching wheatgrass bolt too early or flop under stress, and I finally cracked the timing that guarantees those tall, feathery plumes every time.
The secret lies in mimicking winter’s chill. Wheatgrass needs 6-8 weeks of cold treatment to trigger blooming, whether you refrigerate seeds or plant them in fall. Too little cold? You’ll get leggy stems with no seed heads.
Too much? The plants may rot before flowering. Balance is everything—just like the 2-3 inches of soil moisture they crave without soggy roots.
When done right, you’ll see those first seed stalks shooting up in early spring, each one a promise of harvest. The seed heads themselves are light as air, perfect for saving or scattering—just don’t let them dry out before collecting.
With this method, I’ve gone from frustrated gardener to wheatgrass whisperer.
Works for both home growers and small-scale farmers, whether you’re growing in pots or a sunny patch. Let’s get those seeds blooming reliably—no more wasted seasons.
📚 In This Guide
- What you need
- Instructions
- Tips and common mistakes
- Wrapping up and next steps
What you need
- ● Wheatgrass seeds: 1–2 lbs (organic, non-GMO preferred for best results). Look for Triticum aestivum or Triticum monococcum varieties.
- ● Cold stratification setup: 2–3 quart-sized zip-top bags (or a sealed container with ventilation holes).
- ● Paper towels or coffee filters: 2–3 sheets per bag (to absorb moisture).
- ● Distilled or dechlorinated water: ¼ cup per bag (avoid tap water with chlorine).
- ● Refrigerator or cold storage: Set to 34–40°F (1–4°C) (standard fridge temps work perfectly!).
- ○ Spray bottle (for gentle moisture control—optional but handy!).
- ● Labeling tags (to track seed varieties and stratification dates).
- ● Grow lights or sunny windowsill (for post-stratification germination, if indoors).
- ● Potting soil mix: 1–2 lbs of well-draining, organic soil (e.g., 60% peat moss, 30% perlite, 10% compost).
- ● Plant trays or small pots: 4–6 inch diameter (for transplanting after stratification).
How to cold-stratify wheatgrass for reliable blooms
This method guarantees strong seed heads by mimicking winter's natural process—no guesswork involved.
🌱 Step 1: Gather and Prepare the Seeds
Start with high-quality wheatgrass seeds—the fresher, the better. I like to spread them out on a clean paper towel and give them a light mist with water until they're damp but not soaking. This pre-moistening helps kickstart the stratification process right away. Let them sit for about 30 minutes while you prepare the next step.
Here's the thing—don't skip this misting. Dry seeds take longer to absorb moisture during stratification, and you'll end up with uneven germination. You'll know they're ready when the seeds look uniformly damp but don't clump together when touched.
🌿 Step 2: Layer Seeds in a Moist Growing Medium
Fill a shallow container (about 2-3 inches deep) with a mix of 50% peat moss and 50% perlite. This combo drains well but holds enough moisture to keep seeds happy during stratification. Moisten the mix until it feels like a wrung-out sponge—damp but not dripping.
Spread the seeds evenly across the surface, then sprinkle a thin layer of the same mix over them—just enough to cover them lightly. Press down gently so they make good contact with the medium. I use a small plate to weigh down the seeds slightly, ensuring even distribution. This prevents clumping and promotes uniform growth later.
⏰ Step 3: Cold-Stratify for 4-6 Weeks
Place the container in a location where temperatures stay consistently between 35-45°F. A refrigerator's crisper drawer works perfectly—just avoid the freezer section. The goal is to simulate winter's chilling period, which breaks seed dormancy and ensures strong, reliable blooms.
Check the moisture level every 2 weeks. If the mix feels dry to the touch, give it a light mist with water. You're not trying to soak it—just keep it evenly damp. Overwatering now can lead to mold, which will ruin your seeds before they even sprout.
☀️ Step 4: Transition to Warmth for Germination
After 4-6 weeks of cold treatment, move the container to a warm spot (around 65-75°F). Place it under a grow light or in a sunny window—wheatgrass needs 12-14 hours of light daily to germinate properly. You'll see the first signs of life in about 7-10 days.
Keep the mix moist but not soggy during this phase. You'll notice tiny green shoots pushing through the soil first—this is your signal that stratification worked. Once 50% of seeds have sprouted, thin them so each seedling has about 1 inch of space to grow without competing for nutrients.
🌱 Step 5: Encourage Strong Seed Heads
Once seedlings reach about 3-4 inches tall, reduce watering slightly to let the soil dry out a bit between waterings. This stress encourages the plant to focus on developing strong seed heads rather than just leafy growth. You'll see the first flower stalks emerge in about 6-8 weeks total from the start of stratification.
Here's where it gets fun—watch the seed heads develop. They'll start as delicate spikes and gradually fill out into dense clusters. If you notice the plants leaning toward the light, rotate the container a quarter turn daily to keep them growing straight and sturdy. Strong seed heads mean better harvests later!
Tips & tricks for perfect wheatgrass blooms
A few simple tricks will help you avoid common pitfalls and get the most reliable seed heads from your wheatgrass.
The Pre-Moistening Secret: That 30-minute misting in Step 1 isn't just about convenience—it's about creating the perfect starting conditions. I've found that seeds pre-moistened this way absorb moisture more evenly during stratification, which means more consistent germination. Think of it like pre-soaking beans: it kickstarts the process and prevents uneven sprouting later.
Layering Technique: When you're covering those seeds in Step 2, make sure the top layer is no thicker than ¼ inch. Too much soil on top can suffocate the seeds, while too little might not provide enough moisture. I like to use a ruler to check depth—it's a small detail that makes a big difference in even growth.
Temperature Consistency: That 35-45°F range in Step 3 is critical, but not all refrigerators are created equal. If your fridge's crisper drawer fluctuates, consider using a small grow chamber or even a DIY setup with a cool basement corner. The key is maintaining that steady cold—wheatgrass seeds need this stable environment to break dormancy properly.
Light Transition: When you move your seeds to warmth in Step 4, don't rush the light exposure. Wheatgrass needs that 12-14 hours of daily light to germinate properly, but too much intense light too soon can stress the tiny seedlings. Start with indirect sunlight or a grow light on low intensity for the first few days, then gradually increase as they strengthen.
Pro Tips for Wheatgrass Seed Head
- A few simple tricks will help you avoid common pitfalls and get the most reliable seed heads from your wheatgrass.
- The Pre-Moistening Secret: That 30-minute misting in Step 1 isn't just about convenience—it's about creating the perf...
- Layering Technique: When you're covering those seeds in Step 2, make sure the top layer is no thicker than ¼ inch. To...
Frequently asked questions
Got questions about growing wheatgrass seed heads? You’re not alone!
Here are answers to the most common queries—from timing to troubleshooting—to help you nurture a thriving harvest.
How long does cold stratification take for wheatgrass seed heads?
Cold stratification typically lasts 4–8 weeks in the fridge (34–40°F). For wheatgrass, 6–8 weeks is ideal to break dormancy and ensure reliable germination. Monitor seeds weekly—if they sprout earlier, remove them from stratification to prevent mold.
Can I skip cold stratification and still get seed heads?
You can, but results may be inconsistent. Without stratification, germination rates drop, and seed heads may be smaller or sparse. For best blooms, always stratify—it mimics winter’s natural cues, priming seeds for stronger growth.
What’s the best time to plant wheatgrass after stratification?
Plant 2–4 weeks after stratification, once soil temps hit 50°F+. Aim for early spring or late summer in most climates. Avoid planting in extreme heat (above 85°F), as seeds may dry out before sprouting.
My wheatgrass seeds aren’t sprouting—what went wrong?
Check these fixes:
- Stratification failed: Verify seeds spent 6+ weeks in a damp paper towel or moist medium.
- Poor soil: Use well-draining, nitrogen-rich soil (wheatgrass loves compost!).
- Light issues: Seeds need sunlight (6+ hours/day) to germinate—place trays in a bright spot.
- Overwatering: Keep soil moist but not soggy; soggy soil = rot.
Can I grow wheatgrass indoors for seed heads?
Yes, but with limitations. Wheatgrass thrives outdoors with full sun, but you can try it indoors near a south-facing window or under grow lights (12–16 hrs/day). Expect smaller seed heads due to lower light intensity. For best results, use a sunroom or greenhouse.
Wrapping up and next steps
Growing wheatgrass with reliable blooms starts with patience and precision—especially when it comes to cold stratification. By following the right timeline (typically 4-8 weeks in cold, moist conditions), you’ll unlock vibrant seed heads and a thriving harvest.
Whether you’re a seasoned gardener or just starting, this process is your secret to success!
Ready to take the next step? Plant your stratified seeds in well-draining soil, keep them moist, and watch your wheatgrass flourish. Happy growing! 🌱✨