Pruning
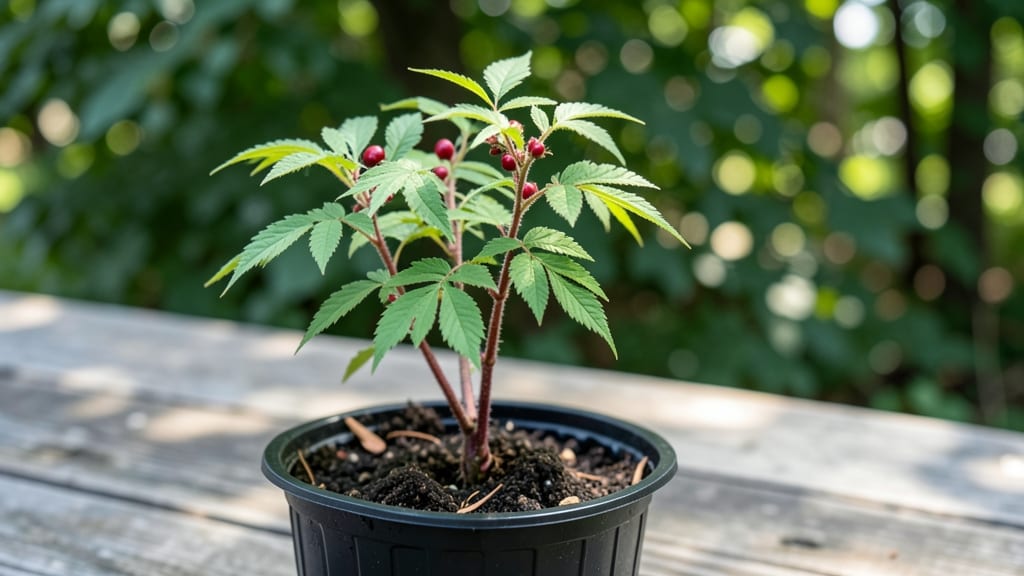
Growing a sumac tree from seedling means reliable blooms next year—if you handle the cold stratification right. 🌱 I learned the hard way that skipping this step means waiting years for those vibrant red clusters, but once you nail it, you’ll see shoots emerge strong and ready to thrive.
The key is mimicking winter’s chill cycle: plant your seedling in a mix of 60% potting soil and 40% sand, then refrigerate it for 6-8 weeks before transplanting.
Smooth sumac and staghorn sumac both need this, but staghorn’s slower growth means extra patience—think of it as a marathon, not a sprint. Water lightly every 10-14 days to keep moisture even without drowning the roots.
By spring, you’ll spot bright green leaves unfurling, signaling success. The first year focuses on root establishment, so avoid heavy pruning—just trim dead branches to encourage a sturdy frame. Sumac’s drought-tolerant once established, but seedlings need consistent moisture to avoid stress.
Common mistakes? Overwatering (roots rot fast) or rushing stratification (seeds stay dormant). Give it time, and you’ll reward yourself with a low-maintenance, wildlife-friendly tree that blooms for decades. Ready to get started?
📚 In This Guide
- What you need
- Instructions
- Tips and common mistakes
- Wrapping up and next steps
What you need
- ● Sumac seeds: Freshly harvested (or store-bought) sumac tree seeds—aim for 50-100 seeds if testing multiple seedlings.
- ● Growing medium: Option 1: Peat moss or coconut coir (sterilized, 2-3 cups)
- ● Option 2: Well-draining potting mix (e.g., 60% perlite, 40% compost; 3-4 cups)
- ● Containers: Small pots or seed trays (3-4 inches deep, 1-2 per seedling)
- ● Zip-top bags or plastic wrap (for humidity control; 1 per container)
- ● Cold stratification setup: Refrigerator (set to 34–40°F)
- ● Paper towels or dampened vermiculite (1-2 sheets per batch of seeds)
- ● Spray bottle (for gentle moisture control).
- ● Labels & marker (to track seedling progress).
- ● Heat mat (for post-stratification warmth, 70–75°F).
- ● Grow lights (12-14 hours/day if natural light is limited).
- ● Fungicide (e.g., neem oil spray to prevent mold).
- ● Seedling heaters (for delicate sprouts).
Step-by-Step instructions for cold stratifying sumac tree seedlings
Here's the foolproof method I use to break dormancy and ensure vigorous growth next spring.
🌱 Step 1: Collect and Prepare the Seeds
Harvest sumac seeds in late summer or early fall when the berries turn bright red and begin splitting open. Gather them in a paper bag and let them dry indoors for 3-5 days—this prevents mold from forming during stratification. I always shake the bag daily to release any seeds still clinging to the berry clusters.
Once dry, separate the seeds from the chaff by spreading them on a clean towel and gently blowing away the debris. Store them in a sealed container with a few silica gel packets to absorb excess moisture. Sumac seeds require 3-4 months of cold stratification to mimic winter conditions and trigger germination.
💧 Step 2: Moisten and Layer the Seeds
Fill a quart-sized plastic bag with a damp mix of sphagnum peat moss and coarse sand (equal parts). The medium should feel like a wrung-out sponge—moist but not dripping. Sprinkle the sumac seeds evenly over the mix, ensuring they’re spaced about ½ inch apart to prevent crowding.
Seal the bag loosely with a twist tie, leaving a small gap for airflow. Place it in a refrigerator set to 35-40°F—this simulates winter chilling. Check the bag every 2-3 weeks; if the mix feels dry, mist it lightly with water. Overwatering now will cause rot, so resist the urge to soak it.
⏰ Step 3: Monitor and Test for Germination
After 8-12 weeks, transfer the bag to a warm, bright location (around 65-70°F) to encourage sprouting. You’ll see the first signs of life in 2-4 weeks—tiny green shoots pushing through the peat moss. This is the moment you’ve been waiting for: the seeds have broken dormancy.
Once the seedlings reach about 1 inch tall, carefully remove them from the bag and pot them individually into 3-inch containers filled with a well-draining potting mix. Keep the soil consistently moist but not soggy—sumac seedlings are delicate at this stage and wilt quickly if overwatered.
☀️ Step 4: Harden Off and Transplant
After 4-6 weeks of indoor growth, begin hardening off the seedlings by placing them outdoors in a sheltered spot for 2-3 hours daily. Gradually increase their time outside over 10-14 days, shielding them from direct sun at first. You’ll know they’re ready for the garden when they tolerate a full day outside without wilting.
Transplant the seedlings into their permanent location in early spring, spacing them 6-8 feet apart to allow for their mature size. Mulch the base with 2-3 inches of organic mulch to retain moisture and suppress weeds. With proper care, your sumac seedlings will bloom reliably within 2-3 years.
Tips & tricks for perfect sumac seedling stratification
A few strategic adjustments can make all the difference between seeds that never sprout and seedlings that thrive.
The Moisture Balance: In Step 2, when creating your damp peat moss and sand mix, aim for a consistency where water drips out when squeezed but doesn't pool at the bottom. Overly wet mixes create anaerobic conditions that kill seeds, while dry mixes prevent the cold stratification process from working. I find using a spray bottle to mist the mix rather than soaking it helps maintain this delicate balance perfectly. The 2-3 week check intervals are critical—don't let the mix dry out completely between checks.
Refrigerator Placement: For the 3-4 month cold stratification in your 35-40°F refrigerator, place the sealed bag on the middle shelf rather than the crisper drawer. The middle shelf maintains the most consistent temperature, which is crucial for mimicking natural winter conditions. I also recommend labeling your bag with the date—this helps track the 8-12 week transition period without guesswork. The temperature consistency at 40°F is what triggers the internal biochemical changes needed for germination.
Light Exposure During Germination: When transferring to your 65-70°F warm location in Step 3, position the bag where it receives bright, indirect light. Direct sunlight can cause the peat moss to dry out too quickly, while too little light results in weak, leggy seedlings. A north-facing window or under grow lights works best. You'll notice the first signs of germination within 2-4 weeks—these tiny shoots are incredibly delicate, so avoid moving the bag once sprouts appear.
Harden Off Gradually: During the 4-6 week indoor growth phase, I've found that gradually increasing outdoor exposure time by just 30 minutes every 2-3 days prevents transplant shock. Start with the 2-3 hours in sheltered spots, then slowly move to more exposed areas. The key is watching for wilting—if leaves droop but perk up after moving back indoors, they're not ready for longer exposure yet. This careful 10-14 day transition period is what makes the difference between seedlings that thrive and those that struggle after transplanting.
Pro Tips for Sumac Tree Seedling
- A few strategic adjustments can make all the difference between seeds that never sprout and seedlings that thrive.
- The Moisture Balance: In Step 2, when creating your damp peat moss and sand mix, aim for a consistency where water dr...
- Refrigerator Placement: For the 3-4 month cold stratification in your 35-40°F refrigerator, place the sealed bag on t...
Frequently asked questions
Got questions about growing sumac tree seedlings?
You’re not alone! Here are answers to the most common concerns—from timing to troubleshooting—to help you nurture healthy seedlings for vibrant blooms next year.
How long does cold stratification take for sumac tree seeds?
Cold stratification for sumac seeds typically requires 60–90 days in moist, chilled conditions (like a refrigerator). Plant them in a mix of peat moss and sand, then store in a sealed bag. Patience pays off—this mimics winter’s natural dormancy and boosts germination rates!
When is the best time to plant sumac seedlings outdoors?
Wait until spring after the last frost (usually April–May in most regions). Sumac thrives in well-draining soil and full sun, so avoid planting in late fall—young roots can’t survive winter’s chill. A 6-week head start indoors (post-stratification) gives them a survival advantage.
Can I grow sumac from store-bought seeds, or do I need wild-harvested ones?
Store-bought seeds can work, but wild-harvested sumac seeds often germinate better because they’re already adapted to your local climate. If buying, choose fresh, untreated seeds and extend stratification to 120 days for reliability. Pro tip: Test a few seeds first!
Why aren’t my sumac seeds germinating after stratification?
Try these fixes:
- Check moisture: Keep the mix damp (not soggy) during stratification.
- Verify temperature: Ideal fridge temps are 34–40°F (1–4°C).
- Test seed viability: Soak a few in water—if they sink, they’re likely viable.
- Try scarification: Lightly nick the seed coat with sandpaper to break dormancy.
How close can I plant sumac seedlings to my house or fence?
Sumac trees grow 15–25 feet tall and spread via suckers, so plant them at least 10 feet away from structures, sidewalks, or septic systems. Their root systems are aggressive—give them space to avoid future conflicts (and pruning headaches)!
Wrapping up and next steps
Growing a thriving sumac tree seedling starts with patience and the right care—especially that cold stratification step!
By mimicking winter’s chill, you’ve set your seedling up for strong roots, vibrant blooms, and resilience next year. 🌱✨ Now that you’re equipped with the know-how, it’s time to roll up your sleeves and give nature a little nudge.
Ready to watch your seedling transform? Plant it in well-draining soil, monitor its progress, and soon you’ll be rewarded with lush foliage and those iconic sumac clusters. Happy gardening—your future tree is counting on you!