Trees
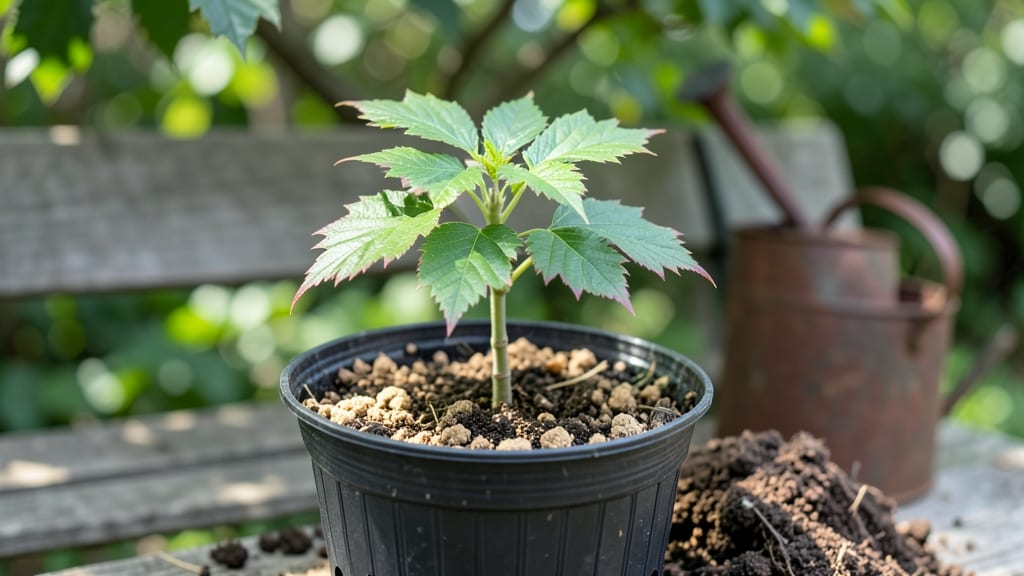
Growing sugar maple seedlings from seed takes patience, but the payoff—a towering shade tree with brilliant fall color—makes every step worthwhile. 🌿 I’ve learned the hard way that skipping cold stratification means months of waiting for germination that may never come.
The secret lies in mimicking nature’s timing, and once you nail it, your seedlings will emerge strong and ready to thrive.
You’ll need fresh seeds, a mix of peat moss and perlite, and a refrigerator for the 60-90 day cold treatment that breaks their dormancy. Plant them in a shallow tray, keep the soil barely damp, and place them in the fridge—no need for fancy equipment.
After stratification, move them to a sunny windowsill or under grow lights, and watch for those first tiny leaves within 2-4 weeks.
By the time they’re ready for the ground, your seedlings will be 3-6 inches tall and ready to handle transplant shock. The key is giving them partial shade at first and consistent moisture—sugar maples hate soggy roots but also can’t handle drought.
Within 5 years, you’ll see them shooting up toward the sky, their leaves turning that iconic fiery red in autumn.
This method works best in zones 4-8, where sugar maples thrive naturally. If you’re in a warmer climate, extend the cold treatment or plant in a protected microclimate.
The real magic happens when you step back in 10 years and see the tree you nurtured from a seedling finally casting shade over your yard.
📚 In This Guide
- What you need
- Instructions
- Tips and common mistakes
- Wrapping up and next steps
What you need
- ● Sugar maple seeds: 5–10 fresh, viable seeds (harvested from healthy trees in fall). Pro tip: 💡 Store seeds in a cool, dry place until stratification begins!
- ● Cold stratification setup: 1–2 paper towels or moistened peat moss (to keep seeds hydrated)
- ● 1 resealable plastic bag (quart-sized) or airtight container (like a Tupperware)
- ● 1 refrigerator (set to 35–40°F for stratification)
- ● Potting mix: 1 10-inch pot or seedling tray filled with well-draining, acidic soil (pH 4.5–6.0). Mix 2 parts peat moss + 1 part perlite + 1 part sand for ideal drainage.
- ● Grow lights or sunny windowsill: A full-spectrum LED grow light (12–16 hours/day) or a south-facing window (for natural light).
- ● Misting bottle or spray nozzle: For gentle watering (avoid over-saturating seeds!).
- ○ Humidity dome or plastic wrap: To maintain moisture during germination (optional but helpful!).
- ● Seedling heat mat: Keeps soil warm (70–75°F) to speed up germination after stratification.
- ● Soil moisture meter: Ensures you’re not over- or under-watering.
- ● Fertilizer: A balanced, water-soluble fertilizer (5-5-5 NPK) diluted to half-strength for young seedlings.
- ● Pruning shears: For trimming leggy growth or shaping the seedling later.
- ● Garden journal: To track stratification dates, germination progress, and growth milestones!
Step-by-step instructions for growing sugar maple seedlings from seed
Cold stratification is the secret to breaking sugar maple dormancy—here’s how to do it right for strong, reliable seedlings.
🌱 Step 1: Collect and Prepare Fresh Seeds
Sugar maple seeds (samaras) must be fresh—use only those collected in late summer or early fall when the wings are fully formed but still green. Remove the seeds from their samara pods by gently twisting them free. Store them in a paper bag (not plastic) in the refrigerator for 30-60 days to mimic natural winter conditions. This cold period softens the seed coat and jumpstarts germination.
If you’re working with older seeds, soak them in lukewarm water for 24 hours before stratification to rehydrate the embryo. Discard any seeds that float—they’re nonviable. I like to label my seeds with the collection date to track stratification progress, since older seeds may need an extra 10-14 days in cold storage.
❄️ Step 2: Stratify Seeds for 60-90 Days
Fill a sealed plastic bag with damp (not soggy) peat moss or vermiculite—just enough to cover the seeds when layered inside. Place the seeds 1 inch apart in a single layer, then seal the bag tightly. Store it in your refrigerator’s crisper drawer (or a cold garage) where temperatures stay between 35-45°F.
Check the bag every 14 days—the peat moss should stay moist but not dripping. If condensation forms on the bag’s interior, let it sit open for 30 minutes to air out. After 60 days, transfer the bag to a 60-70°F environment (like a sunny windowsill) to simulate spring thaw. Germination typically begins within 7-21 days after this shift.
🌿 Step 3: Sow Stratified Seeds in Growing Medium
Fill a seed tray with a mix of 50% peat moss and 50% perlite—this lightweight blend prevents damping-off while allowing roots to establish quickly. Plant stratified seeds ¼ inch deep, spacing them 2 inches apart to avoid overcrowding. Gently press the soil around each seed to ensure good contact, then mist the surface with water until evenly moist.
Cover the tray with a clear plastic dome or plastic wrap to retain humidity, but remove it daily for 10 minutes to prevent fungal growth. Place the tray in a bright, indirect light spot—direct sun will dry out the soil too quickly. You’ll see the first true leaves (not the initial seed leaves) emerge within 4-6 weeks, signaling it’s time to thin.
☀️ Step 4: Transplant and Acclimate Seedlings
Once seedlings reach 3-4 inches tall and develop 4-5 true leaves, transplant them into individual 4-inch pots filled with a well-draining potting mix. Handle seedlings by their leaves (never the stems) to avoid damage. Water thoroughly after transplanting, then place the pots in a shaded outdoor area for 1 week to harden off.
Gradually introduce seedlings to morning sun only for the first 3 days, then extend exposure to full sun by day 5. This slow transition prevents leaf scorch. After 2 weeks, you can plant them outdoors in a partial shade to full sun location, spacing them 10 feet apart to allow for mature growth. Mulch around the base with 2-3 inches of organic mulch to retain moisture and regulate soil temperature.
⏰ Step 5: Maintain Through First Growing Season
Water seedlings deeply once weekly during dry spells, ensuring the soil stays consistently moist but not waterlogged. Sugar maples are drought-tolerant once established, but young seedlings need steady moisture. You’ll know they’re thriving when new leaves emerge every 2-3 weeks and the stems develop a slight woody texture by fall.
Fertilize lightly in early spring with a balanced 10-10-10 fertilizer applied at half strength. Avoid high-nitrogen fertilizers—they promote leafy growth at the expense of root development. By their third year, seedlings will be ready for their permanent planting location, where they’ll grow 1-2 feet annually under optimal conditions.
Tips & tricks for perfect sugar maple seedling growth
Cold stratification might seem like a waiting game, but these key strategies will maximize your success rate and ensure strong, healthy seedlings.
Seed Selection and Preparation: When collecting samaras in late summer or early fall, look for seeds with fully formed wings that are still green—not dried or brittle. The 30-60 day cold storage period in a paper bag is critical for breaking dormancy, but don't skip the float test after soaking older seeds for 24 hours. Any seeds that float are nonviable and should be discarded immediately. I've found that labeling seeds with collection dates helps track stratification progress, especially since older seeds may need that extra 10-14 days in cold storage.
Stratification Environment: The 35-45°F temperature range in your refrigerator's crisper drawer is ideal, but consistency matters more than exact degrees. I've had success using a cold garage when refrigerator space is limited, just monitor the temperature with a thermometer. That 14-day check-in is crucial—peat moss should stay damp but never soggy. If you notice condensation, let the bag air out for exactly 30 minutes to prevent mold while maintaining moisture. After the 60-day cold period, the sudden shift to 60-70°F triggers germination, which typically begins within 7-21 days.
Sowing Technique: The 50% peat moss and 50% perlite mix creates perfect drainage while preventing damping-off disease. When planting seeds ¼ inch deep and 2 inches apart, use a toothpick to create small holes—this prevents damaging the delicate seed coats. After sowing, mist until evenly moist but not saturated. The daily 10-minute dome removal is essential for preventing fungal growth while maintaining humidity. I've found that placing trays under grow lights (instead of direct sun) during the first 4-6 weeks gives more consistent results than windowsill locations.
Transplanting Timing: Wait until seedlings reach 3-4 inches tall with 4-5 true leaves before transplanting to 4-inch pots. This size ensures they have enough energy reserves for the transition. When hardening off, that first week in shaded outdoor conditions is critical—gradually increasing sun exposure prevents leaf scorch. After 2 weeks, you can plant outdoors, but remember that sugar maples need 10 feet of spacing for mature growth. The 2-3 inches of organic mulch helps regulate soil temperature and retain moisture during the first growing season.
Pro Tips for Sugar Maple Seedling
- Cold stratification might seem like a waiting game, but these key strategies will maximize your success rate and ensu...
- Seed Selection and Preparation: When collecting samaras in late summer or early fall, look for seeds with fully forme...
- Stratification Environment: The 35-45°F temperature range in your refrigerator's crisper drawer is ideal, but consist...
Frequently asked questions
Got questions about nurturing your sugar maple seedling? You’re not alone! Here are answers to the most common concerns—from timing to troubleshooting—to help your young tree thrive.
How long does cold stratification take for sugar maple seeds?
Cold stratification typically requires 60–90 days in moist, refrigerated conditions (33–41°F) to mimic winter. For best results, start this process in late fall (October–November) so seedlings can be planted in early spring. Pro tip: Use a damp paper towel or peat moss in a sealed bag for even moisture!
When is the best time to plant a sugar maple seedling outdoors?
Plant your seedling in early spring (March–April) or fall (September–October), after the soil is workable but before extreme heat or frost. Avoid transplanting during summer heatwaves—root stress can set back growth. Pro tip: Water deeply 1–2 weeks before planting to reduce shock.
Can I grow a sugar maple from seed instead of buying a seedling?
Yes, but it’s time-consuming and less reliable! Seeds need stratification, then 1–2 years of nursery care before transplanting. Seedlings from reputable nurseries (1–2 years old) are hardier and bloom faster. Pro tip: If starting from seed, expect 3–5 years before seeing maple syrup potential!
Why is my sugar maple seedling wilting or turning yellow?
Wilting often signals overwatering or underwatering. Yellow leaves (chlorosis) may indicate nutrient deficiency (iron/zinc) or poor drainage. Check soil moisture—it should stay consistently damp but not soggy. Amend heavy clay soil with compost to improve aeration. Pro tip: Mulch around the base to retain moisture and regulate temperature.
How fast does a sugar maple seedling grow, and when will it produce syrup?
Seedlings grow 1–2 feet per year in ideal conditions, reaching maturity (syrup production) in 20–40 years. For syrup, you’ll need a tree at least 10–12 inches in diameter. Patience is key—focus on healthy growth now for future rewards! Pro tip: Prune in late winter to encourage strong sap flow later.
Wrapping up and next steps
Growing a sugar maple seedling is a rewarding journey that combines patience, care, and a touch of science—especially with cold stratification to unlock vibrant blooms. 🌱 By following the right timeline and conditions, you’ll set the stage for a thriving tree that’s both beautiful and ecologically valuable.
Ready to take the next step? Start your seedlings today, monitor their progress, and watch as your efforts bloom into a stunning canopy for years to come!
🌿 Pro Tip for Success:
- Keep a growth journal to track milestones—it’s a fun way to celebrate progress!
- Share your experience with fellow gardeners for tips and encouragement.