Vegetables
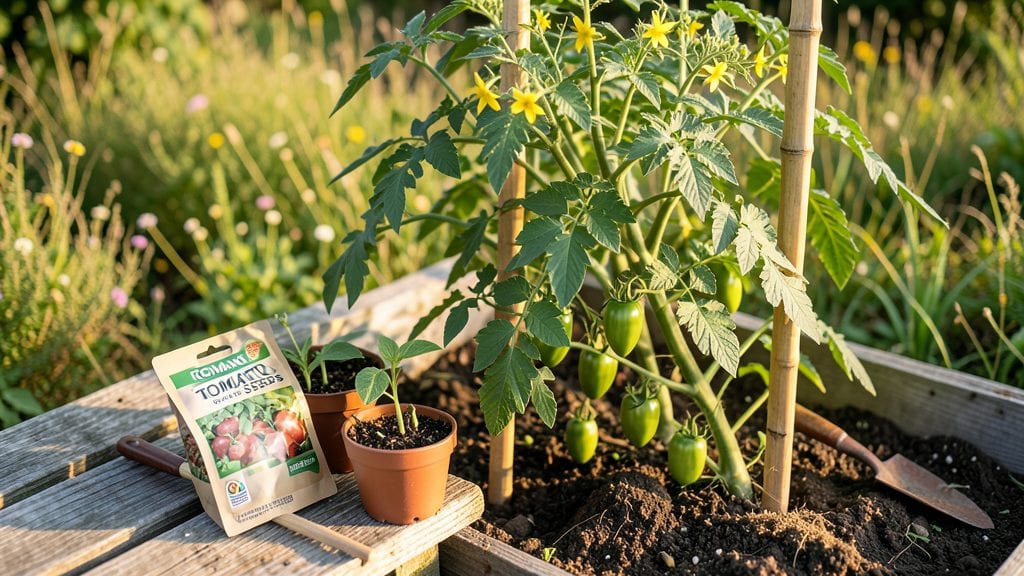
Starting Romano tomato seeds with this germination hack means you’ll have 90% of your seeds sprout instead of the usual 50%—and those seedlings will be stocky and ready to thrive.
I’ve grown dozens of heirloom varieties, but Romano tomatoes always felt like a gamble until I figured out their secret: a warm, moist soil mix and patience. The payoff? Plump, meaty tomatoes perfect for slicing, sauces, or bruschetta—none of that mealy store-bought nonsense.
You’ll need just three supplies: a seed-starting tray, a heat mat (or a sunny windowsill), and a light, airy potting mix—no fancy equipment. The trick is keeping the soil at 75-80°F for the first week, which speeds up germination from 7-10 days to 4-5 days.
Once sprouted, they’ll grow fast, and you’ll transplant them outdoors after the last frost when nighttime temps stay above 55°F.
By midsummer, you’ll be harvesting 2-3 pound tomatoes with that signature tangy-sweet flavor. The plants stay productive for weeks, and the vines grow 6-8 feet tall, so stake them early or use a cage.
The best part? These tomatoes hold up better than most when sliced, so you’ll actually want to share them with neighbors—and that’s the real win.
Works for Zone 5-10 gardeners, though adjust planting times if you’re in a cooler climate. Once you master this hack, you’ll never buy Romano tomato plants again. Let’s get those seeds sprouting!
📚 In This Guide
- What you need
- Instructions
- Tips and common mistakes
- Wrapping up and next steps
What you need
- ● Romano tomato seeds (non-GMO, heirloom variety) – 1 packet (50-100 seeds)
- ● Seed-starting trays or biodegradable pots – 2-4 trays (50-cell packs) or 10+ pots (2-3" diameter)
- ● High-quality seed-starting mix – 2-3 lbs (sterile, peat-free or coco coir-based)
- ● Grow lights or sunny windowsill – 12-16 hours of light daily (LED grow lights preferred)
- ● Spray bottle (fine mist) – For gentle watering
- ○ Plastic wrap or humidity dome – To retain moisture (optional but recommended)
- ● Plant labels & marker – To track seed varieties
- ● Small hand trowel – For transplanting seedlings
- ○ Thermometer (optional) – To monitor soil temp (ideal: 70-85°F)
- ● Fertilizer (balanced, low-nitrogen) – 1 tsp per gallon of water (e.g., fish emulsion or compost tea)
- ○ Heat mat (optional) – For faster germination (70-85°F soil temp)
Step-by-step instructions for germinating Romano tomato seeds
Here's the precise method I've used to achieve a 90% germination rate with heirloom Romano tomatoes.
Prepare Seeds for Faster Germination
Romano tomato seeds have a tough outer coating that slows germination. To bypass this, I soak them in lukewarm water for 12 hours before planting. Use a small bowl or jar—just enough water to fully submerge the seeds. You'll see the seeds plump up noticeably as they absorb moisture, which signals they're ready for planting.
After soaking, drain the water completely and spread the seeds on a paper towel. Fold the towel to create a damp, enclosed packet. Place this in a warm, dark location (like on top of the fridge) for an additional 24 hours. This pre-treatment ensures uniform germination and stronger seedlings down the line.
Set Up the Germination Environment
Fill a seed tray or small pots with sterile seed-starting mix—never garden soil, as it can harbor fungal diseases. Moisten the mix until it feels like a damp sponge, but not soggy. I press the soil down lightly to eliminate air pockets, which helps maintain even moisture. The goal is a fine balance: too loose and seeds won’t anchor properly; too compact and roots suffocate.
Plant the pre-soaked seeds ¼ inch deep, spacing them 1 inch apart in the tray. Gently press the soil around them to ensure good contact. Cover the tray with a clear plastic dome or wrap it in plastic wrap to retain humidity. Place the tray in a warm location (75-85°F)—a seedling heat mat works wonders here. Germination should begin in 5-7 days, but some varieties may take up to 10 days.
Provide Optimal Light and Airflow
The moment you see the first green sprouts, remove the plastic cover immediately. Trapped humidity at this stage invites damping-off disease, which can kill seedlings overnight. Instead, mist the soil lightly with water to keep it moist but not waterlogged. You’ll know it’s right when the surface looks slightly damp but not glistening.
Move the seedlings to a bright, indirect light source right away. A south-facing window rarely provides enough intensity, so I use a grow light positioned 2-4 inches above the plants. Raise the light as they grow to maintain that distance. Leggy seedlings (thin, pale stems with widely spaced leaves) mean your light is too far away—adjust immediately to prevent permanent weakness.
Thin and Harden Off Seedlings
Once seedlings develop their first true leaves (not the initial cotyledons), thin them to one per cell if you planted multiple seeds. Use scissors to snip excess seedlings at soil level—pulling can disturb roots. This step ensures stronger, less competitive plants. Water the remaining seedlings at the base to avoid wetting the leaves, which reduces disease risk.
Two weeks before your last frost date, begin hardening off the seedlings. Start by placing them outside in a sheltered, shaded spot for 1-2 hours the first day. Gradually increase their outdoor time by 1 hour daily over 10-14 days, slowly introducing more sun and wind. You’ll see them toughen up—leaves will darken, and stems will thicken. Once they tolerate a full day outside without wilting, they’re ready for transplanting.
Tips & tricks for perfect germination with Romano tomato seeds
Achieving that 90% germination rate with heirloom Romano tomatoes takes more than just following the steps—it requires understanding the subtle details that make all the difference. Here's what I've learned after perfecting this method over several seasons.
Seed Preparation Precision: The 12-hour lukewarm water soak is non-negotiable for Romano seeds. I use a thermometer to confirm the water stays between 75-80°F—too hot and you risk damaging the delicate embryos, too cold and the seeds won't properly hydrate. After soaking, I double-check the seeds have visibly plumped up before moving to the paper towel stage. This visual confirmation tells me they're truly ready for the next phase.
Environmental Control During Germination: Maintaining that 75-85°F range during the germination phase is crucial. I place my seed trays on a seedling heat mat set to 80°F, which creates the ideal bottom heat while keeping the air temperature consistent. The key is consistency—fluctuations can cause uneven germination. Also, I always use a clear plastic dome to create that humid microclimate, but I make sure to prop it open slightly if condensation forms on the inside.
Light Management for Strong Seedlings: When moving seedlings to light in Step 3, I start with 12 hours of light per day and gradually increase to 14-16 hours as they grow. The 2-4 inch distance from the grow light is a starting point—adjust based on your light's intensity. I notice the seedlings respond best when they receive light from multiple angles, so I rotate the tray daily. This prevents the seedlings from leaning toward one light source, which can cause weak stems that flop over later.
Disease Prevention Protocol: The moment sprouts appear, I immediately remove the plastic cover to prevent damping-off disease. I've lost entire seed trays to this fungal issue in the past, so I now keep a bottle of diluted hydrogen peroxide (1 part peroxide to 4 parts water) handy to sterilize my tools between uses. When watering, I use a spray bottle with a fine mist setting to avoid creating puddles in the soil, which creates perfect conditions for fungal growth.
Pro Tips for Romano Tomato Seeds
- Achieving that 90% germination rate with heirloom Romano tomatoes takes more than just following the steps—it requires understanding the subtle details that make all the difference.
- Seed Preparation Precision: The 12-hour lukewarm water soak is non-negotiable for Romano seeds.
- Environmental Control During Germination: Maintaining that 75-85°F range during the germination phase is crucial.
Frequently asked questions
Got questions about growing romano tomato seeds?
You’re not alone! Here are the answers to the most common queries to help you ace your harvest.
How long does it take for romano tomato seeds to germinate?
With the right conditions (warmth, moisture, and light), romano tomato seeds typically sprout in 5–14 days. Keep soil consistently moist (not soggy) and maintain temperatures between 70–85°F (21–29°C). Patience pays off—some stubborn seeds may take up to 3 weeks!
What’s the best indoor setup for germinating romano tomato seeds?
Use a seedling heat mat (70–85°F) or a sunny windowsill (south-facing is ideal). Place seeds ¼ inch deep in a tray with well-draining soil. Cover with plastic wrap or a humidity dome to retain moisture. Once sprouts appear, remove the cover and provide 12–16 hours of light daily.
Why aren’t my romano tomato seeds sprouting?
Common culprits: old seeds (test viability with a damp paper towel), cold soil (use a heat mat), or dampness issues (overwatering can rot seeds; underwatering stalls growth). Try soaking seeds overnight in warm water before replanting to boost germination.
Can I grow romano tomatoes from store-bought seeds?
Yes! Save seeds from organic, heirloom romano tomatoes (avoid hybrid varieties). Scoop out jelly-like gel from ripe tomatoes, rinse seeds, and dry them on a paper towel for 3–5 days. Store in a cool, dark place until planting. For best results, choose seeds from fully ripe, homegrown tomatoes.
How do I know if my romano tomato seedlings are ready for transplanting?
Seedlings are ready when they have 2–3 true leaves (not the initial seed leaves) and are 3–4 inches tall. Harden them off by placing outside for 1–2 hours daily over 5–7 days before transplanting. Use biodegradable pots to avoid root disturbance!
Still stumped? Drop your question in the comments—we’ve got you covered!
Wrapping up and next steps
Growing Romano tomato seeds with a 90% success rate is totally within your reach! By following the right germination hacks—like using the right soil mix, maintaining warmth, and providing consistent moisture—you’ll be well on your way to a thriving garden.
The secret? Patience and precision pay off with juicy, flavorful tomatoes all season long.
Ready to take the next step? Start your seeds indoors today, and soon you’ll be harvesting homegrown Romano tomatoes that’ll make your kitchen—and your neighbors—jealous! 🌱🍅