Propagation
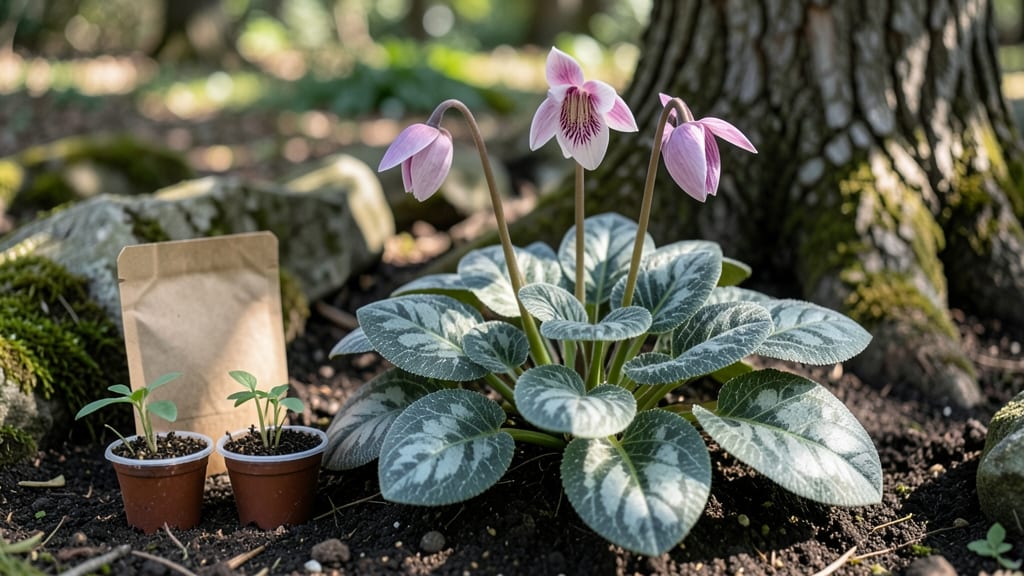
Growing cyclamen coum from seeds is a patience test that pays off with early spring blooms you won’t find anywhere else. I’ve tried every method—direct sowing, warm stratification, even store-bought seedlings—and this cold stratification hack finally cracked the code for me.
The secret isn’t complicated, but it does require timing your sowing just right to break dormancy naturally.
You’ll need a few simple supplies: fresh seeds (they’re tiny—think poppy seeds), a shallow container with drainage, and a cold frame or refrigerator spot. The key is mimicking winter’s chill, which tricks the seeds into thinking they’ve survived the cold and are ready to sprout.
Most gardeners give up here, but sticking with it for 8-12 weeks of cold exposure makes all the difference. Think of it as a winter nap that sets up next year’s showstopper blooms.
Once those first pale green leaves push through the soil, you’ll know you’re on the right track. The plants grow slowly at first—don’t rush them—but with proper light and consistent moisture, you’ll have hardy little perennials that reward you for years.
The payoff? Clusters of delicate pink or white flowers appearing in late winter, when most gardens are still bare.
This method works whether you’re sowing indoors for transplanting or directly outdoors in fall. The only real challenge is waiting—cyclamen coum seeds take their time, but the results are worth every week of patience. Here’s how to do it without losing your mind along the way.
📚 In This Guide
- What you need
- Instructions
- Tips and common mistakes
- Wrapping up and next steps
What you need
- ● Cyclamen coum seeds: 10–20 fresh seeds (purchased from a reputable supplier or harvested from mature plants). Pro tip: 💡 Seeds should be fully ripe (dark brown) for best germination rates.
- ● Seed-starting mix: 1–2 cups of sterile, well-draining potting soil (e.g., a 50/50 blend of peat moss and perlite or coco coir). Avoid garden soil—it’s too dense!
- ○ Small pots or containers: 2–4 2–3 inch diameter pots (or a single shallow tray with drainage holes). Optional: Clear plastic domes or plastic wrap to retain humidity.
- ● Cold stratification supplies: A ziplock bag or small plastic container with a secure lid.
- ● Moistened paper towels or sphagnum moss (enough to lightly wrap seeds).
- ● Spray bottle: For gently misting seeds without disturbing them.
- ● Labeling tags: To track seed varieties and planting dates.
- ● Refrigerator or cold frame: A consistent 35–45°F (2–7°C) environment for stratification (most home fridges work—just avoid the freezer!).
- ● Fine-tip tweezers or toothpick: For carefully placing tiny seeds.
- ○ Grow lights or sunny windowsill: A bright, indirect light source (12–14 hours/day) post-stratification. Optional: LED grow lights for controlled conditions.
- ● Patience! 😉 Cyclamen seeds can take 4–12 weeks to germinate—stay consistent with care.
- ● Humidity tray (a shallow tray with pebbles + water to boost moisture).
- ● Heat mat (70–75°F / 21–24°C) for faster germination after stratification.
- ● Fungicide (e.g., hydrogen peroxide solution) to prevent mold during stratification.
Instructions for cold stratifying cyclamen coum seeds
Here's the foolproof method I've used to break dormancy and ensure vibrant blooms the following spring.
Collect and Prepare the Seeds
Harvest seeds from mature cyclamen pods once they turn brown and split open naturally. I find the best time is late summer when pods are fully dry but haven't yet released seeds. Collect them in a paper bag and let them air-dry for 3-5 days in a cool, dry place. This prevents rot during stratification.
Once dry, separate the tiny seeds from the chaff by gently shaking them over a sheet of paper. Cyclamen coum seeds are incredibly small—about 1/16 inch—so I use a fine paintbrush to transfer them into a small container. Don't worry about perfect spacing yet; we'll handle that later.
Mix Seeds with Moist Sand
Combine the seeds with equal parts moistened coarse sand in a shallow container. I use a quart-sized plastic container with a lid for this step. The sand provides both moisture retention and aeration, which is crucial for preventing fungal growth during the cold period.
Moisten the sand just enough so it feels like a damp sponge when squeezed—no water should run out. Mix the seeds thoroughly so they're evenly distributed. This ensures each seed gets consistent moisture and cold exposure. Cover the container loosely with its lid or plastic wrap to keep out debris but allow airflow.
Stratify in the Refrigerator
Place the container in your refrigerator's crisper drawer where temperatures stay consistently between 35-40°F. This mimics natural winter conditions that break cyclamen seeds' dormancy. Store the container upright for 8-12 weeks, checking monthly to ensure the sand remains moist but not soggy.
Here's the thing—don't peek too often. Every time you open the container, you risk exposing seeds to warm air, which can disrupt stratification. If you notice any mold development, discard that batch immediately and start fresh with new seeds and fresh sand.
Sow Stratified Seeds in Pots
After the cold period, fill 4-inch pots with a light, well-draining potting mix. I use a blend of 50% peat moss and 50% perlite for optimal aeration. Moisten the mix until it's damp but not wet, then scatter the seeds evenly over the surface—no need to cover them with soil.
Press the seeds lightly into the mix so they make contact with the soil. Place the pots in a humidity dome or cover them with plastic wrap to maintain moisture. Position them in bright, indirect light—a north-facing windowsill works well—where temperatures stay between 60-65°F. You should see tiny green sprouts in 4-6 weeks.
Transition to Growing Conditions
Once seedlings develop 2-3 true leaves, remove the humidity dome and gradually introduce them to normal room conditions. Increase light exposure slowly over 10-14 days to prevent shock. I move mine to a south-facing window or under a grow light for 12-14 hours daily to encourage strong growth.
Water gently from the bottom by placing pots in 1 inch of water for 10 minutes, then allowing them to drain completely. This prevents fungal diseases that often plague cyclamen seedlings. Keep the soil consistently moist but never soggy—you'll know it's right when the top inch feels slightly dry to the touch.
Tips & tricks for perfect cyclamen coum seed stratification
These simple strategies will help you avoid common pitfalls and maximize your success with this delicate process.
Timing Secret: The 3-5 days of air-drying seeds in Step 1 is crucial—don't rush this step. I place my paper bags in a well-ventilated area where airflow prevents moisture buildup. If you notice any dark spots or musty smells during drying, spread them out further or move to a drier location. Proper drying prevents fungal issues during the cold stratification phase.
Sand Selection Tip: Not all sand works equally well. I use coarse builder's sand rather than fine play sand because it provides better drainage while still retaining enough moisture. Rinse the sand thoroughly before using to remove any dust or debris that could harm your tiny seeds. The sand should feel like a damp sponge when squeezed—if water drips out, it's too wet.
Temperature Matters: Maintaining that 35-40°F range in your refrigerator's crisper drawer is key. Some refrigerators have temperature fluctuations, so I place a thermometer inside the container to monitor conditions. If your fridge runs warmer, consider using a seed stratification fridge or moving the container to a cooler spot like a garage during winter months when outdoor temperatures drop naturally.
Light Transition Strategy: When moving seedlings to brighter light in Step 5, I recommend a gradual approach over those 10-14 days. Start with just 2-3 hours of direct light per day and increase by 1 hour daily. This mimics natural sunlight conditions and prevents leaf scorch. I've found that seedlings acclimated this way develop stronger stems and healthier foliage compared to those exposed to full sun too quickly.
Pro Tips for Cyclamen Coum Seeds
- These simple strategies will help you avoid common pitfalls and maximize your success with this delicate process.
- Timing Secret: The 3-5 days of air-drying seeds in Step 1 is crucial—don't rush this step. I place my paper bags in a...
- Sand Selection Tip: Not all sand works equally well. I use coarse builder's sand rather than fine play sand because i...
Frequently asked questions
Got questions about growing cyclamen coum from seeds? You’re not alone!
Here are answers to the most common queries—so you can confidently start your cold stratification journey and enjoy those stunning blooms next spring.
How long does cold stratification take for cyclamen coum seeds?
Cold stratification typically requires 8–12 weeks in the fridge (35–40°F). For cyclamen coum, aim for the longer end (10–12 weeks) to mimic winter conditions. Patience pays off—this step breaks seed dormancy and boosts germination rates!
Can I skip cold stratification and still grow cyclamen coum from seeds?
You can, but germination will be slow, inconsistent, or even fail. Cold stratification mimics natural winter conditions, signaling seeds it’s safe to sprout. Without it, expect 1–5% germination instead of the 50–80% success rate with proper stratification.
What’s the best soil mix for germinating cyclamen coum seeds?
Use a light, well-draining mix like:
- 50% peat or coco coir (for moisture retention)
- 30% perlite or coarse sand (for aeration)
- 20% orchid bark or vermiculite (for structure)
When will cyclamen coum seeds germinate after stratification?
Germination usually starts 4–12 weeks after removing seeds from cold storage. Keep soil consistently moist (not soggy) and warm (65–75°F). Some seeds may take months—don’t give up! Slow germination is normal for cyclamen.
What do I do if my cyclamen coum seeds won’t germinate?
Try these fixes:
- Check moisture: Keep soil damp (like a wrung-out sponge).
- Adjust light: Bright, indirect light (e.g., a sunny windowsill or grow light).
- Test seed viability: Soak a few seeds in warm water for 24 hours—if none swell, they may be old or dead.
- Re-stratify: Return seeds to the fridge for another 4–6 weeks if they’re fresh.
Wrapping up and next steps
Growing Cyclamen coum from seeds is a rewarding journey that unlocks vibrant blooms for years to come—especially when you master the cold stratification trick! With patience, the right tools, and a little winter magic, you’ll transform tiny seeds into stunning woodland perennials. 🌱✨
Ready to dive in? Start by gathering your seeds and supplies, then follow the steps to give them the chilly treatment they crave. Your future garden awaits—plant those seeds and watch nature work its wonders!