Lawn
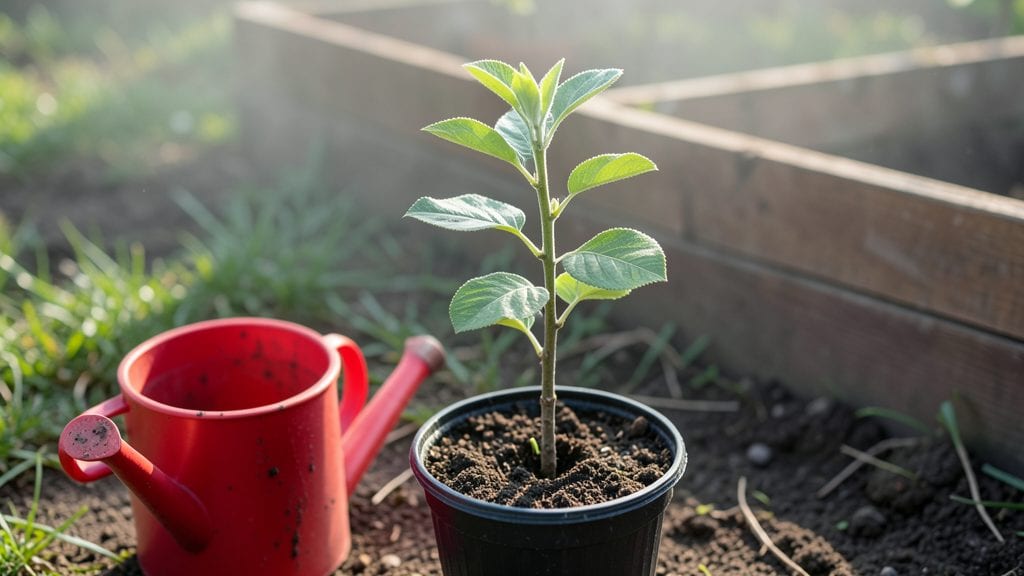
The slow, rewarding process of apple seed growth yields one-of-a-kind trees—though it demands cold-stratification and a healthy dose of patience. 🌱 I’ve cold-stratified seeds for years, and the first flush of green leaves after winter feels like magic.
The catch? These seedlings won’t produce fruit like their parent tree, but the journey is worth it for the challenge.
You’ll need fresh apple seeds, a damp paper towel, a plastic bag, and a fridge for 6-8 weeks of cold treatment. Skip this step, and germination rates drop to near zero—trust me, I’ve tried.
Once the seeds sprout, they’ll grow 2-3 inches in their first month, then slow down as roots establish. The real test comes when you transplant them into pots or the ground.
By 90 days, you’ll have sturdy seedlings with 4-6 true leaves, ready to handle outdoor conditions. They’ll grow 6-12 inches tall by spring, though fruit won’t appear for 5-10 years.
The payoff? A tree with its own story, shaped by your care and the quirks of nature. Every gardener should try this at least once.
Works best in zones 4-8, where winters help break seed dormancy naturally. For warmer climates, extend the cold treatment or use a seedling heat mat.
The secret to success? Consistency—water when the top inch of soil dries, and protect young trees from deer and rabbits. Here’s how to make it happen.
📚 In This Guide
- What you need
- Instructions
- Tips and common mistakes
- Wrapping up and next steps
What you need
- ● Fresh apple seeds: 10–20 seeds (harvested from organic apples for best results).
- ● Cold-stratification supplies: Paper towels or damp coconut coir (enough to wrap seeds).
- ● Ziploc bag or airtight container.
- ● Potting mix: 1–2 gallons of well-draining seed-starting mix (sterilized).
- ● Small pots or seed trays: 2–4 (3–4 inch diameter) with drainage holes.
- ● Spray bottle: For gentle watering.
- ● Grow lights or sunny windowsill: 12+ hours of light daily.
- ○ Heat mat (optional but helpful): For faster germination (70–75°F).
- ● Seedling labels: To track varieties.
- ● Humidity dome: Keeps moisture levels ideal.
- ● Fertilizer: Balanced 10-10-10 or compost tea (once sprouts appear).
- ● Transplanting tools: Small trowel + biodegradable pots for outdoor transfer.
- ● Apple tree pruning shears: For future shaping (if growing long-term!).
Step-by-step instructions for growing apple trees from seed
Turn those kitchen scraps into a future orchard—here’s how to break dormancy and coax life from apple seeds.
🌱 Step 1: Harvest and Prepare the Seeds
Extract seeds from a fresh, organic apple (store-bought seeds may be treated to prevent germination). Scoop out the core, rinse the seeds thoroughly, and let them dry on a paper towel for 24 hours at room temperature. This prevents mold and prepares them for stratification. I like to store them in a small envelope labeled with the apple variety and date—you’ll forget which seed came from which fruit after a few weeks.
Once dry, place the seeds in a ziplock bag with a damp paper towel. Seal it loosely to allow airflow and refrigerate for 6-8 weeks. This cold stratification mimics winter conditions, breaking seed dormancy. Check weekly—if the towel dries out, spritz it lightly with water. You’ll know stratification is working when tiny roots (radicles) appear after 3-4 weeks.
💧 Step 2: Plant Stratified Seeds in Moist Potting Mix
Fill a 4-inch diameter pot with sterile seed-starting mix (never garden soil—it’s too dense and may harbor pathogens). Moisten the mix until it’s damp but not soggy, then press it down lightly with your fingers. Plant 2-3 seeds per pot at a depth of ½ inch, spacing them 1 inch apart. Cover them with a thin layer of additional mix and mist gently with water to settle the soil around the seeds.
Place the pot in a warm (65-75°F) location with indirect light, like a sunny windowsill away from direct afternoon sun. Keep the soil consistently moist—never waterlogged—by checking the top inch daily. You’ll see first true leaves (not the initial seed leaves) in 4-6 weeks, signaling successful germination. If only one seedling emerges per pot, snip the others at the base with clean scissors to avoid competition.
☀️ Step 3: Harden Off and Transplant Seedlings
Once seedlings reach 4-6 inches tall and develop 3-4 sets of true leaves, it’s time to harden them off. Move the pot outdoors to a shaded, sheltered spot for 1-2 hours the first day, gradually increasing exposure over 10-14 days. This acclimates them to outdoor conditions without shock. Watch for wilting—if leaves droop, bring them back inside and extend the outdoor time the next day.
After hardening, transplant seedlings into individual 6-inch pots filled with well-draining potting mix. Dig a hole twice as wide as the root ball but only as deep as the container’s base. Gently remove the seedling, place it in the hole, and firm soil around the roots. Water deeply to settle the mix and encourage root growth. Keep seedlings outdoors in partial shade for their first 2 weeks, then gradually introduce full sun over the next month.
⏰ Step 4: Overwinter and Prune for Future Growth
Apple seedlings grown from seed are biennial, meaning they’ll produce leaves the first year but no flowers until the second or third year. After the first growing season, cut back ⅓ of the top growth in late fall to encourage bushier growth. Move the pot to a garage or unheated shed where temperatures stay between 30-50°F during winter. Keep the soil slightly moist but not wet—overwatering in dormancy causes rot.
In early spring, repot the seedling into a 1-gallon container with fresh potting mix. Place it back in full sun and fertilize lightly with a balanced 10-10-10 fertilizer diluted to half strength. You’ll notice new shoots emerging within 2-3 weeks. This is the year they’ll finally bloom—though the fruit may take 4-5 more years to mature. Patience is key; apple trees grown from seed are a long-term investment in fruit-bearing magic.
Tips & tricks for growing apple trees from seed
Cold-stratification isn't just science—it's where the magic happens. These pro moves will help you turn those apple seeds into thriving saplings with fewer surprises and more success.
Stratification Timing: The 6-8 week cold period is non-negotiable for breaking dormancy, but here's the secret: start checking for radicle development after exactly 3-4 weeks. You'll see tiny white roots emerging from the seeds—this confirms stratification is working. If you don't see roots by week 5, your seeds might need 1-2 extra weeks in the fridge. Never rush this process; patience at this stage prevents moldy failures later.
Lighting Strategy: During the 4-6 week germination window in Step 2, position your pots where they get bright but indirect light—think east-facing windowsill rather than south-facing. Apple seedlings are sensitive to heat stress, and direct sun at 75°F can cause the soil to dry out too quickly. I use a simple LED grow light on a timer for 12 hours daily if natural light is insufficient. The goal is consistent moisture without overheating.
Transplanting Technique: When moving seedlings to 6-inch pots in Step 3, focus on the root ball rather than depth. Gently loosen the roots if they're circling in the 4-inch pot—this prevents root binding that stunts growth. Use your finger to create small pockets in the new soil where roots can settle naturally. Water immediately after transplanting to eliminate air pockets, then keep the soil lightly moist for the first week to reduce transplant shock.
Winter Care: The 30-50°F range during overwintering is critical, but don't assume your garage meets this automatically. Check temperatures with a thermometer—some garages can drop below freezing. If your space gets colder, add insulation around the pot or move it to a more temperate spot. The key is maintaining that slight moisture while preventing rot from excess water during dormancy.
Pro Tips for Apple Seed Growth
- Cold-stratification isn't just science—it's where the magic happens. These pro moves will help you turn those apple s...
- Stratification Timing: The 6-8 week cold period is non-negotiable for breaking dormancy, but here's the secret: start...
- Lighting Strategy: During the 4-6 week germination window in Step 2, position your pots where they get bright but ind...
Frequently asked questions
Got questions about growing apple seeds into thriving plants?
You’re not alone! Here are answers to the most common queries—from patience to pitfalls—so you can cultivate confidence along with your seedlings.
How long does it really take for apple seeds to sprout?
With cold stratification (the key step!), most apple seeds sprout in 4–8 weeks after planting in well-draining soil. Some varieties may take up to 12 weeks, especially if stratification wasn’t perfect. Patience is key—don’t dig up the pot to check!
What if my seeds don’t sprout after stratification?
If seeds remain dormant after 3 months, they may need longer cold exposure (try 4–6 months) or scarification (lightly sanding the seed coat). Some seeds are simply non-viable—apple seeds have a 50%+ germination rate, so don’t stress over a few failures. Pro tip: Use multiple seeds per pot!
Can I grow apple trees from grocery store seeds?
Yes! But expect unpredictable results—grocery seeds often produce wild, non-commercial varieties (e.g., crabapples). For edible, true-to-type apples, buy seeds from certified nurseries or graft onto rootstock. Fun fact: Some heirloom varieties thrive from store-bought seeds!
Do apple seedlings need full sun immediately?
Start seedlings in bright, indirect light (e.g., a south-facing window) for 2–3 weeks to avoid leggy (tall, weak) growth. Once sprouted, gradually introduce full sun (6+ hours/day) over 1–2 weeks. Warning: Sudden sun exposure can scorch tender leaves!
Will my apple tree produce fruit in 90 days?
Nope! Apple trees from seeds take 5–10 years to bear fruit (if they’re grafted varieties). Seed-grown trees may never fruit or produce tiny, inedible apples. For faster results, buy a young sapling or practice grafting. Reality check: Enjoy the journey—not the harvest!
What’s the best alternative if seeds fail to grow?
Try these low-fuss options:
- Layering: Propagate from a branch of an existing apple tree (takes 1–2 years).
- Grafting: Attach a scion (budwood) to a rootstock for guaranteed variety results.
- Buy a sapling: Nursery trees (1–2 years old) fruit faster and are disease-resistant.
Wrapping up and next steps
Growing apple seeds into blooming plants in just 90 days is a rewarding journey that blends patience with science! 🌱 With the right cold-stratification techniques, you’ve unlocked the secret to breaking dormancy and nurturing tiny seeds into vibrant saplings.
Whether you’re a gardening newbie or a green-thumb enthusiast, this method proves that even the simplest seeds hold big potential—and your future orchard starts now!
Ready to take the next step? Start by planting your prepped seeds in well-draining soil, and keep an eye out for those first tiny sprouts. Soon, you’ll be harvesting fresh apples straight from your own backyard! 🍏✨