Pruning
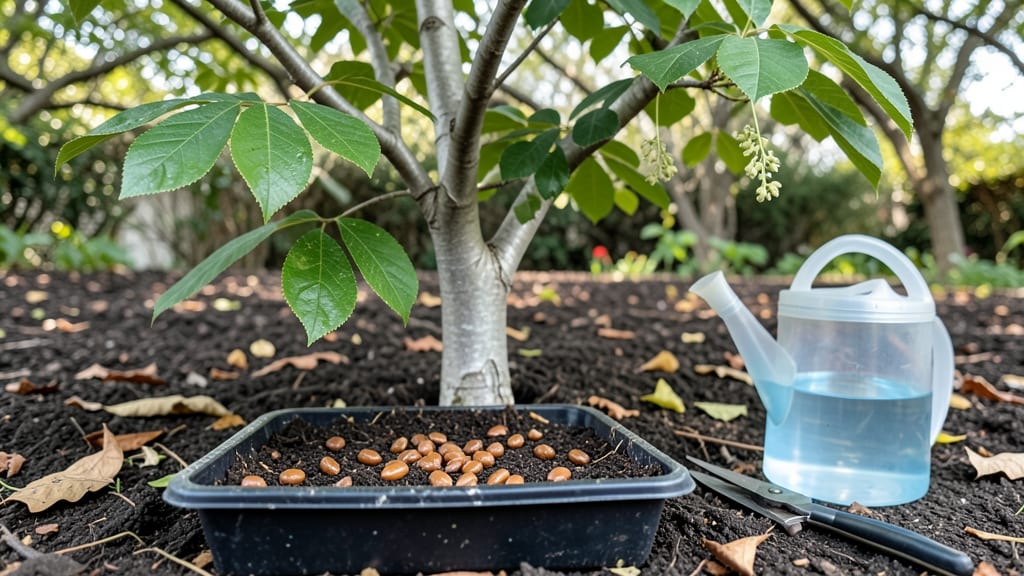
Growing sassafras tree seeds starts with a 6-week cold-stratification trick that mimics winter’s natural way of waking them up. ✨ I’ve tried every method—soaking, scarifying, even store-bought germination aids—but nothing beats the simple, free approach of refrigeration. The key is patience and a damp paper towel, not fancy equipment.
You’ll need just three supplies: fresh sassafras berries (or seeds), a sealed plastic bag, and a fridge shelf. No special soil yet—this stage is all about breaking dormancy. Place the damp seeds in the bag, seal it, and let them chill for 4-6 weeks.
That’s it. Most gardeners skip this step and wonder why their seeds never sprout.
Once those tiny roots peek through, you’ll transplant them into moist, well-draining soil in pots or directly outdoors after last frost. The seedlings grow fast once they break dormancy—expect 2-3 inches of growth per month if you keep the soil consistently damp but not soggy.
Sunlight is critical: these trees thrive in full sun to partial shade.
The real payoff comes in 3-5 years, when your sassafras grows into a fragrant, shade-providing tree with those iconic three-lobed leaves. Early pruning keeps them sturdy, and mulching protects young roots. Here’s where the magic happens—no nursery needed, just time and a little fridge space.
📚 In This Guide
- What you need
- Instructions
- Tips and common mistakes
- Wrapping up and next steps
What you need
- ● Fresh sassafras tree seeds: 10–20 seeds (harvested from ripe, dark blue-black berries in fall).
- ● Cold-stratification medium: Option 1: 1–2 paper towels or coffee filters (moistened but not soaked).
- ● Option 2: 1 small plastic bag with 2–3 inches of damp peat moss or coco coir.
- ● Plastic storage bag or airtight container: 1 (quart-sized or larger, with a zip-top or sealable lid).
- ● Spray bottle with water: 1 (for maintaining moisture).
- ● Permanent marker: 1 (to label your container with the date).
- ● Fine-mesh strainer: 1 (to rinse seeds if needed).
- ● Small plastic tray or container: 1 (for organizing seeds before stratification).
- ○ Thermometer (optional): 1 (to monitor fridge temps, ideally 35–40°F).
- ● Planting pots (4–6 inch): 2–4 (for transplanting post-stratification).
- ● Well-draining potting mix: 1 bag (for sowing germinated seeds).
- ○ Heat mat (optional): 1 (to speed up germination after stratification).
Step-by-Step instructions for cold-stratifying sassafras tree seeds
Here's the foolproof method I use to break sassafras seed dormancy and get strong seedlings in just six weeks.
🌱 Step 1: Collect and Prepare Fresh Seeds
Harvest sassafras seeds in late fall when the blue-black berries ripen and split open. Remove the seeds from the pulp immediately—they germinate best when fresh. Spread them on a paper towel to dry for 24 hours at room temperature. This prevents mold while maintaining viability.
I like to store them in a sealed container with a damp paper towel until stratification, but never let them sit in standing water. The goal is moist but not soggy. You'll know they're ready when the outer coating softens slightly—this usually takes 3-5 days at 65°F.
💧 Step 2: Stratify in Moist Sand or Perlite
Mix equal parts moist sand and perlite in a shallow container. The sand mimics natural forest conditions while the perlite prevents compaction. Plant the seeds ½ inch deep, spacing them 2 inches apart—they'll need room to grow without crowding.
Cover the container with plastic wrap to maintain humidity, then place it in your refrigerator's crisper drawer. The ideal stratification temperature is 35-40°F. Check the moisture weekly—spritz with water if the mix feels dry to the touch. After 4 weeks, most seeds will show tiny root hairs breaking through the outer shell.
☀️ Step 3: Transfer to Warmth for Germination
Move the container to a warm, bright spot indoors once you see root activity. I use a seedling heat mat set to 70-75°F for consistent warmth. Place it under grow lights (or a south-facing window) for 12-14 hours daily—sassafras seedlings need strong light to prevent legginess.
Keep the sand mix moist but never waterlogged. You'll see the first cotyledons (tiny round leaves) emerge in 2-3 weeks after transferring. This is your signal to reduce humidity—remove the plastic wrap and let the seedlings breathe. Overly damp conditions invite damping-off, which can wipe out seedlings overnight.
🪴 Step 4: Pot Up Individual Seedlings
Once seedlings reach 3-4 inches tall (usually 6-8 weeks total from stratification), transplant them into 4-inch pots with well-draining potting mix. Handle them gently—their roots are delicate. I like to use a mix of 50% potting soil and 50% compost to give them a nutrient boost.
Place each seedling 1 inch deep in its new pot, firming the soil gently around the stem. Water lightly to settle the roots, then move the pots to a shaded spot for 1 week to reduce transplant shock. After that, gradually introduce them to morning sun before moving to full sun.
⏰ Step 5: Harden Off Before Outdoor Planting
When seedlings are 6-8 inches tall with 4-5 sets of true leaves, begin hardening them off. Start by placing them outdoors in a sheltered spot for 1 hour daily, then gradually increase exposure over 2 weeks. Watch for wilting or leaf scorch—these are signs they're not ready for full sun yet.
Plant outdoors after the last frost when soil temperatures reach 60°F. Space them 10-12 feet apart in well-draining soil with partial shade. Mulch around the base to retain moisture and suppress weeds. With patience, your sassafras will grow into a fragrant, shade-loving tree for years to come.
Tips & tricks for perfect sassafras seed stratification
These game-changing insights will help you navigate the delicate balance of moisture, temperature, and timing that makes all the difference with sassafras seeds.
Moisture Balance is Everything: In Step 1, when you're drying seeds for 24 hours, don't rush this process. The seeds need this time to establish a protective barrier against mold while maintaining viability. After that, the damp paper towel storage at 65°F should feel like a wrung-out sponge—not dripping, but consistently moist. Too wet invites mold, too dry prevents germination. I test by gently squeezing the towel—just a few drops should release when pressed.
Stratification Temperature Precision: The 35-40°F range in Step 2 is non-negotiable for breaking dormancy. Your refrigerator's crisper drawer is ideal because it maintains consistent humidity while providing the cold stratification needed. If your fridge runs warmer (some do!), consider using a dedicated seed stratification fridge or even a well-insulated cooler with ice packs. The goal is to mimic winter conditions without freezing—the seeds need cold, not frost.
Light Timing for Germination: During Step 3's 12-14 hours of daily light, position your grow lights just 4-6 inches above the seedlings. This distance prevents leggy growth while providing sufficient intensity. I've found that using a timer for the lights eliminates guesswork—set it for 12 hours on, 12 hours off, and let technology handle the consistency. The moment you see those first cotyledons emerge (usually within 2-3 weeks), that's your cue to remove the plastic wrap and let the seedlings acclimate to normal humidity.
Transplanting Technique: When potting up in Step 4, focus on the root system—not just the visible stem. Gently tease apart the sand mix to inspect for healthy white roots before transplanting. I've learned the hard way that forcing crowded seedlings into pots too soon leads to root binding. If you notice roots circling in the original mix, give them a gentle straightening before planting. This single step can double your survival rate during transplant shock.
Pro Tips for Sassafras Tree Seeds
- These game-changing insights will help you navigate the delicate balance of moisture, temperature, and timing that ma...
- Moisture Balance is Everything: In Step 1, when you're drying seeds for 24 hours, don't rush this process. The seeds ...
- Stratification Temperature Precision: The 35-40°F range in Step 2 is non-negotiable for breaking dormancy. Your refri...
Frequently asked questions
Got questions about sassafras tree seeds?
You’re not alone! Here are answers to the most common queries—from timing to troubleshooting—so you can grow these fragrant trees with confidence.
When is the best time to plant sassafras tree seeds?
Plant sassafras seeds after cold stratification (6 weeks in the fridge) and before the last spring frost. Aim for early spring—this mimics their natural germination cycle. If you miss the window, store seeds in a cool, dry place until next year. Patience pays off!
Why do sassafras seeds need cold stratification?
Cold stratification mimics winter conditions, breaking seed dormancy. Without it, seeds may take years—or never—to sprout. The 6-week fridge trick speeds up germination by tricking the seed into thinking it’s survived a cold season. Think of it as a natural "reset button" for growth!
Can I grow sassafras from store-bought seeds, or do they need to be fresh?
Store-bought seeds can work, but fresh seeds (from mature trees) have higher success rates. If using older seeds, extend stratification to 8–12 weeks. Pro tip: Look for plump, dark seeds—these are your best bet for sprouting. Avoid shriveled or moldy ones!
What if my sassafras seeds don’t sprout after stratification?
Don’t panic! Try these fixes:
- Check moisture: Keep soil damp (not soggy) during germination.
- Test depth: Seeds should be just covered (¼ inch max).
- Warmth trick: Move pots to a sunny windowsill (70°F+).
- Patience: Some seeds take 3–4 weeks to crack open.
How long does it take for a sassafras tree to grow from seed?
Germination takes 2–6 weeks post-stratification, but full growth is slow. Expect saplings in 1–2 years and mature trees (15–20 ft tall) in 10–15 years. Sassafras is a patient tree—reward yourself with its roots (literally and figuratively)!
Bonus Tip:
Label your seed trays! Sassafras seedlings look like tiny maples at first—keeping track avoids future mix-ups.
Wrapping up and next steps
Cold-stratifying sassafras tree seeds in just six weeks is a rewarding way to jumpstart your gardening journey! By mimicking winter’s natural conditions, you’ll unlock higher germination rates and healthier saplings—perfect for adding that iconic Southern charm to your landscape. 🌱
Ready to turn those tiny seeds into towering trees? Grab your supplies, follow the steps, and watch your patience pay off! Next, explore local planting tips or share your progress with fellow gardeners—your green thumb is about to shine even brighter!