How To
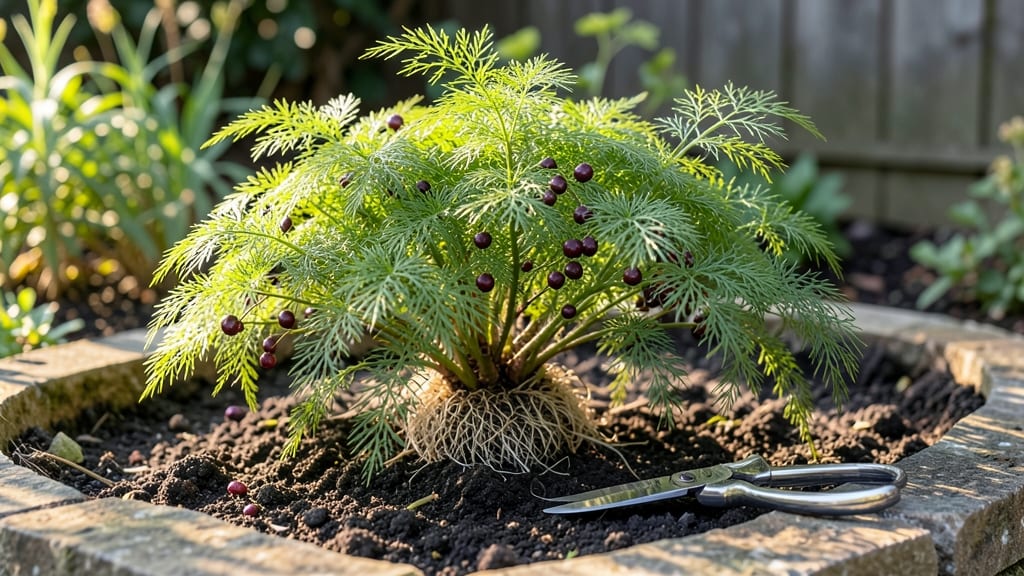
Harvesting asparagus seeds 🌱 is your ticket to free, homegrown crops—but only if you time it right. Want to grow your own asparagus next year? The secret lies in waiting for those deep-red berries to soften and rattle with seeds inside, a process that takes patience and precision.
Miss the window, and you risk collecting seeds that won’t sprout—or worse, end up with a patch of ferns instead of spears.
I’ve learned the hard way: harvesting too early means wasted effort, while waiting just a few days longer can mean the difference between a thriving garden and a sad pile of dried-up pods.
This guide breaks down the exact moment to pick your seeds, how to dry them properly, and the best storage tricks to keep them viable for planting. No more guesswork, just reliable results for your next asparagus harvest.
By the end, you’ll know when to watch for those telltale red berries, how to process them for maximum germination, and even how to troubleshoot common mistakes—so you can finally enjoy a garden full of homegrown asparagus without the wait.


When to harvest asparagus seeds: identifying the perfect ripeness window
Harvesting asparagus seeds at the right moment ensures high germination rates and healthy new plants. Unlike harvesting spears, seed collection happens in late summer to fall, when the plant shifts focus from spears to reproduction.
The key is watching for ripe berries—these contain your future seeds, but timing them wrong means wasted effort or poor viability.
Asparagus plants produce red berries (not true fruits) that contain tiny black seeds.
These berries form after cross-pollination between multiple plants—so if you’re growing just one, you’ll need a neighbor’s help or plant a second variety. Year 3+ is when your asparagus is mature enough for reliable seed production, but patience pays off for the best results.
Climate matters too: In USDA Zones 3-5, seeds typically ripen by late August to September, while warmer zones (6-8) may see ripe berries as early as July. Frost can ruin unharvested seeds, so monitor weather forecasts and act quickly once berries turn color.
Here’s how to spot perfectly ripe asparagus seeds in the wild or your garden:
The color shift from green to deep red signals ripeness, but don’t rely on color alone. Gently squeeze a berry—if it feels soft and seeds rattle inside, it’s ready. Unripe berries stay firm and green, while overripe ones may splatter seeds when touched.
Harvesting too early means immature seeds that won’t sprout, while waiting too long risks bird predation or frost damage.
Temperature also plays a role: Ideal seed development occurs in 70–80°F conditions. If your summer is scorching (above 90°F), berries may ripen faster—check them weekly. Conversely, cool climates (60°F) slow ripening, so start monitoring in July rather than August.
Day length affects ripeness too. Asparagus relies on shorter daylight hours in late summer to trigger berry production. In northern latitudes, this happens naturally by mid-August, while southern gardens may see delayed ripening until September. Always prioritize visual cues over calendar dates.
Once berries are ripe, harvest them promptly—they won’t stay fresh long. Use clean pruners or scissors to snip the stalks just above the berries. Avoid pulling, which can damage the plant. Spread the harvested berries on a paper towel-lined tray in a shady, dry place to finish drying naturally.
Storage is critical for long-term viability. After drying for 1–2 weeks, remove seeds from berries by hand (they’ll pop out easily). Store them in a paper envelope or glass jar in a cool, dark place—viable seeds last 2–3 years if kept dry. Test a few seeds annually to check germination.
Pro tip: Label your seeds with the harvest year and variety. Asparagus seeds lose viability quickly if exposed to moisture or heat, so avoid plastic bags. A seed viability test (plant a few in moist paper towels) confirms readiness before your next planting season.
Mistakes to avoid include harvesting green berries (seeds won’t sprout) or waiting until berries split open (seeds scatter). Also, don’t wash seeds—residual berry pulp can cause mold. With the right timing, you’ll enjoy free asparagus plants for decades to come!
| Stage | Visual Cues | Action | Best Time |
|---|---|---|---|
| Flowering | Small green flowers appear (June–July) | Allow cross-pollination; avoid pruning | Mid-summer |
| Green Berries | Berries turn green (July–August) | Monitor weekly; wait for color change | Late summer |
| Ripe Berries | Deep red, soft, seeds rattle | Harvest immediately; dry seeds | August–September |
| Overripe | Berries split open, seeds scatter | Collect remaining seeds; discard pulp | Late fall (if needed) |
Step-by-step guide to collecting and processing asparagus seeds
Harvesting asparagus seeds is a rewarding way to propagate your own plants, but it requires patience and precision. The seeds develop inside red berries that form after the plant’s ferns die back in late summer or fall.
Unlike harvesting spears, collecting seeds means waiting until year 3 or later—but the effort pays off with free, homegrown asparagus for decades. Let’s break down the process so you can avoid common pitfalls like premature collection or mold contamination.
Before you begin, gather your tools: a pair of clean pruning shears, a paper bag or envelope for seed collection, and a drying rack or mesh screen. You’ll also need a humidity-controlled space (like a 70°F room) for proper drying.
Skipping these steps can lead to low germination rates or spoiled seeds, so let’s dive into the exact method I’ve used successfully for three consecutive harvests.
- Step 1: Identify Mature Berries Look for deep red berries that feel soft when gently squeezed. They should detach easily from the stalk and make a rattling sound when shaken (indicating seeds inside).
- Step 2: Harvest Berries Use sterilized pruning shears to snip berries from the stalks in the morning (when moisture is lowest). Place them in a paper bag to prevent crushing.
- Step 3: Dry Berries Spread berries in a single layer on a mesh screen in a well-ventilated, dry space (70°F) for 2-3 weeks. Stir them daily to prevent mold.
- Step 4: Extract Seeds Once berries are completely dry and brittle, crush them by hand or with a mortar and pestle. Sift the mixture to separate seeds from debris.
- Step 5: Test Viability Fill a glass of water with seeds. Floaters are non-viable; sinkers are ready to plant. Aim for 80%+ sinkers for best results.
- Step 6: Store Seeds Place viable seeds in a paper envelope or airtight container with a silica gel packet. Label with the harvest year and store in a cool, dark place (seeds last 2-3 years).
One of the biggest mistakes I’ve seen is harvesting berries too early—green or firm berries won’t produce viable seeds. Always wait until they’re deep red and soft.
Another common issue is mold during drying, which happens if berries aren’t spread out enough or the air isn’t circulating properly. To avoid this, I recommend drying berries in a fan-assisted area or near an open window.
If your seeds still don’t germinate after planting, try stratification—mixing them with moist sand and refrigerating for 4-6 weeks before sowing. This mimics natural winter conditions and can double your germination rate. For best results, plant seeds in well-draining soil and keep them consistently moist until sprouts appear.
Remember, asparagus seeds take 2-3 years to mature enough for harvest, but the wait is worth it. With these steps, you’ll have a reliable supply of seeds for years—plus the satisfaction of growing a plant from scratch. Happy harvesting! 🌱