Picking
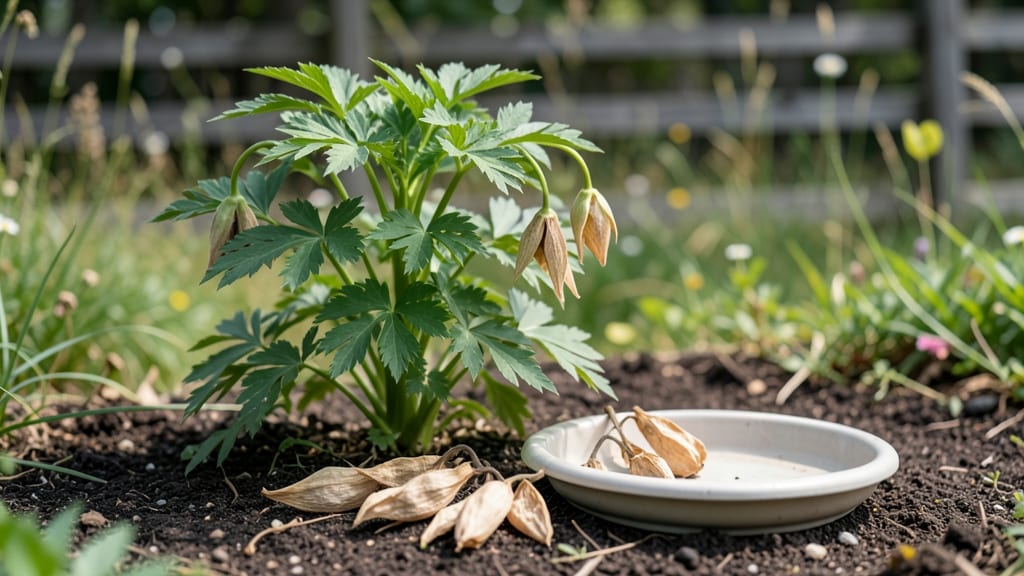
Harvesting columbine seeds is the secret to next year’s showstopping blooms. 🌿 I’ve learned that waiting for the pods to split open naturally is the key—those delicate blue flowers won’t disappoint if you handle the seeds right.
The timing matters more than you’d think, and a little cold treatment goes a long way toward ensuring strong germination.
You’ll need just a few simple tools: sharp scissors or pruners, a paper bag for drying, and a sealed container for storage.
The best time to collect seeds is late summer or early fall, when the pods turn brown and crispy—this means they’re ready to be harvested before they burst open on their own. A gentle touch is all it takes to avoid damaging the tiny seeds inside.
Once you’ve collected the pods, let them dry completely in a cool, dry place for about two weeks. Then, crack them open to release the seeds, and store them in a sealed container in the refrigerator for cold stratification.
This mimics winter conditions and helps break dormancy, so your columbines will pop up reliably in spring. The process is simple but makes all the difference.
With this method, you’ll have a fresh supply of seeds ready for planting come spring, ensuring your garden stays filled with those beloved nodding blooms year after year. The payoff is worth the patience—just imagine the vibrant display you’ll get from seeds you’ve nurtured yourself.
📚 In This Guide
- What you need
- Instructions
- Tips and common mistakes
- Wrapping up and next steps
What you need
- ● Mature Columbine plants: Choose healthy, disease-free plants with fully developed seed pods (brown, dry, and papery). Aim for at least 3-5 pods per variety.
- ● Sharp pruning shears or scissors: For cleanly snipping seed pods without damaging stems.
- ● Paper bags or breathable mesh sacks: 1-2 bags (8x10 inches) to collect pods and allow airflow.
- ● Permanent marker or labels: To tag varieties (e.g., ‘Queen of Hearts,’ ‘Gold Queen’).
- ● Small paper towels or coffee filters: For drying seeds (1-2 sheets per batch).
- ● Plastic zip-top bags: Quart-sized (2-4 bags) for cold stratification.
- ● Moistened paper towels or peat moss: To create a damp (not soggy!) medium for stratification.
- ● Refrigerator or cold frame: Set to 35–45°F (2–7°C) for 4–8 weeks.
- ● Desiccant packets: 1-2 for zip-top bags to prevent mold during stratification.
- ● Plant journal/notebook: To log seed sources, harvest dates, and germination notes.
- ● Seed tray or small pots: For direct sowing post-stratification (if skipping outdoor planting).
- ● Humidity dome or plastic wrap: To retain moisture during early germination (if starting indoors).
- ● Garden gloves: To protect hands from prickly seed pods (if sensitive to texture).
How to harvest and stratify columbine seeds for next season’s blooms
Here’s my foolproof method to collect, clean, and cold-stratify columbine seeds—guaranteed to break dormancy and produce vibrant flowers next spring.
🌿 Step 1: Identify and Collect Ripe Seed Pods
Wait until late summer or early fall when the seed pods turn from green to tan or brown and begin splitting open on their own. These dry pods contain the seeds you’ll harvest. Gently twist or pinch the pods to release the seeds—don’t force them, or you’ll damage the delicate structures inside.
Columbine seeds are tiny and surrounded by a feathery, parachute-like structure. Collect them in a paper bag (not plastic) to prevent moisture buildup. I like to work on a dry day when the pods are fully mature but haven’t yet scattered their seeds naturally.
🌱 Step 2: Clean and Separate the Seeds
Spread the collected seeds and fluff on a clean, dry surface like a baking sheet or piece of cardboard. Use a small hand fan or gently blow on them to separate the seeds from the chaff. The seeds will be tiny, dark, and slightly oval-shaped, while the fluff will float away.
Once cleaned, store the seeds in a paper envelope or small breathable container. Label it with the date and variety if you’re growing multiple types. Moisture is the enemy here—keep them in a cool, dry place until stratification.
❄️ Step 3: Cold Stratify for Germination Success
Columbine seeds need cold stratification to break dormancy. Place the seeds in a sealed plastic bag with a damp paper towel (not soaking wet—just lightly moist). Seal the bag and place it in the refrigerator for 4-6 weeks. Check occasionally to ensure the towel stays damp but not soggy.
This mimics winter conditions and tricks the seeds into thinking they’ve experienced a natural cold period. After 4-6 weeks, remove the bag and let the seeds dry out slightly before sowing. You’ll see better germination rates this way than if you plant them immediately.
🌱 Step 4: Sow Stratified Seeds in Late Winter
Plant the stratified seeds in late winter (around February or March), just before the last frost date in your area. Scatter them on the surface of moist potting mix in a seed tray or small pots—columbine seeds don’t need deep planting. Press them lightly into the soil so they make contact but don’t bury them.
Keep the soil consistently moist (not waterlogged) and place the tray in a cool, bright spot (like a sunny windowsill). Germination can take 2-4 weeks, so be patient. Once seedlings appear, move them to a location with partial shade until they’re ready for transplanting outdoors in spring.
☀️ Step 5: Acclimate and Transplant Young Seedlings
After the last frost, harden off the seedlings by placing them outside in a shaded, sheltered spot for 1-2 hours the first day, gradually increasing their time outdoors over 10-14 days. This helps them adjust to real-world conditions without shock.
Transplant them into the garden in early spring, spacing them 12-18 inches apart in well-draining soil. Columbine thrives in partial shade and prefers moist but not soggy conditions. With proper care, you’ll see blooms the following year—proof your stratification worked!
Tips & tricks for perfect columbine seed harvesting
These little-known tricks will help you maximize your columbine seed yield and ensure reliable germination next spring.
Timing is Everything: The key to successful harvest is patience—wait until the seed pods turn completely tan or brown and begin splitting open naturally. If you harvest too early, the seeds won't be fully mature, and if you wait too long, they'll scatter on their own. I always check pods in late summer when they start to dry out but haven't yet released their seeds. Working on a dry day prevents moisture from sticking to the delicate seeds.
Gentle Handling Matters: Columbine seeds are surrounded by fragile fluff that helps with dispersal. When collecting pods in Step 1, avoid squeezing or crushing them—gently twist or pinch to release seeds. For Step 2, use a small hand fan or blow gently to separate seeds from chaff. I've learned the hard way that aggressive handling damages the tiny seeds, reducing germination rates.
Stratification Secrets: During the 4-6 week cold stratification in Step 3, place the damp paper towel in the bag with seeds so it's just moist—not dripping wet. I like to fold the towel into a small square and place it in the bag before adding seeds, ensuring even moisture distribution. Check weekly to refresh dampness if needed. This mimics natural winter conditions perfectly.
Sowing Strategy: When sowing in late winter (Step 4), press seeds lightly into moist potting mix rather than burying them. I use a small spoon to create tiny indentations, ensuring good soil contact without covering. For better organization, I label seed trays with the date and variety—this helps track germination progress and prevents mix-ups if growing multiple types.
Pro Tips for Harvest Columbine Seeds
- These little-known tricks will help you maximize your columbine seed yield and ensure reliable germination next spring.
- Timing is Everything: The key to successful harvest is patience—wait until the seed pods turn completely tan or brown...
- Gentle Handling Matters: Columbine seeds are surrounded by fragile fluff that helps with dispersal. When collecting p...
Frequently asked questions
Got questions about harvesting and storing columbine seeds? You’re not alone! Here are answers to the most common queries to help you succeed in growing these delicate blooms next season.
When is the best time to harvest columbine seeds?
Harvest columbine seeds when the seed pods turn brown and begin to split open—usually late summer to early fall. Wait until the pods are dry but haven’t released seeds naturally. Collect them before wildlife or wind can scatter them!
Why do columbine seeds need cold stratification?
Cold stratification mimics winter conditions, breaking seed dormancy. Columbine seeds require 4–8 weeks in the fridge (34–40°F) to germinate successfully. Without this step, seeds may stay dormant for months—or never sprout!
Can I collect seeds from spent flowers?
Yes, but focus on the seed pods, not the flowers. After blooms fade, watch for elongated, pea-like pods. These are your seed sources! Avoid collecting from flowers that haven’t developed pods yet.
What if my seeds won’t germinate after stratification?
Try these fixes:
- Check moisture: Keep soil lightly damp (not soggy) during germination.
- Test freshness: Older seeds may need longer stratification (up to 12 weeks).
- Scarify seeds: Lightly nick the seed coat with sandpaper to help water penetrate.
Are there alternatives to cold stratification?
While cold stratification is ideal, you can try soaking seeds in warm water for 24 hours before planting. Some gardeners also plant seeds directly outdoors in fall (they’ll naturally stratify over winter). However, results may vary!
Wrapping up and next steps
Harvesting and cold-stratifying columbine seeds is your ticket to a vibrant garden next spring! With the right timing, tools, and a little patience, you’ll unlock a reliable way to grow these stunning blooms year after year. 🌱
Now that you’re armed with the know-how, it’s time to put your skills into action. Grab those pods, follow the steps, and watch your garden transform. Happy gardening—and here’s to next year’s flourishing columbines!
Next step: Mark your calendar for late summer or early fall to start the process fresh!