Pruning
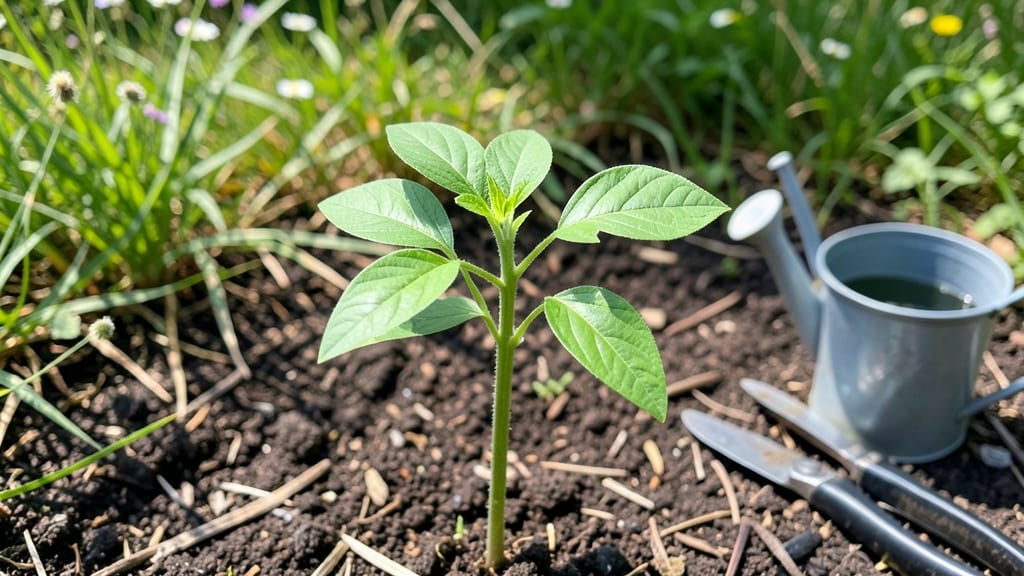
Cold-stressed bush bean seedlings grow faster and stronger than anything from a nursery. 🌱 I learned this the hard way after my first batch of leggy, weak plants—until I started pre-chilling seeds before planting. The trick isn’t complicated, but it makes all the difference in your harvest.
You’ll need a cool, dark spot (like a fridge) for 24–48 hours before sowing, well-draining soil, and a sunny windowsill or garden bed. Most people skip this step, but chilling mimics natural winter conditions, helping roots establish quickly.
Within 7–10 days, you’ll see sturdy sprouts ready for transplanting—no more floppy, slow-starting seedlings.
The payoff? Plants that bolt later, produce more pods, and handle heat better than store-bought seedlings. By the time summer hits, you’ll be harvesting 3–4 weeks earlier than expected. The secret’s in the roots—stronger now means bigger yields later.
Works for any bush bean variety and even in small spaces. Ready to try it? Here’s how to do it right the first time.
📚 In This Guide
- What you need
- Instructions
- Tips and common mistakes
- Wrapping up and next steps
What you need
- ● Bush bean seeds: 10–20 seeds (choose cold-hardy varieties like Blue Lake Bush or Kentucky Wonder)
- ● Seed-starting trays or biodegradable pots: 2–4" deep, with drainage holes (10–20 units, depending on seed quantity)
- ● High-quality seed-starting mix: Lightweight, sterile, and well-draining (1–2 bags, ~10–20 lbs total)
- ○ Cold frame or cold-hardening tray: Optional but helpful for gradual exposure (or a shaded outdoor area)
- ● Watering can or spray bottle: With a fine mist nozzle for gentle hydration
- ● Plant labels: Small tags or sticks to mark seed varieties and planting dates
- ● Small hand trowel: For transplanting seedlings
- ○ Grow lights (optional): LED or fluorescent, 12–16 hours/day if starting indoors
- ○ Thermometer (optional): To monitor soil temps (ideal: 50–60°F for cold stress)
- ○ Fertilizer (optional): Balanced, water-soluble (5-10-5 ratio) for post-stress growth
- ○ Mulch or row cover (optional): For protecting seedlings during hardening
Step-by-step instructions for cold-stressing bush bean seedlings
Here’s how to toughen up your bean seedlings using cold treatment—it’s faster than you’d think.
🌱 Step 1: Start Seeds Indoors Under Warm Conditions
Begin by sowing your bush bean seeds in sterile seed-starting mix (not garden soil) at a depth of ½ inch in 2-3 inch deep containers. Keep them in a warm spot—75-85°F—since beans germinate best in heat. I use a seedling heat mat to ensure consistent warmth, which speeds up germination to 5-7 days. Avoid overwatering; the mix should stay evenly moist but not soggy.
Once the first true leaves appear (not the initial seed leaves), move the seedlings to a cooler spot—60-65°F—for 3-4 days. This gradual shift mimics outdoor temperature fluctuations and primes their roots for real-world conditions. Watch for sturdy stems and deep green leaves; these are signs your seedlings are ready for the next step.
💧 Step 2: Apply Cold Treatment for Root Toughening
Place the seedlings in a refrigerator (not the freezer) for 24-48 hours at 35-40°F. I wrap the trays in a damp paper towel to maintain humidity—this prevents stress from drying out. The cold treatment shocks the roots into producing more protective compounds, which makes them resilient against transplant shock and early-season pests.
After the cold exposure, return the seedlings to room temperature (65-75°F) for 24 hours to let them recover. You’ll notice no immediate changes, but their root systems will be stronger. This is the moment that matters: the cold-stress response kicks in, and your beans will grow faster once planted outside.
☀️ Step 3: Harden Off Gradually Before Transplanting
Start hardening off by moving the seedlings to a shaded outdoor spot for 1-2 hours the first day. Over 5-7 days, increase their outdoor time by 1 hour daily, slowly introducing them to direct sunlight and breezes. I place them on a porch or patio where they get morning sun but are protected from harsh afternoon rays.
By the time you’re ready to transplant, your seedlings will tolerate full sun and cooler soil temperatures without wilting. Plant them in well-draining soil (amended with compost) at the same depth they were growing in containers. Water deeply right after transplanting to help roots establish quickly.
✂️ Step 4: Monitor Growth and Support Early Production
After transplanting, keep the soil consistently moist but not waterlogged—beans hate soggy roots. I water at the base in the morning to prevent fungal diseases. Within 7-10 days, you’ll see new leaves forming, signaling that the cold-stressed roots are thriving. Use tall stakes or trellises (even for bush beans) to support stems as they grow taller.
This method ensures your bush beans mature 2-3 weeks faster than untreated seedlings. You’ll harvest your first pods in 45-55 days, and the plants will keep producing until frost. The key is patience during the cold treatment—it’s the secret to hardier, more productive beans.
Tips & tricks for cold-stressing bush bean seedlings
Here's what I've learned after perfecting this method for faster, hardier bean plants—these details make all the difference.
Temperature Control: The 75-85°F range for initial germination is non-negotiable—beans are tropical plants that need heat to sprout. I've tried cooler starts, and germination takes twice as long. Once you see true leaves, that 60-65°F adjustment for 3-4 days is crucial. This mimics spring's natural temperature fluctuations and prevents shock when you later expose them to cold treatment. Think of it as a warm-up act before the main event.
Cold Treatment Precision: The 24-48 hour refrigerator stint at 35-40°F triggers protective compounds in the roots, but timing matters. I've found 36 hours works best for my climate—any shorter and the effect is minimal, any longer risks over-stressing delicate seedlings. Wrap those trays in damp paper towels to maintain 90% humidity; without this, the cold can dry out the tender leaves faster than you'd expect.
Harden Off Strategically: That 1-2 hour outdoor introduction on day one might seem short, but it's about gradual exposure. I've seen seedlings wilt dramatically when rushed into full sun too soon. The key is increasing exposure by just 1 hour daily—this trains their vascular systems to handle water movement in varying light conditions. By day 5-7, they'll be ready for full sun without wilting.
Post-Transplant Care: The 7-10 day window after transplanting is critical for root establishment. I water at the base in the morning to prevent fungal diseases that thrive in evening moisture. For bush beans, even though they don't climb, using tall stakes provides support against wind and helps maintain upright growth—this prevents lodging that can block sunlight from lower leaves.
Pro Tips for Bush Bean Seedling
- Here's what I've learned after perfecting this method for faster, hardier bean plants—these details make all the diff...
- Temperature Control: The 75-85°F range for initial germination is non-negotiable—beans are tropical plants that need ...
- Cold Treatment Precision: The 24-48 hour refrigerator stint at 35-40°F triggers protective compounds in the roots, bu...
Frequently asked questions
Got questions about growing bush bean seedlings? You’re not alone! Here are some of the most common concerns—and their solutions—to help you grow strong, resilient plants from the start.
How do I know if my bush bean seedlings are cold-stressed?
Cold-stressed seedlings may show stunted growth, yellowing leaves, or a pale, leggy appearance. Gently touch the soil—if it’s below 60°F (15°C), your roots may be struggling. Transplant seedlings only when nighttime temperatures stay above 50°F (10°C) to avoid shock.
Can I speed up germination for bush bean seedlings?
Yes! Soak seeds in warm water for 4–6 hours before planting to kickstart germination. Use a heat mat (set to 70–80°F/21–27°C) or place trays in a sunny window. Keep soil consistently moist but not soggy—consistency is key!
What’s the best way to harden off bush bean seedlings?
Start hardening off 7–10 days before transplanting by moving seedlings outdoors for 1–2 hours daily, gradually increasing exposure. Protect them from wind and direct sun at first. By day 7, they should handle full sunlight—no more baby plants!
Can I reuse soil from last year’s bush bean seedlings?
Reusing soil can work, but sterilize it first by baking at 200°F (93°C) for 30 minutes or mixing in 10% fresh compost. Bush beans are prone to root rot, so avoid overwatering and rotate planting spots yearly to prevent disease buildup.
My bush bean seedlings are wilting—what’s wrong?
Wilting often signals overwatering, underwatering, or root stress. Check soil moisture with your finger—it should feel like a wrung-out sponge. If roots are mushy (rot) or dry/cracked, adjust watering and ensure pots have drainage holes. A light seaweed tonic can boost recovery!
Wrapping up and next steps
Growing bush bean seedlings with cold-stressed roots is a game-changer for hardier, faster-growing plants—and you’ve got all the tools to make it happen! 🌱 Whether you’re a seasoned gardener or just starting out, this method boosts resilience and sets your seedlings up for success.
Now that you’re armed with the know-how, why not take the next step?
🌟 Ready to Grow?
Start small with a batch of seedlings, experiment with the cold-stress timing, and watch your beans thrive! Share your progress with fellow gardeners or dive deeper into pruning techniques to keep your plants at their best. Happy growing—your future harvest is waiting! 🌱✨